In engineering projects, site leveling is typically performed during the early stages of construction. It serves as a fundamental prerequisite and a basic condition for the successful execution of the entire project. The use of three-dimensional (3D) terrain models plays a crucial role in this process.
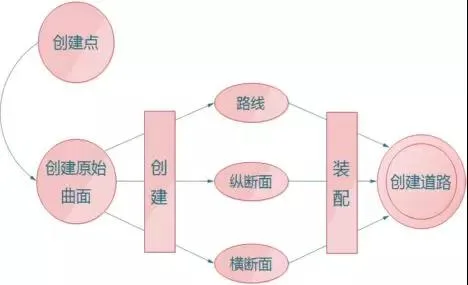
With the help of software, both terrain surfaces and site design surfaces can be constructed to quickly generate 3D visualizations. A 3D site model allows for precise calculations of slope excavation and earthwork volumes, route design, creation of longitudinal and cross sections, and road assembly. Compared to traditional two-dimensional designs, 3D models are more intuitive, vivid, and accurate.
The significance of terrain surfaces in a project is like the foundation of a building. Without a solid foundation, how can a building stand?
What are the methods to create a 3D digital field model?
1. Using Measurement Point Data
Creating a terrain model from raw measurement point data is the most direct and accurate approach. This method allows for the construction of terrain surfaces directly from measurement data, avoiding additional errors that may arise from further software processing.
2. Generating Terrain Using Oblique Photography
This method involves high-overlap and redundant flight paths during data collection, which leads to more flight routes and higher costs. It requires strict environmental conditions for photography and early-stage data availability. Additionally, it struggles with effectively capturing moving objects, reflective surfaces, and textureless areas.
3. Downloading Terrain Data from Databases
Terrain data sourced from databases tends to be less accurate compared to direct measurements.
This article focuses on creating surfaces based on measurement point data, dividing the process into five key parts:
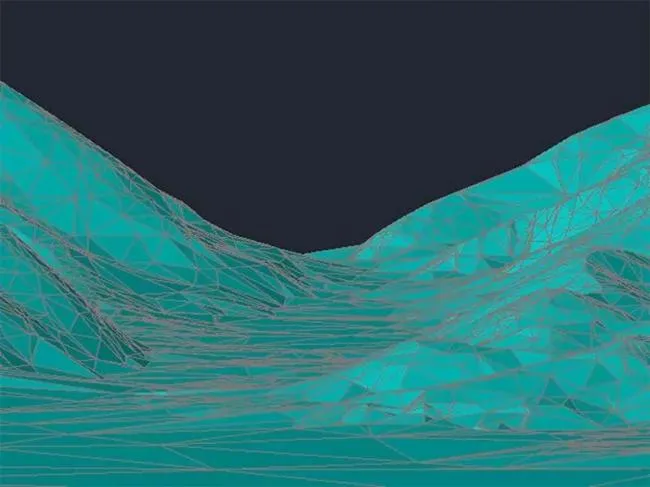
1. Terrain Surface
Using the Civil 3D surface feature, terrain surfaces can be created by adding block references, elevation text attributes, and contour lines.
2. Data Comparison
Raw data often comes standardized, but sometimes non-standard data requires preprocessing. “Non-standard” refers to cases where elevation text attributes and contour elevation attributes in topographic maps are often zero or indicative rather than exact elevations.
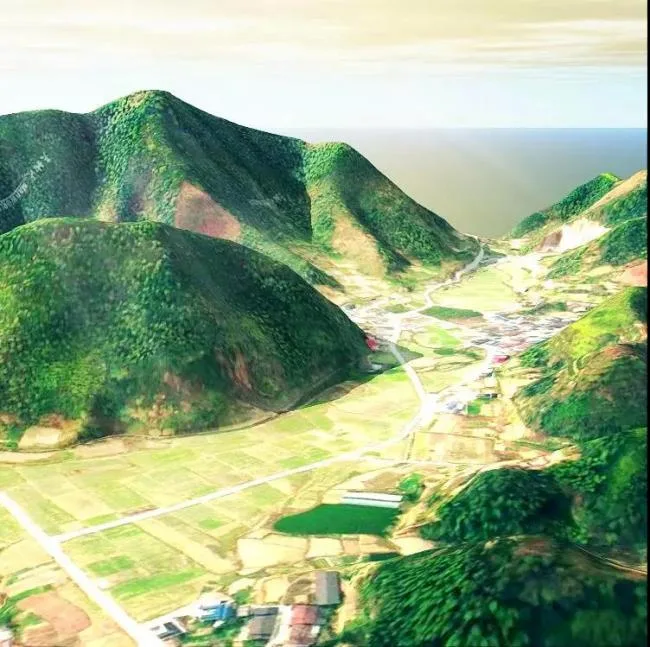
3. Satellite Maps
By downloading satellite maps and using the Raster Tools plugin, satellite images can be overlaid onto terrain surfaces. This enhances the realism and three-dimensional appearance of the terrain.
4. Waters
During raw data processing, bodies of water such as ponds or rivers are usually present. By drawing polylines, exporting them, and assigning materials, realistic water flow effects can be simulated. Road layouts or bridge spans can also take into account the direction of rivers, helping to avoid design errors and save time and costs.

5. Houses
By assigning elevation, exporting, and applying materials to houses in the original terrain, a three-dimensional effect can be achieved. Houses are an essential part of terrain processing. Early planning for road design and determining the scope of surrounding housing demolition can help save both time and costs.
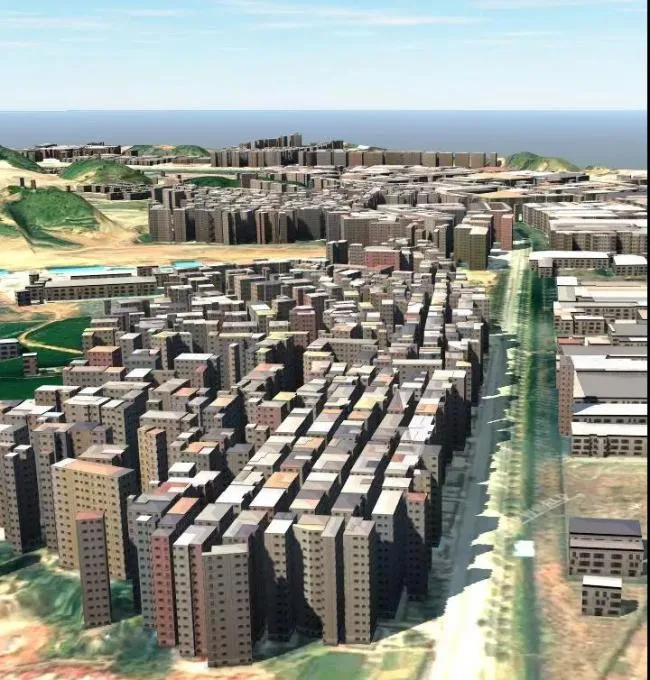
Final Outcome
In conclusion, I hope my insights and experiences with this software can provide valuable help to beginners. For those interested in learning more about Navisworks, please check out our video category for more systematic and comprehensive tutorials.


Must log in before commenting!
Sign Up