BIM Software Tip: How to Create Segmented Section Views in Revit
Learn how to create segmented section views in Revit for more efficient and precise modeling.
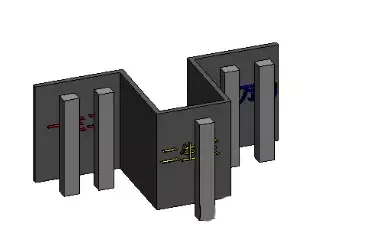
In the model shown below, a standard section and its corresponding section view have already been generated.
However, the pillar obstructs the wall text, making it difficult to read.

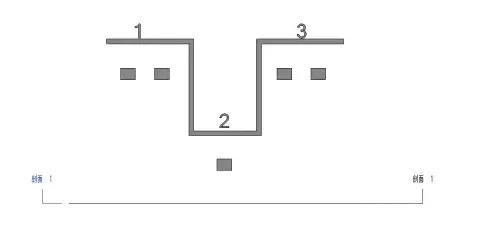
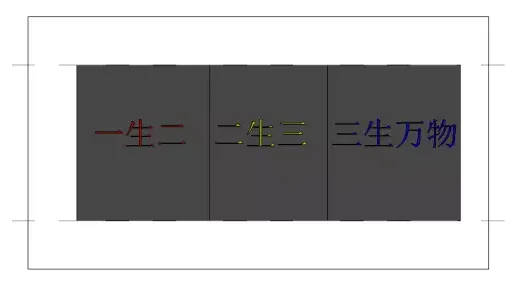
To resolve this, you can use the “Split Line Segment” tool to create a segmented section line, achieving the effect shown below:

Follow these detailed steps:
1. Select Section 2, go to the Modify tab, and choose the Split Line Segment tool.
2. Convert the section line into a segmented form. Use the control grips on each segment to adjust the section line as needed. The generated section view will update accordingly.
What does “Split Line Segment” mean?
This tool allows you to divide a section line into multiple segments perpendicular to the view direction. This way, you can cut through different parts of the model without creating multiple separate sections, making it a very convenient feature in many scenarios.


Must log in before commenting!
Sign Up