Displaying door and window areas in a detailed schedule (using the door schedule as an example):
After creating a new door schedule, you may notice that the schedule does not directly calculate the area of doors and windows in Revit.
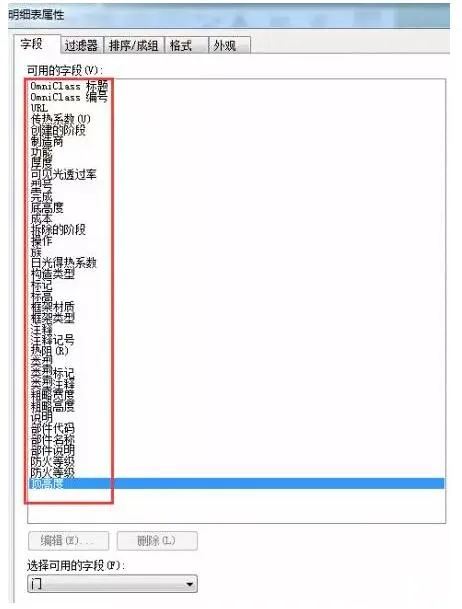
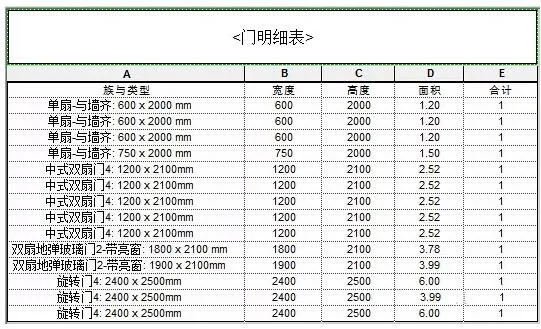
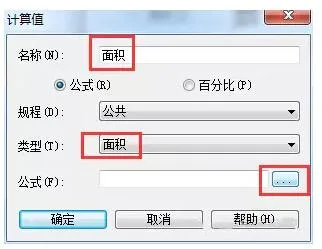
At this stage, you can add a Calculated Value to process the data, resulting in two different area statistics, as shown below:
Additionally, the main text display in the schedule often appears in the following formats:
One
Two
Three
Four
The steps to create new text types are as follows:
- Create a new door schedule.
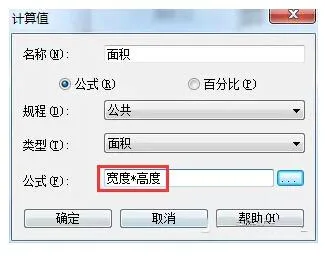
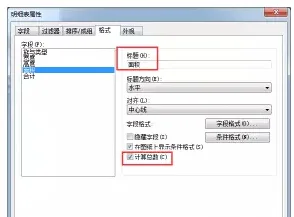
- Add calculated values.
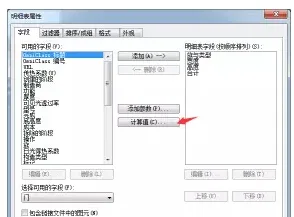
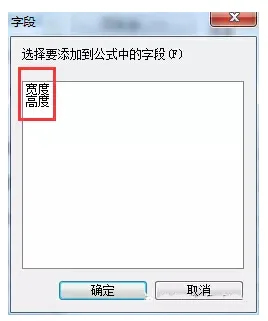
- Add the area parameter.
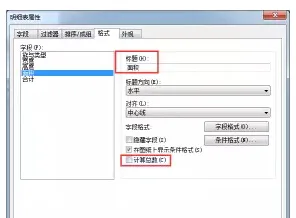
4. Edit the properties of the schedule to achieve different results.
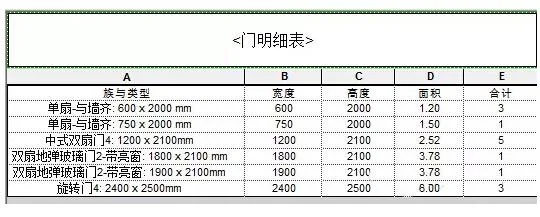
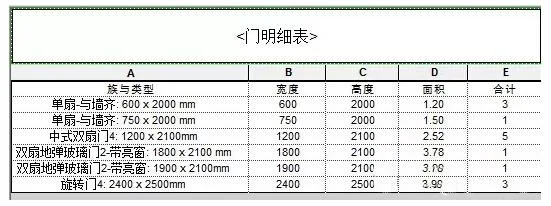
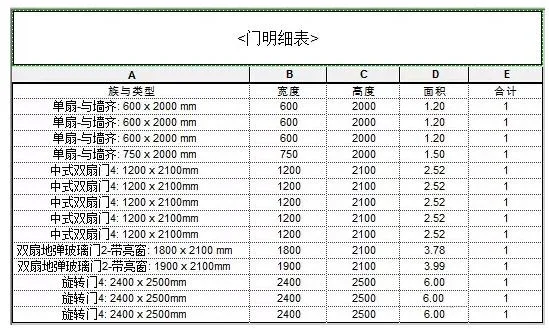
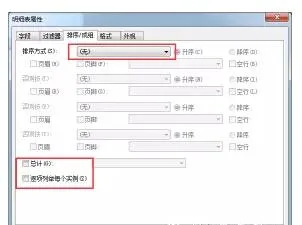
A: If the Total Area option under the formatting command is disabled, the area statistics will display as individual door or window areas, as shown below:
(Window) Single frame area
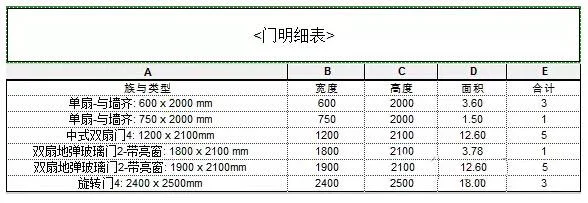
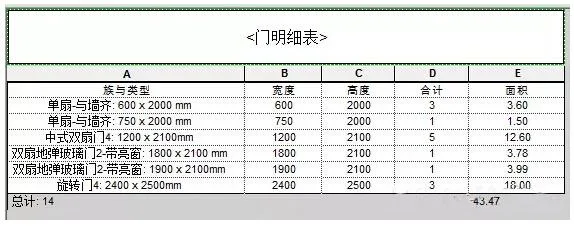
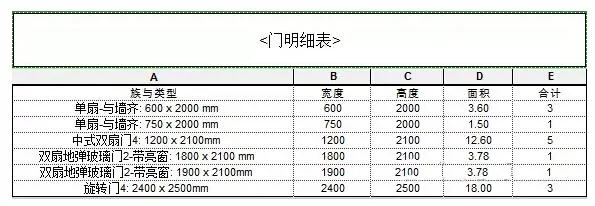
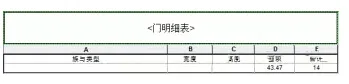
B: If the Total Area option is enabled under the formatting command, the schedule will calculate the total area of doors or windows:
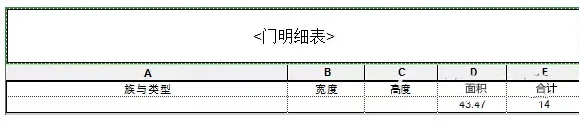
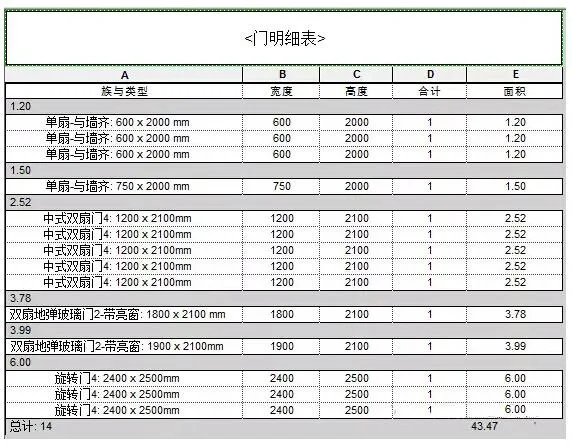
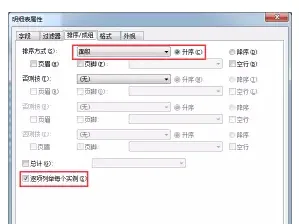
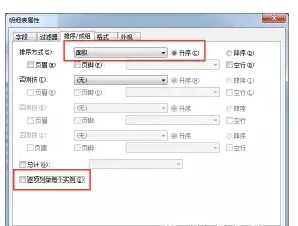
C: By adjusting the sorting method under the Sorting/Grouping command, you can achieve different display results:
One
Two
Three
How to create a new Appearance text type in the tab options:

- Click on the Annotation tab, then go to the Text panel.
- In the Type Properties dialog box, select the desired text type from the list.
- If needed, click Rename to change the type name, or click Duplicate to create a new text type.
- Set the properties related to the display of text annotations.
- Click OK to confirm.


Must log in before commenting!
Sign Up