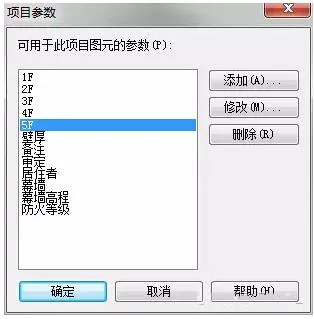
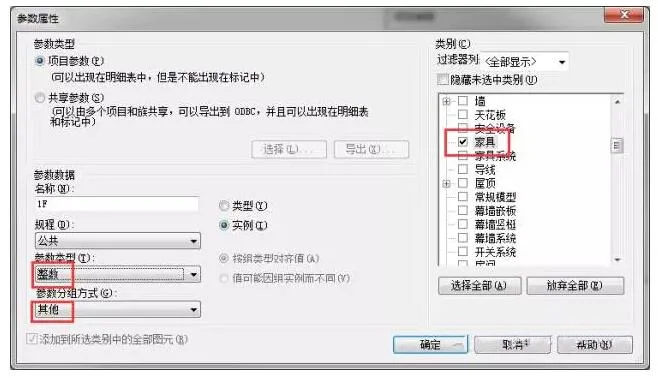
1. First, add new parameters to the project parameters and name them “1F”, “2F”, “3F”, and so on. The specific settings are illustrated in the images below.
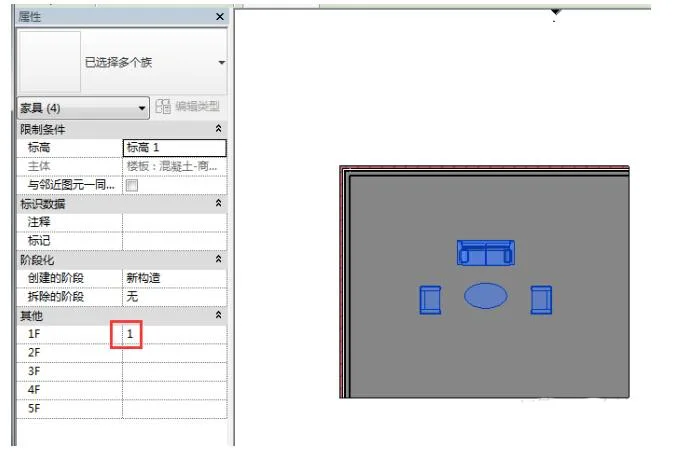
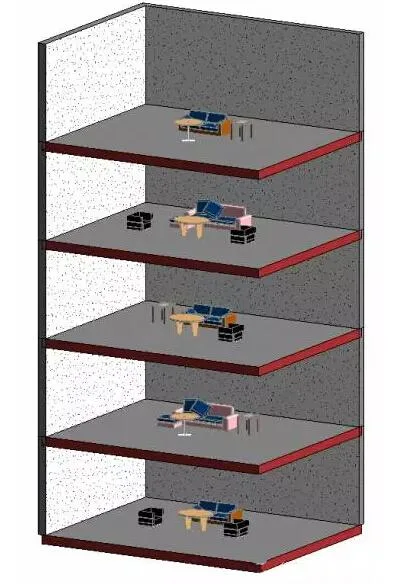
2. Open the Elevation 1 view and select all the furniture. You will see the newly added parameters “1F”, “2F”, “3F”, etc., displayed in the properties panel.
In the Elevation 1 view, with all furniture on this floor selected, enter “1” after the “1F” parameter in the properties panel.
Similarly, in the Elevation 2 view, select all furniture on that floor and enter “1” after the “2F” parameter.
Repeat this process for all other elevations following the same pattern.
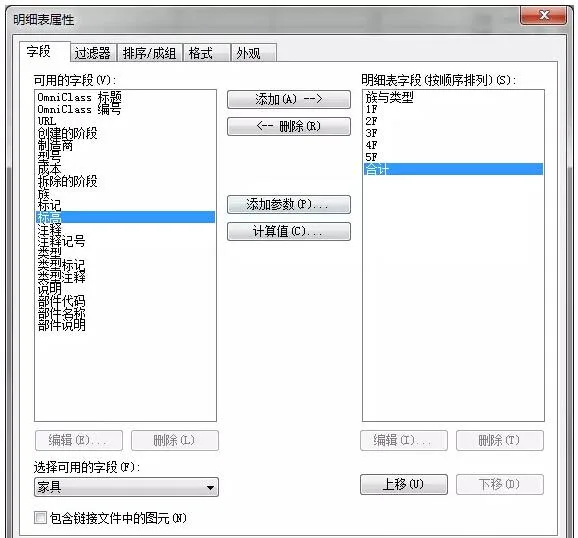
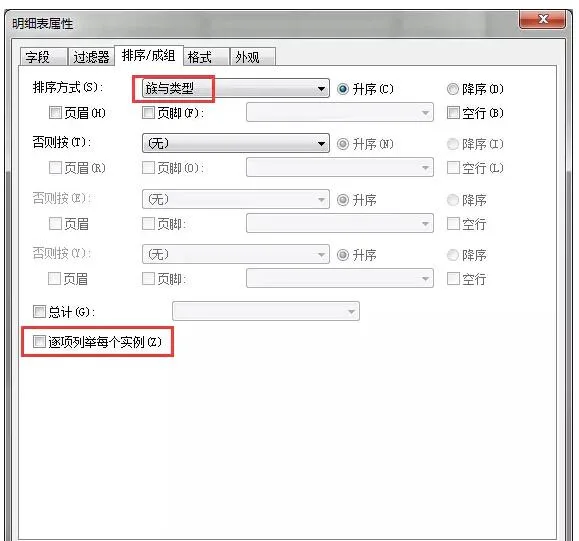
3. Next, create a new furniture schedule. Configure the fields, sorting, and formatting as shown in the following images.
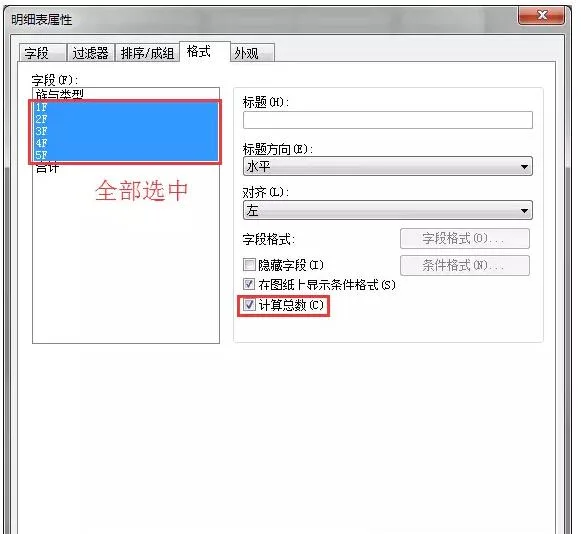
4. The detailed schedule corresponds directly to the model, enabling hierarchical statistics for furniture quantities.

This approach can be applied not only to stratify furniture quantities but also to count other graphic elements such as doors and windows.
Regarding the “Sort/Group” footer options, here is an explanation:
Title, Total, and Total:
- Title: Displays the header information.
- Total: Shows the number of elements within the group.
- The title and total are left-aligned and displayed below the group.
- Total: Displays the subtotal below the column, and the sum of these subtotals is the grand total. Columns like “Cost” and “In total” can be summarized in the “Format” tab.
- Title and Total: Displays both title and subtotal information.
- Total and Total: Displays total and subtotal values.
- Total Only: Shows only the subtotal for columns that are summarized.
List each instance item by item:
Selecting this option will display every instance of the graphic element in a separate row.
If this option is not selected, multiple instances will be grouped into a single row based on the sorting parameters.
Note: If no sorting parameter is specified, all instances will be combined into one row.


Must log in before commenting!
Sign Up