During project editing, we often encounter multiple instances of the same type of element, such as replacing door modules and functional types, or adjusting the elevation placement of various fan types. Editing these one by one can be tedious and prone to errors or omissions.
In such cases, it’s more efficient to select all similar instances within a view or across the entire project for batch editing. Here’s how you can do it:
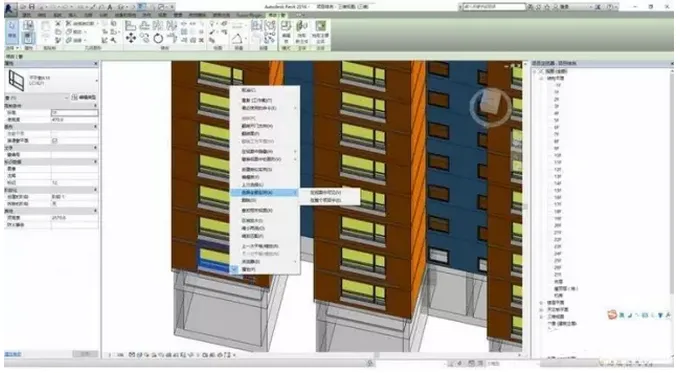
1. Select one instance of the element you want to modify within the project.
2. Right-click and choose Select All Instances — you can then choose either Visible in View (which selects all instances visible in the current view) or Visible in Entire Project (which selects all instances throughout the whole project).
3. Use the Properties palette to make your changes, such as modifying the family type, elevation, and other parameters.


Must log in before commenting!
Sign Up