Begin by creating a conceptual volume, then copy one or more vertical work planes to the left and right as needed for your model.
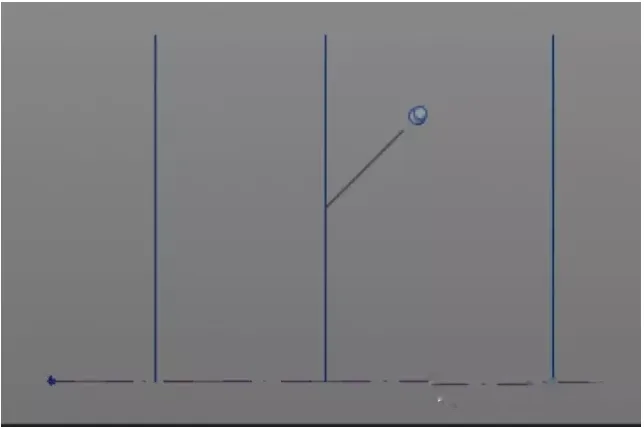
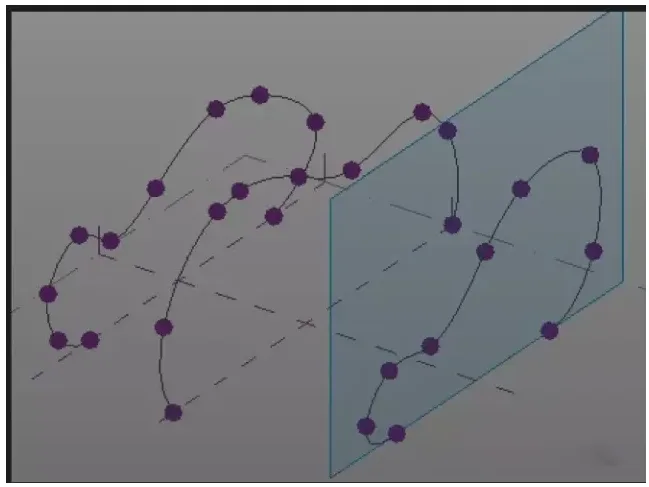
Next, set different work planes and use spline curves to draw the desired shapes on each of the three planes. Select the three curves and create a solid form, as illustrated below.

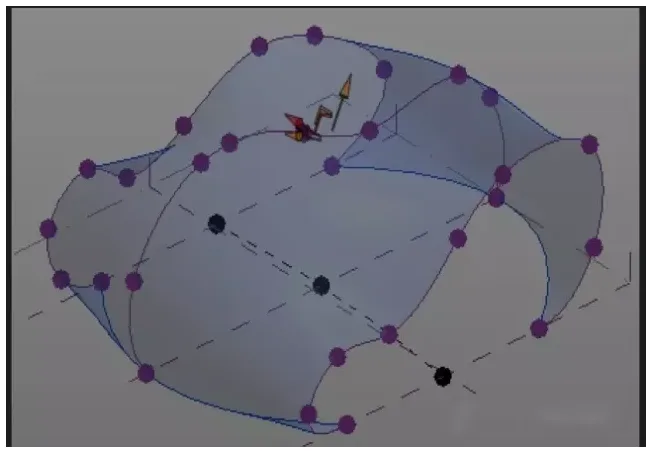
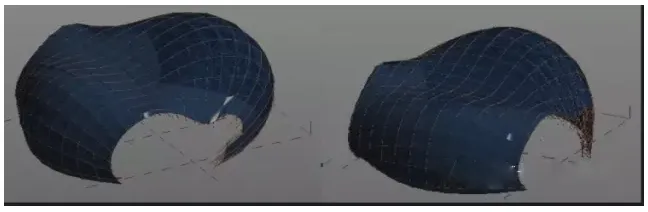
You can also use the ‘Perspective’ tool to further modify the shape, as shown below.
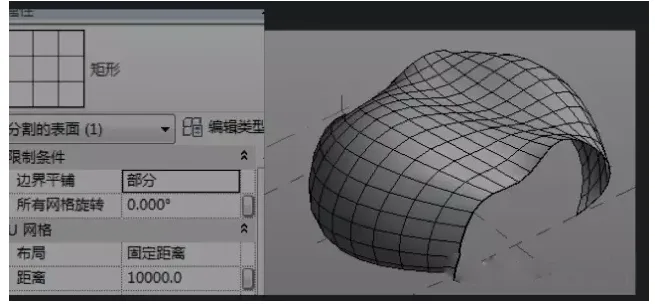
Afterwards, divide the grid and adjust the shape and spacing of the grid elements.
Now, proceed to draw the panel model and achieve the desired design by creating specific panel styles.
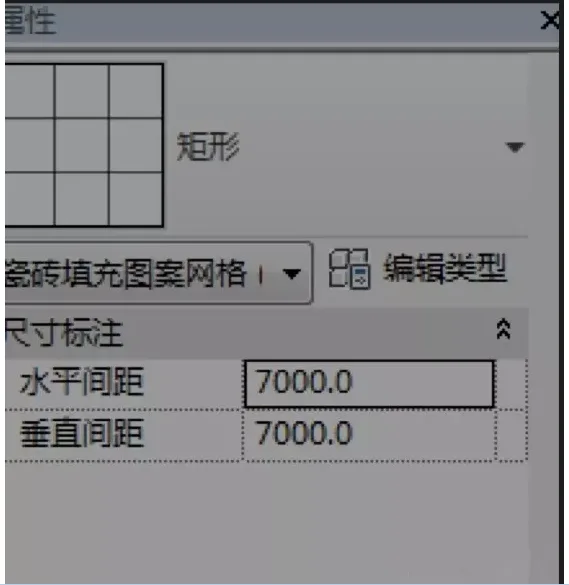
First, create a fill pattern based on metric curtain wall panels. Open the pattern and set the bottom grid distance to match the grid partition spacing, as demonstrated below.
Next, draw the grid panel following these steps.
![]()
The steps for creating grid panels are as follows:
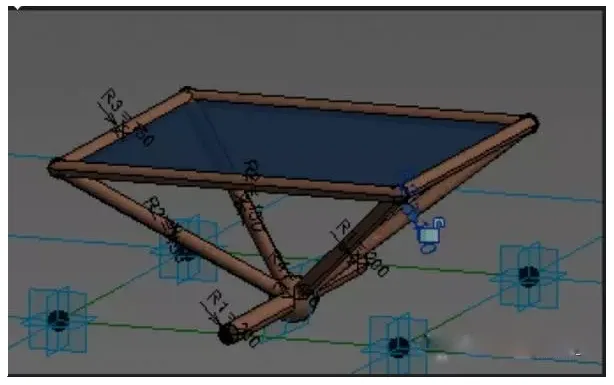
Step 1: Draw the bottommost cylinder. Place two reference points at the midpoints of the reference line ends, connect them with the reference line (make sure to set the work plane), then draw a vertical circular model line at any reference point on one end. Select both the circle and reference line to create a solid shape.
Step 2: Draw four reference points directly above the four adaptive points. Connect these with reference lines and create a solid circular shape. Then, add a reference point at the midpoint of the bottom reference line, connect it to the four points above, and draw a circular model line as before. Select and create a solid shape.
(You can set parameterized labels to control the cylinder dimensions as needed.)
Step 3: Select the top four reference lines and create a solid planar shape.
Step 4: Select the reference point in the middle of the bottom and create a solid spherical shape.
Finally, adjust and add materials as required to complete the grid panel creation. Load the panel into the mass grid, select it in the properties bar, make any changes, and your irregular grid panel is finished.


Must log in before commenting!
Sign Up