First, it’s important to understand the methods used to hide elements in Revit. There are two primary ways to hide elements:
- Temporary hide
- Permanent hide
1. Temporary Hide
There are two ways to activate temporary hiding:
- Use the shortcut key HH.
- Click the Temporary Hide/Isolate button (represented by a small glasses icon) on the bottom View Control Bar.
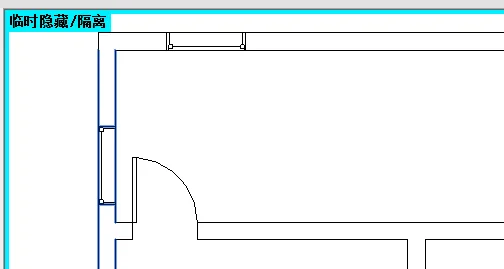
When elements are temporarily hidden, a blue box with a text prompt appears in the drawing interface:
How to Restore Temporarily Hidden Elements
- Close and then reopen the project.
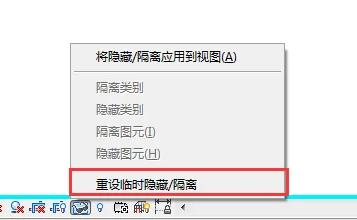
- Click on the small glasses icon in the View Control Bar, then select Reset Temporary Hide/Isolate.
2. Permanent Hide
There are two common ways to hide elements permanently:
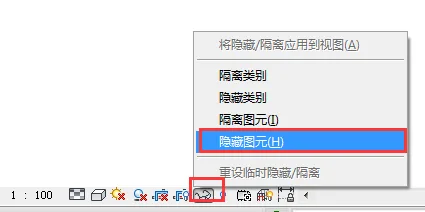
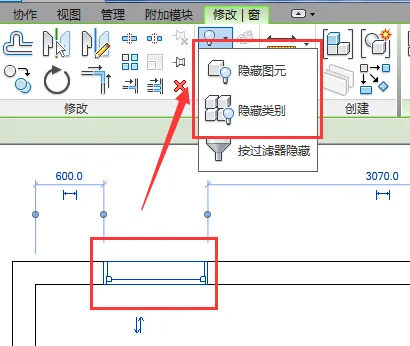
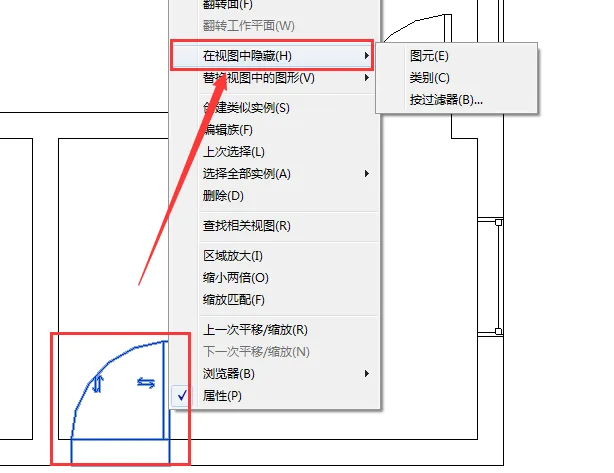
- Select the elements you want to hide or isolate, then use the Hide/Isolate command on the Modify tab (shortcut key: EH).
- Alternatively, select the elements, right-click, and choose the Hide/Isolate command from the context menu.
How to Unhide and Restore Elements
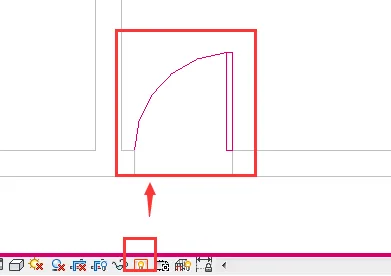
- First, reveal the hidden elements by clicking the small light bulb icon on the View Control Bar (Show Hidden Elements). After clicking, a red box appears around the hidden elements in the drawing interface, highlighting them in red.
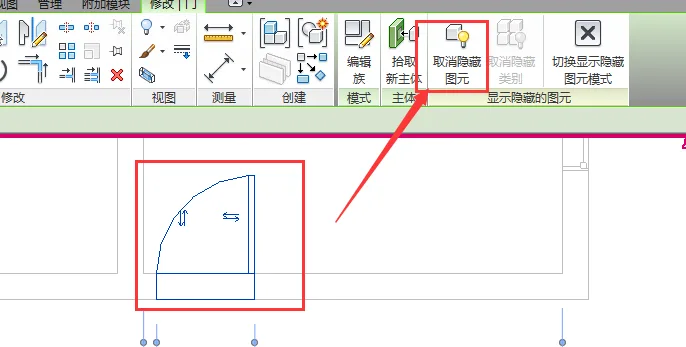
- Select the hidden element, then use the Unhide command on the Modify tab to restore its visibility.
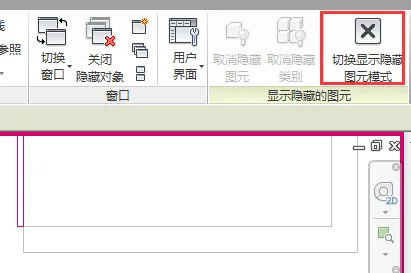
- Finally, click the button to Switch between displaying and hiding graphic elements mode to complete the process.

xuebim
Follow the latest BIM developments in the architecture industry, explore innovative building technologies, and discover cutting-edge industry insights.
← Scan with WeChat


Must log in before commenting!
Sign Up