Content source: Xiao Jiang said BIM

In REVIT modeling software, beginners often struggle with modeling materials like floor tiles because there are no dedicated tile tools available. However, tile modeling is a crucial aspect of decoration and renovation projects, and being able to extract tile quantities is a valuable skill. So, what is the best way to draw tiles in Revit? Through practice, it has been found that using panel tools exclusively works best.
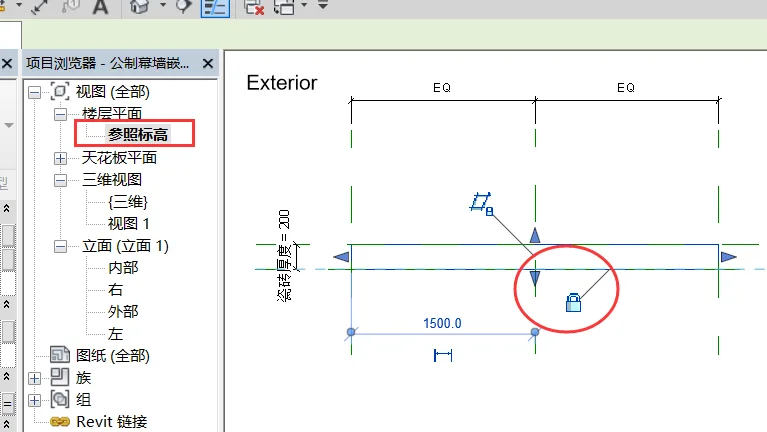
1. First, create a new family template using the “metric curtain wall panel” option. Navigate to the interior elevation view, use the stretch tool to draw a rectangle along the reference planes, and lock each edge. Assign a material to this shape and name it “ceramic tile”.

2. In the floor plan view, create a new horizontal reference plane and label its vertical distance from the center reference plane as the “tile thickness” parameter. Lock the lower edge of the stretched shape to this new reference plane. This step assigns a thickness parameter to the tile.
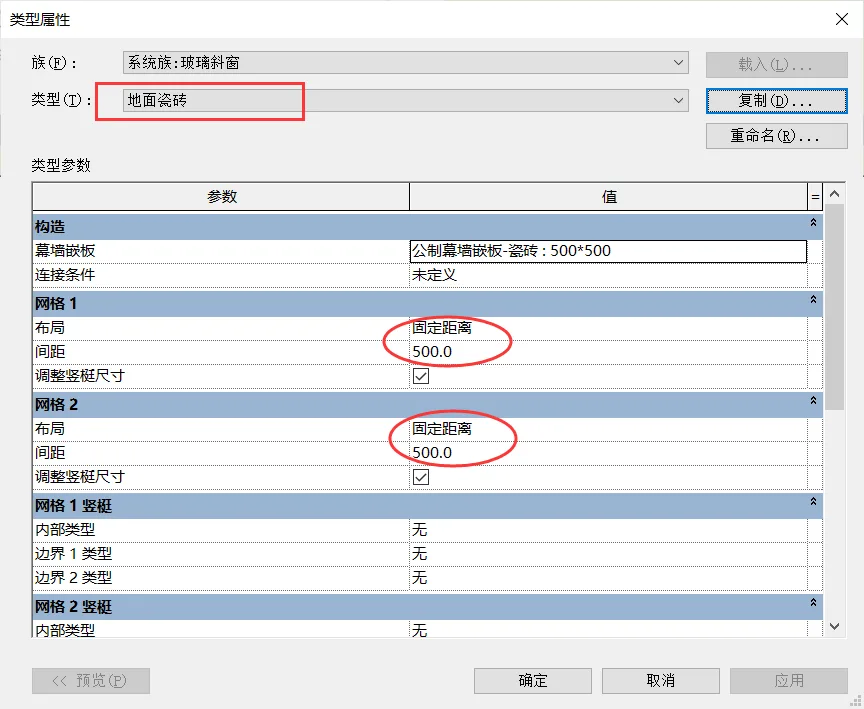
3. In the family type properties, create a new tile type named 500 × 500 and set the tile thickness parameter to 10mm. Then, load this family into any project.
4. Within the project, build simple room walls, floors, and other structures. Use the footprint roof tool to trace the floor boundary along the inner wall line in elevation 1 plan view. Change the roof’s attribute to ‘glass slanted window’.

5. Access the type properties of the slanted glass window, duplicate the type named “Floor Tile,” and replace the curtain wall panel with the previously created “Tile” family. Adjust the layout for “Grid 1” and “Grid 2” to “Fixed Distance” with 500mm spacing.
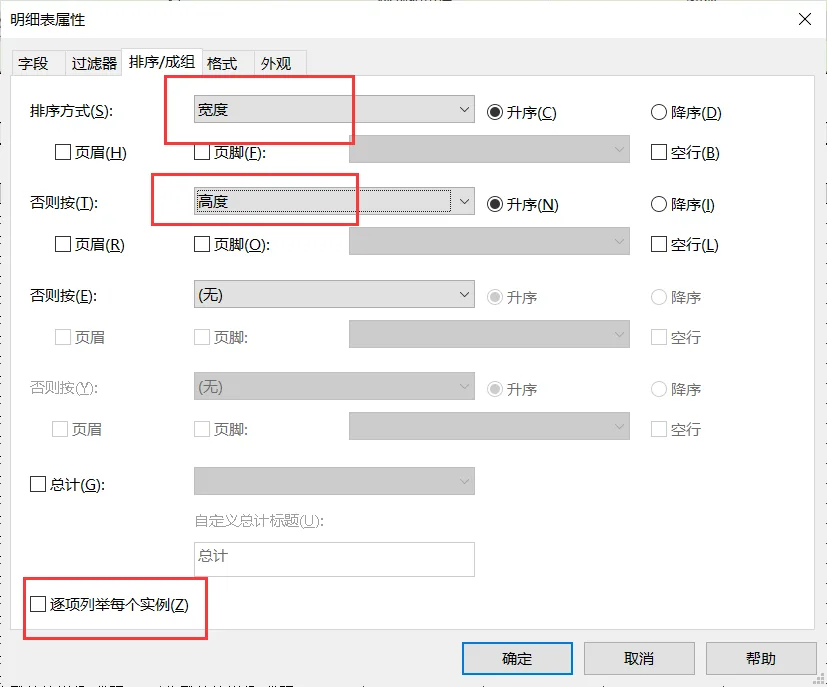
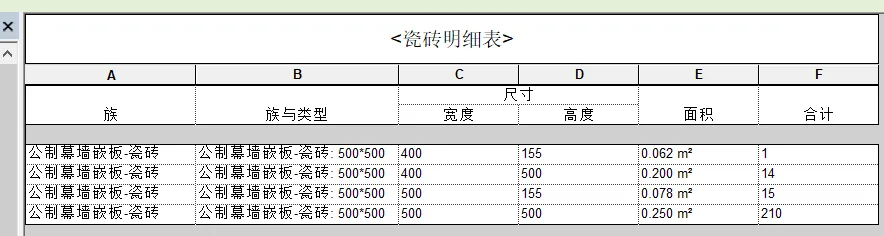
6. Create a tile schedule by adding a new curtain wall panel and including fields such as family, type, width, height, area, and total count. Initially, the schedule lists each tile instance individually, which can be cumbersome. To improve readability, go to the schedule properties, navigate to the sorting tab, uncheck “itemize every instance,” and add “width and height” as sorting criteria. This adjustment displays the total size and count of tiles grouped by dimensions. For example, there may be 14 tiles sized 400 × 500 and 210 tiles sized 500 × 500. Note that the tile family used here is an example with a 500mm × 500mm size. Different rooms may require creating families with corresponding tile sizes.


Must log in before commenting!
Sign Up