BIM World
A Professional BIM Learning Platform


How to Create Sloping Roofs (Type 4) in Revit Using BIM Techniques

Source: Applied Consultation Society

How to draw a sloping roof in Revit using BIM techniques? How to draw sloping roofs in Revit (Type 4)

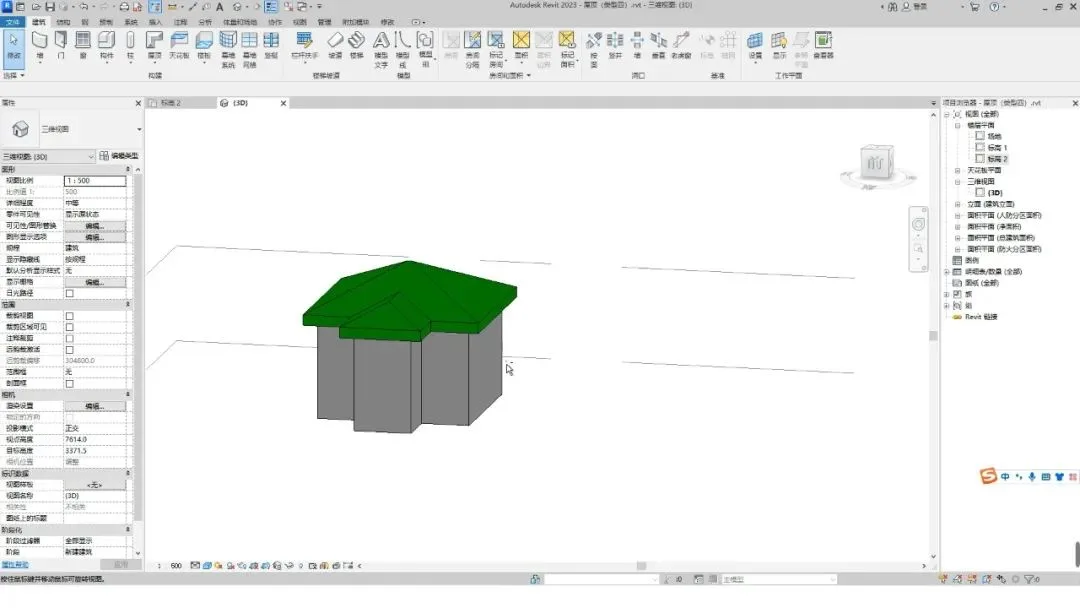
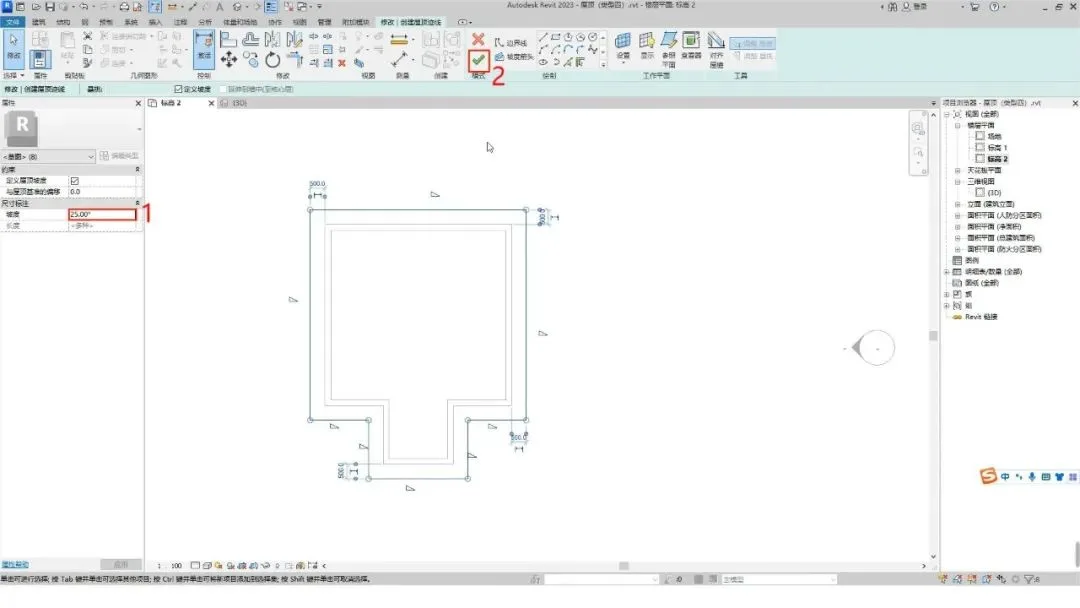
The roof profile clearly shows a slope, so we will create the roof by defining its slope.

How to draw a sloping roof in Revit using BIM techniques? How to draw sloping roofs in Revit (Type 4)

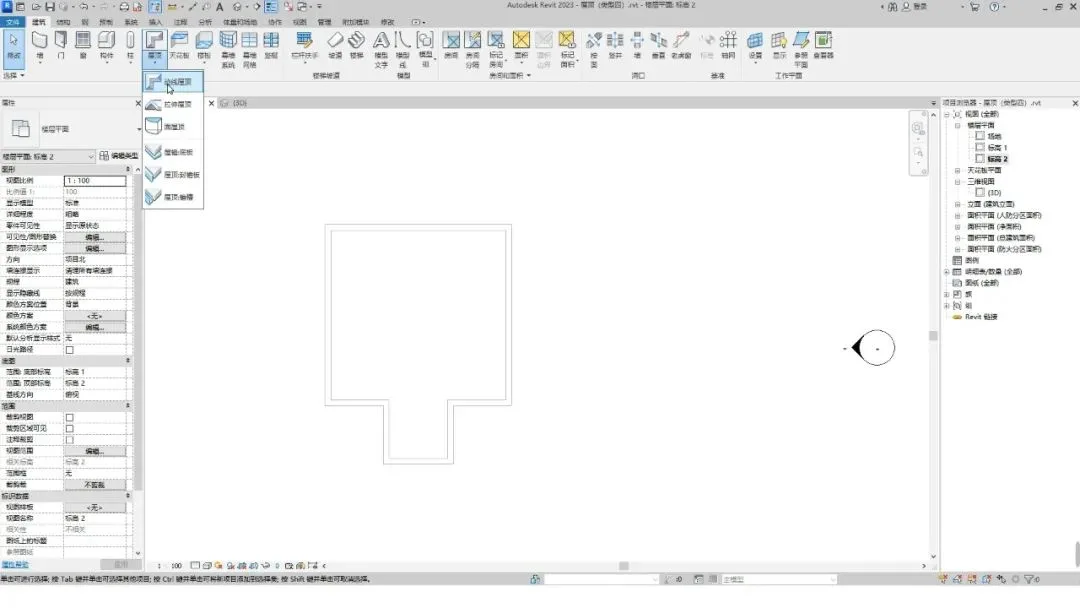
Start by clicking the Roof button under the Building tab, then select the Footprint Roof option.

How to draw a sloping roof in Revit using BIM techniques? How to draw sloping roofs in Revit (Type 4)

Choose the Pick Line tool and set the offset value to 500 in the options bar.

How to draw a sloping roof in Revit using BIM techniques? How to draw sloping roofs in Revit (Type 4)

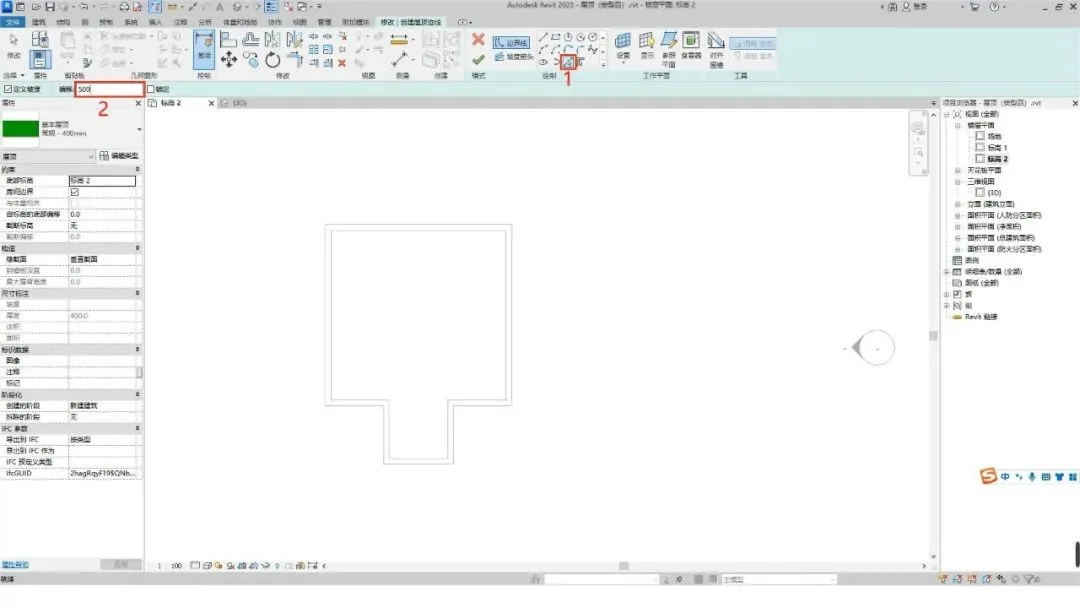
Pick the edge of the wall to trace the roof outline.

How to draw a sloping roof in Revit using BIM techniques? How to draw sloping roofs in Revit (Type 4)

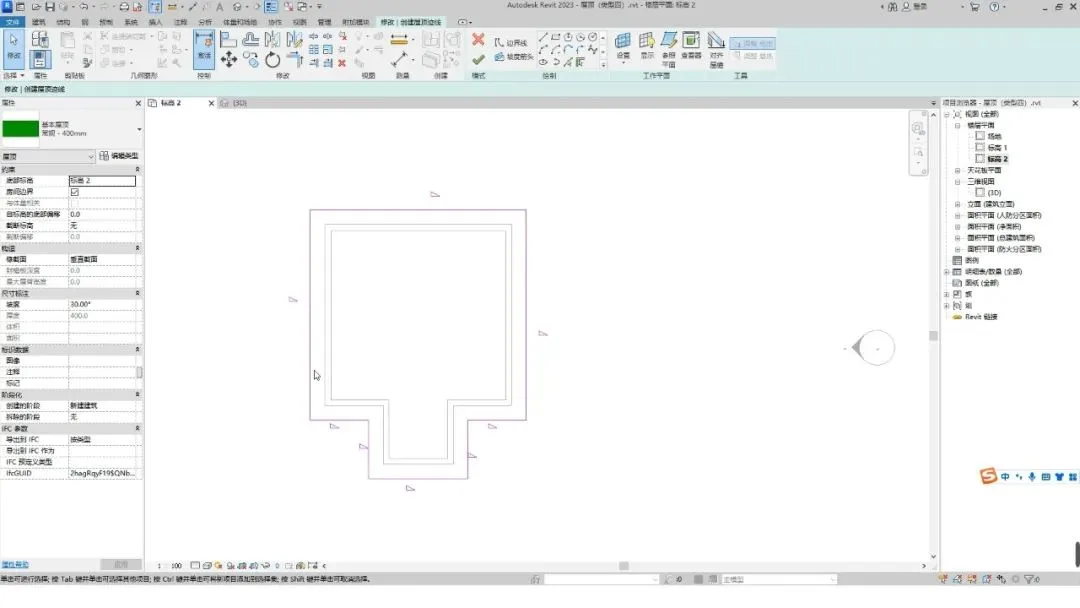
Select all the lines, assign a slope angle of 25°, then click the Finish button.

How to draw a sloping roof in Revit using BIM techniques? How to draw sloping roofs in Revit (Type 4)

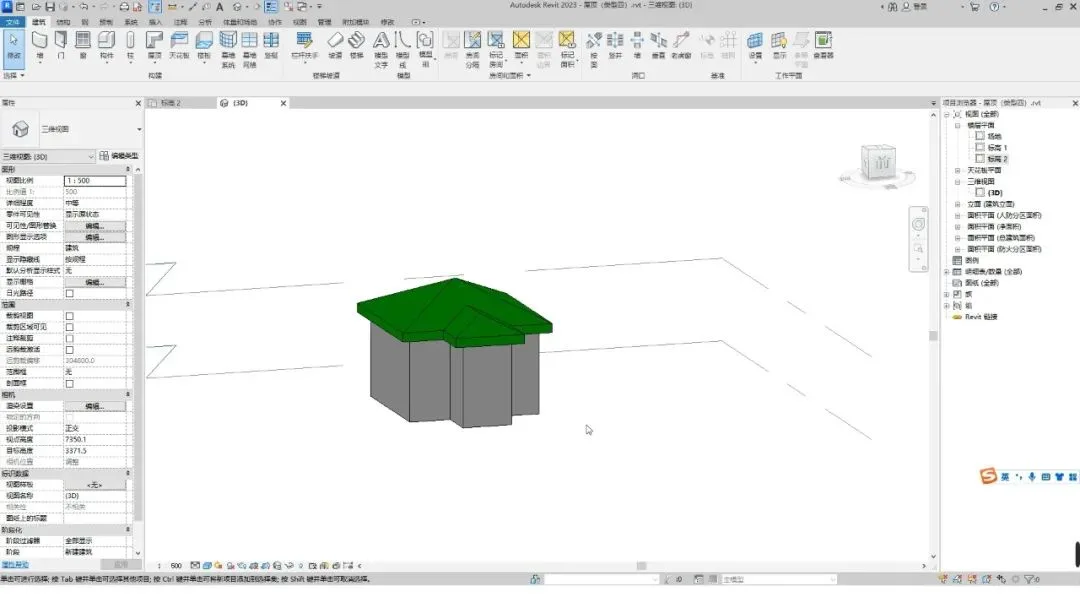
Switch to a 3D view to review the completed roof.

How to draw a sloping roof in Revit using BIM techniques? How to draw sloping roofs in Revit (Type 4)

xuebim
Follow the latest BIM developments in the architecture industry, explore innovative building technologies, and discover cutting-edge industry insights.
← Scan with WeChat
Like(1) 打赏
BIM WORLD » How to Create Sloping Roofs (Type 4) in Revit Using BIM Techniques

Comment Get first!

Must log in before commenting!


BIM World, A Professional BIM Learning Platform

Stay updated on the latest architecture trends and share new building technologies.

Contact UsAbout Us

觉得文章有用就打赏一下小编吧

非常感谢你的打赏,我们将继续提供更多优质内容,让我们一起创建更加美好的网络世界!

支付宝扫一扫

微信扫一扫

Account Login

By signing in, you agree toUser Agreement

Sign Up