The filter function allows for batch selection and editing of various attributes of model components. It is widely used in practical projects, not only for drafting but also for collaborative analysis and design coordination, making it a highly exploratory tool. Notably, the filter’s priority is higher than object styles, visibility, piping systems, and phase settings. This means any filter settings will override those in the first four panels. However, filter settings apply only to the current view and do not affect the appearance of model components in other views.
Wall Thickness Filter
This section uses wall thickness as an example to demonstrate how to utilize the filter function. As shown in Figure 3.38, the drawing illustrates the standard floor plan of a residential building. Our goal is to use the filter to visually represent wall thicknesses on the drawing.
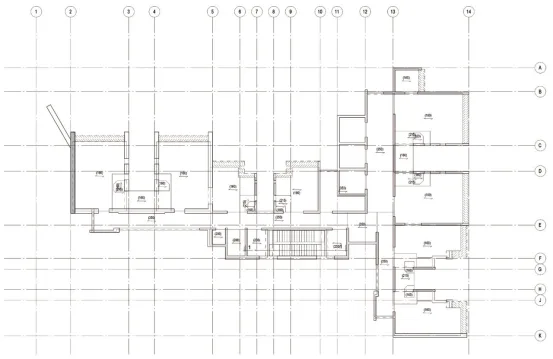
Figure 3.38 Residential Building Standard Floor Plan
Setting up filters involves three main steps: defining criteria, limiting categories, and setting conditions.
As seen in Figure 3.39, the left column allows you to specify selection criteria and name the filters. Because the filter’s purpose is based on wall thickness, the filters are named accordingly—for example, Wall200 represents a selection set of walls with a thickness of 200mm. Similarly, other sets like Wall250 and Wall300 are created.
The middle column restricts the category by selecting the model component type relevant to the filter—in this case, walls. The right column sets the conditions using logical expressions, such as thickness equals 200mm. This process is repeated to complete all filter setups.
After creating the filter sets, return to the Visibility/Graphics settings panel (Figure 3.40), and sequentially add the filter conditions. Customize the graphic representation based on project requirements. The final result is shown in Figure 3.41.
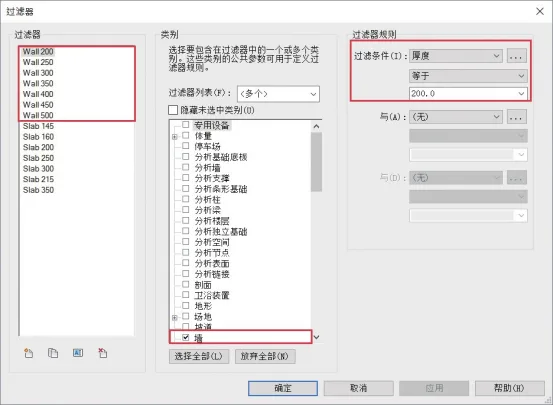
Figure 3.39 Wall Thickness Filter Settings
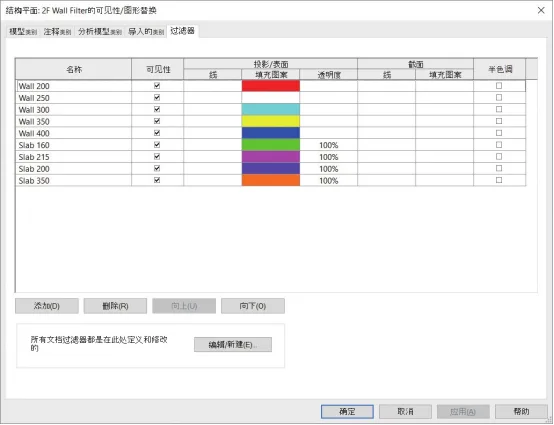
Figure 3.40 Customized Wall Thickness Filter Settings on the Drawing
—Excerpt from BIM Design Software and Drawing – Drawing Practice Based on Revit by Li Yiyi
For learning and communication purposes only. Copyright belongs to the original author and publisher. If there is any infringement, please contact us for removal.


Must log in before commenting!
Sign Up