BIM software excels at providing accurate material quantity statistics, a key feature that supports precise project planning. It extracts exact engineering quantities tailored to actual construction requirements—such as the length of pipe fittings and valves—helping to minimize material waste and maintain strict cost control. Let’s explore how to do this in Revit together!
Step 1: Open a .rvt model file that contains the quantities you want to measure.
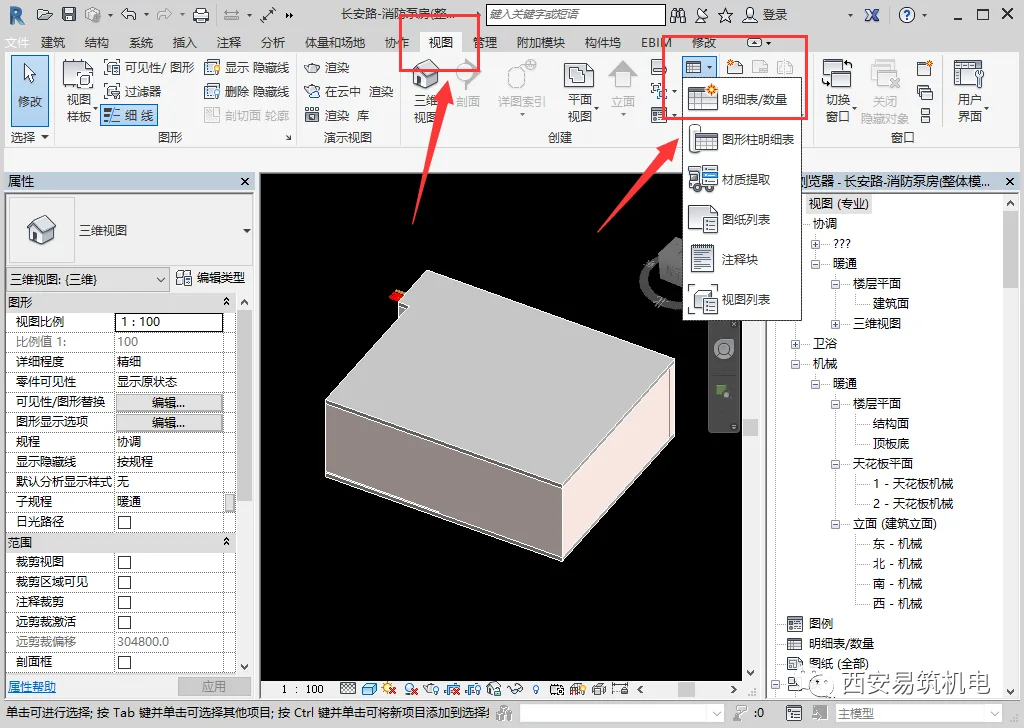
Step 2: Navigate to the Menu Options Bar: View > Schedule > Schedule/Quantities.
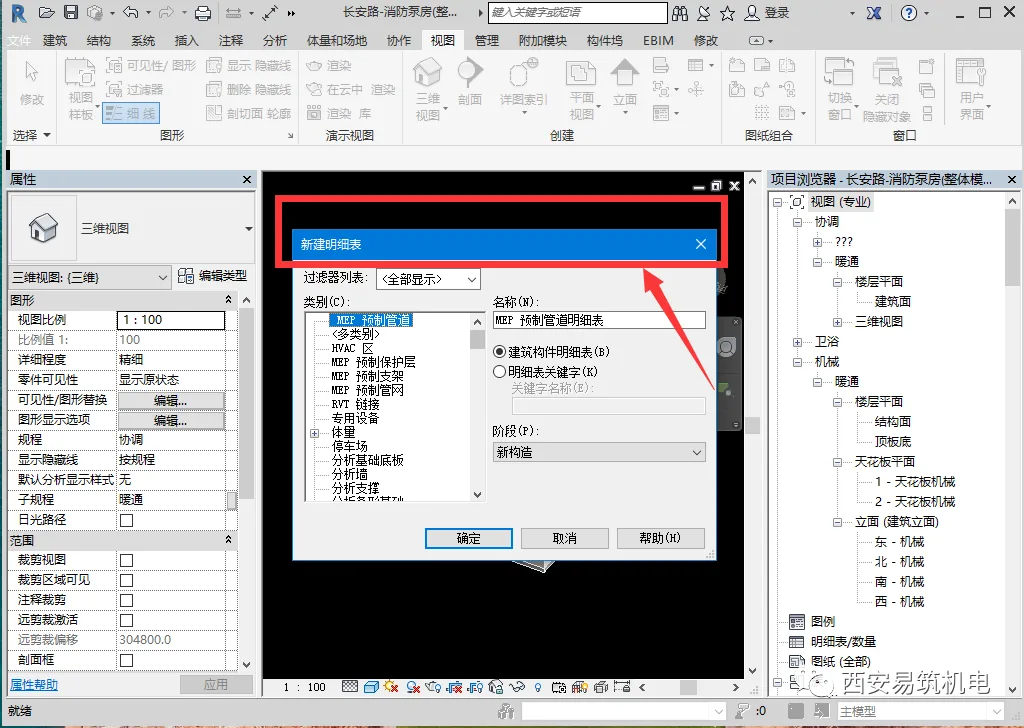
Step 3: Create a new detailed schedule.
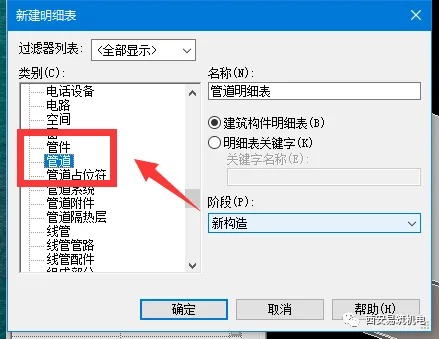
Step 4: Select the specific elements you want to include in the schedule. For example, choose pipelines for quantity statistics.
Step 5: Choose the required fields from the left selection panel to include in your schedule.
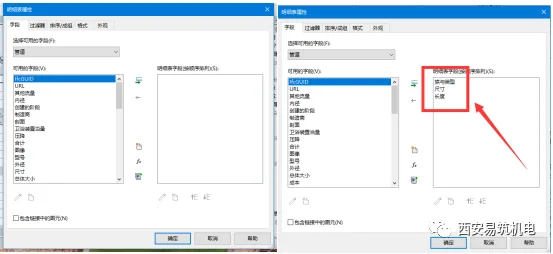
Step 6: Confirm your selections to export the pipeline quantity data you need.
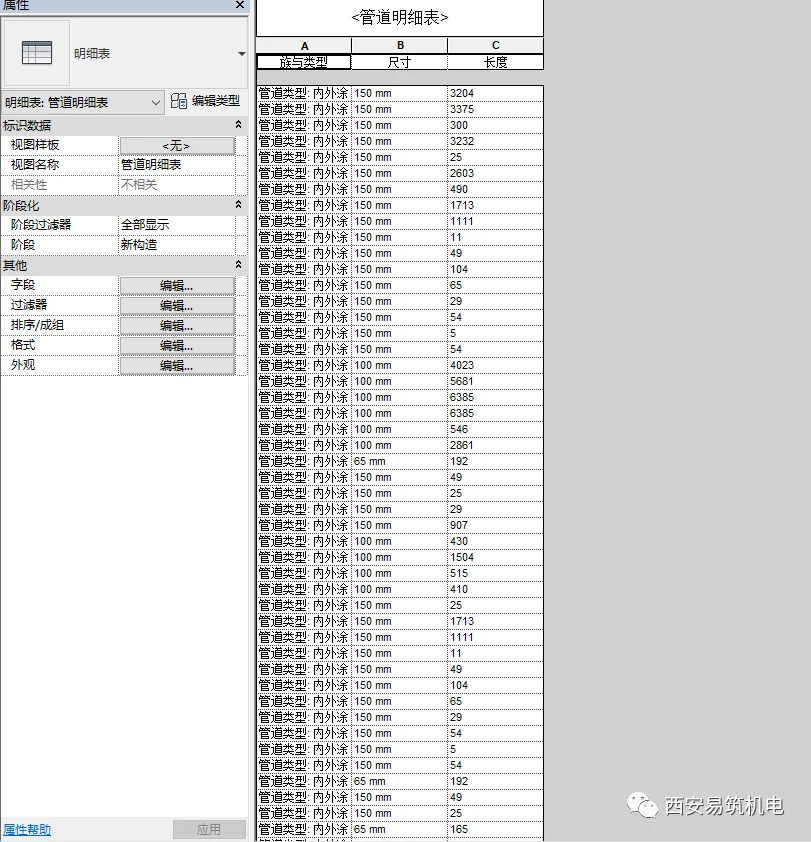
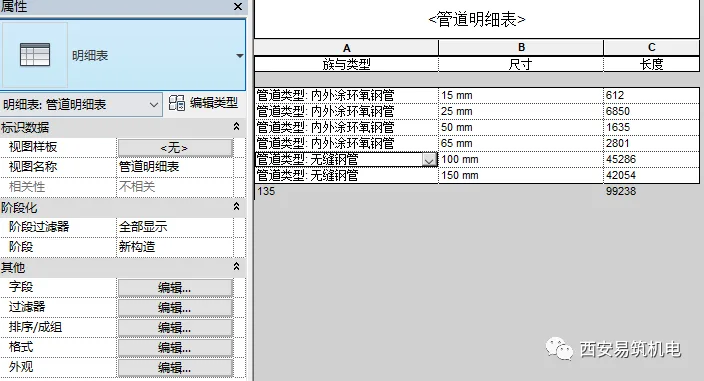
Step 7: Hold on—this isn’t the end. You’ll notice that the schedule hasn’t merged items by the same specifications and sizes yet. Next, manually sort and organize the fields you selected.
Click to sort and group the data.
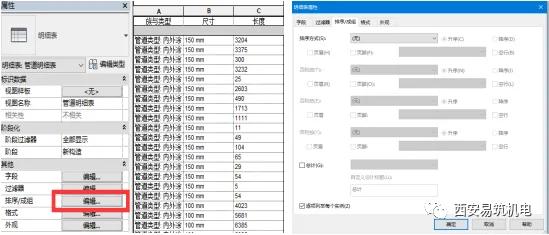
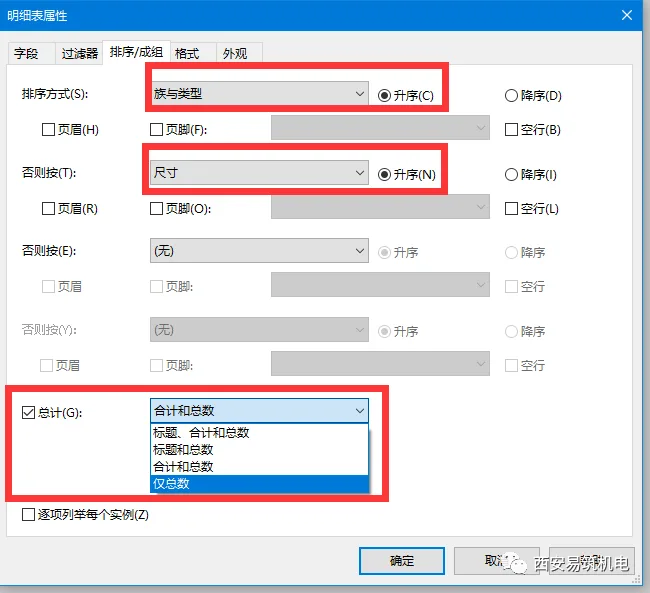
Step 8: For pipelines, sort by size and material, organized by total length.
Sort by Family and Type > Size > Total. Select ‘Total’ and choose ‘Do Not List Each Instance.’
Step 9: Format the Length field to calculate the total count.
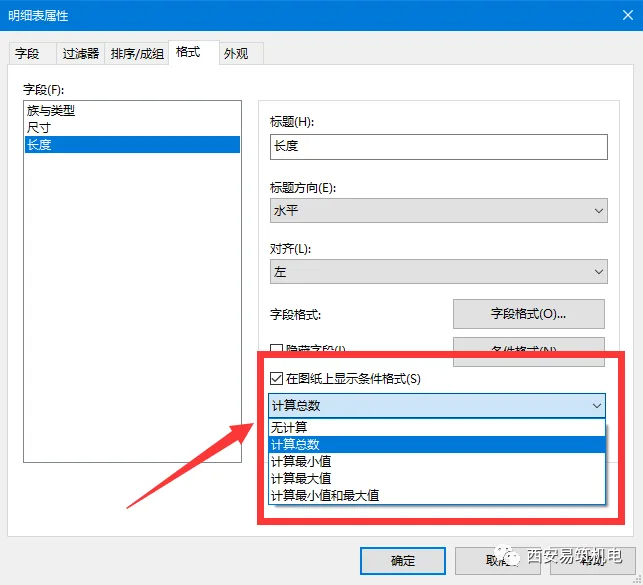
Step 10: After completing these steps, your pipeline schedule will be merged and organized by type, size, and in ascending order.
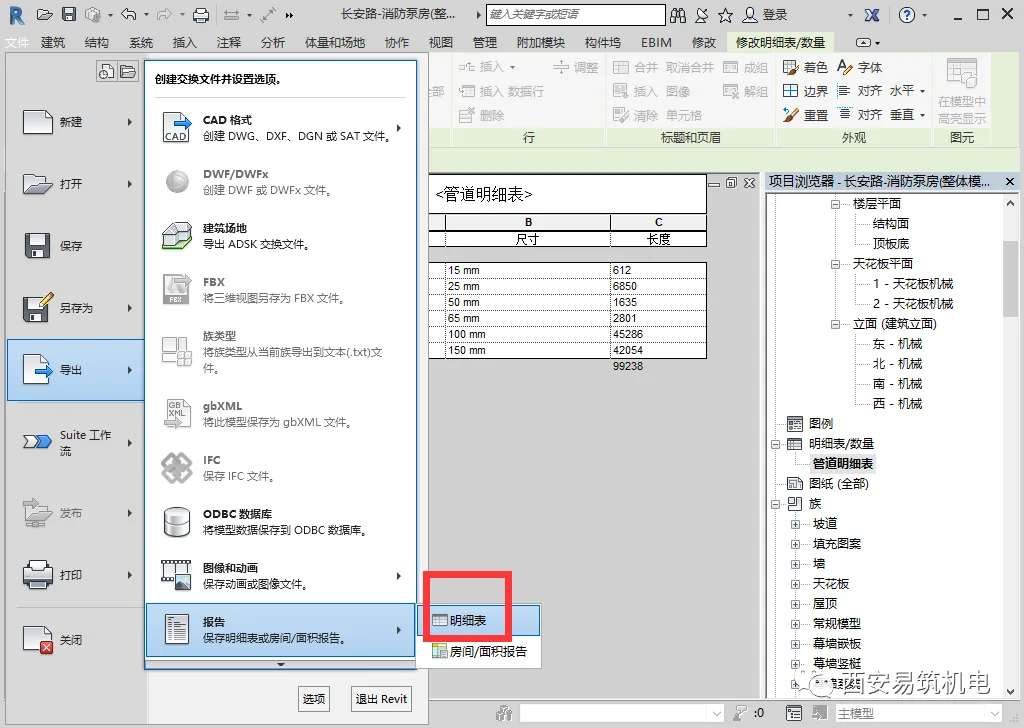
Note that Revit’s detailed schedules cannot be directly exported to Excel. Instead, export the data as a .txt file from Revit, then open it in Excel for further processing.
So, have you learned how to calculate quantities using Revit’s detailed schedules?


Must log in before commenting!
Sign Up