This article is from the WeChat official account: Hongjian Smart Building.
Typically, when drawing paths in Revit, the results are either flat on a plane or composed of straight lines. But how do you draw a path along a three-dimensional curve? Today, we’ll explore this technique.
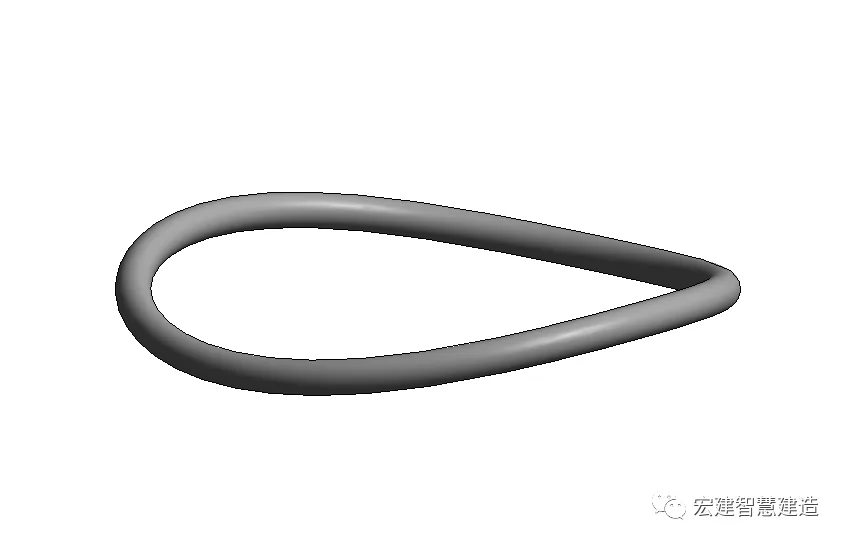
For instance, if we want to create a three-dimensional curved path like the one shown above, it might seem confusing at first since such a path cannot be drawn directly. In this case, we need to apply a method of “borrowing” geometry.
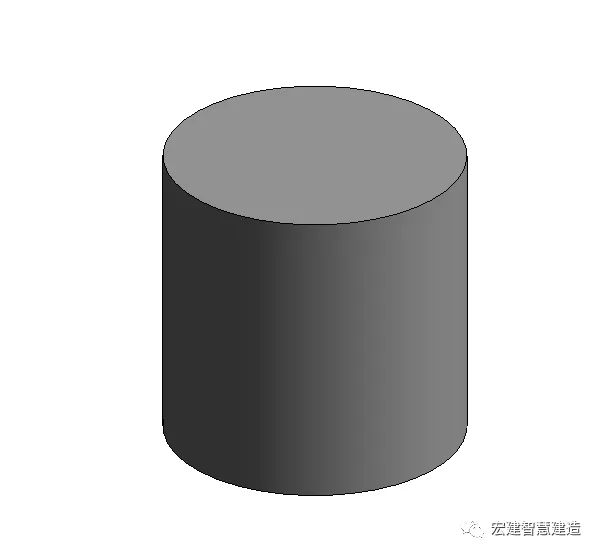
Step 1: Create a solid cylinder
Creating a cylinder is straightforward. You can adjust its length by stretching or rotate it as needed.
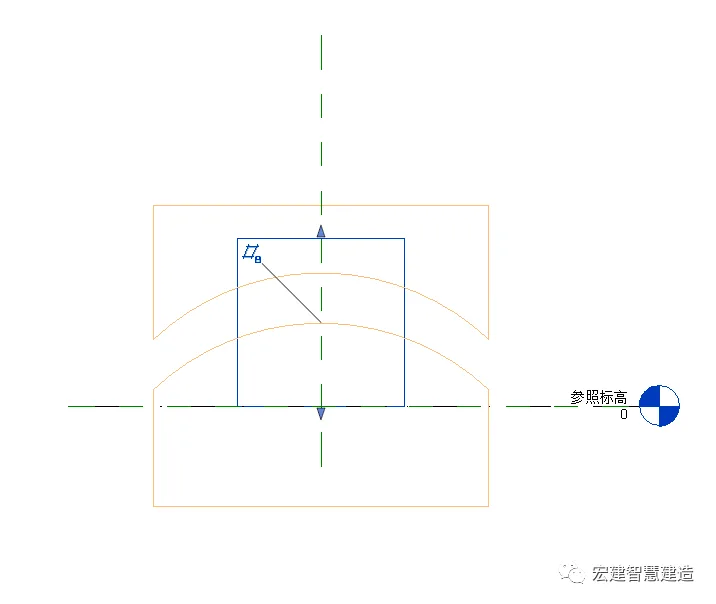
Step 2: Create hollow shapes and cut the cylinder
At any elevation, sketch a hollow shape with a circular arc on either the lower or upper surface. Use this shape to cut the cylindrical solid.
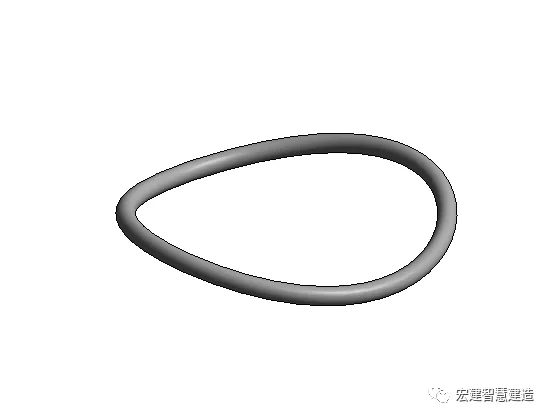
Here’s the resulting three-dimensional shape after the cut:
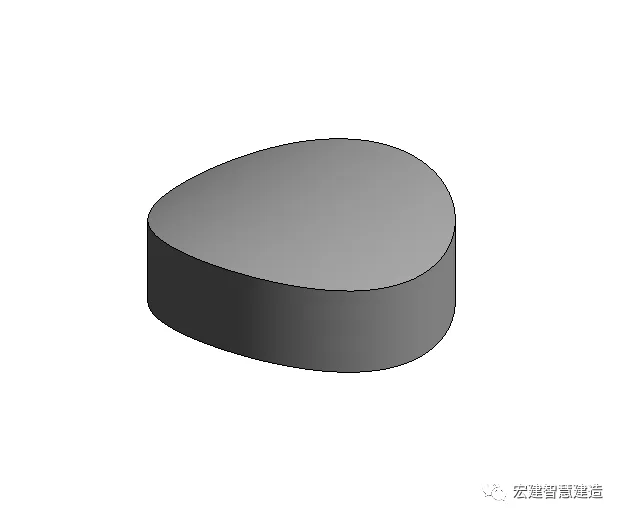
Do you see the outline we are aiming for? This is the three-dimensional curve path we want. With this path ready, we can move on to creating the desired shape using layout tools.
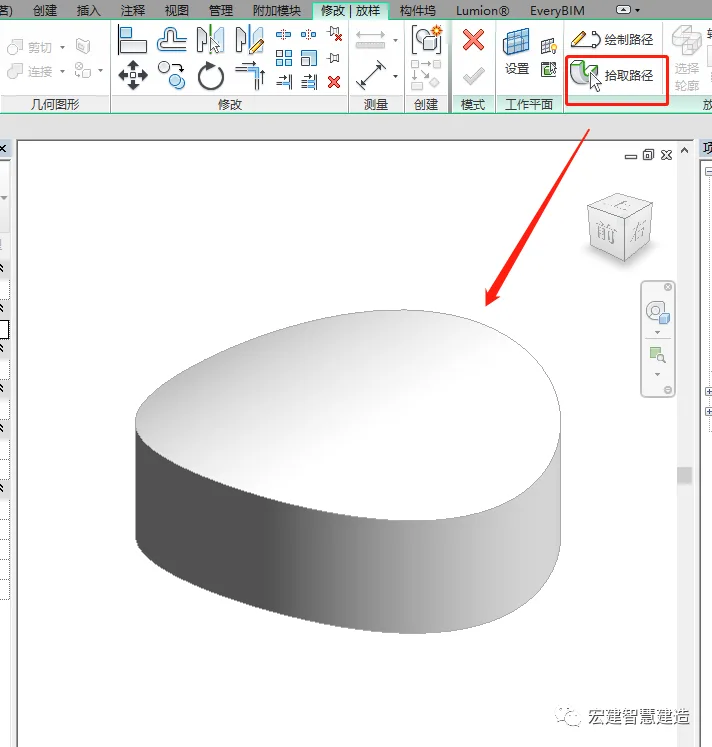
Step 3: Use layout to create a solid circular ring
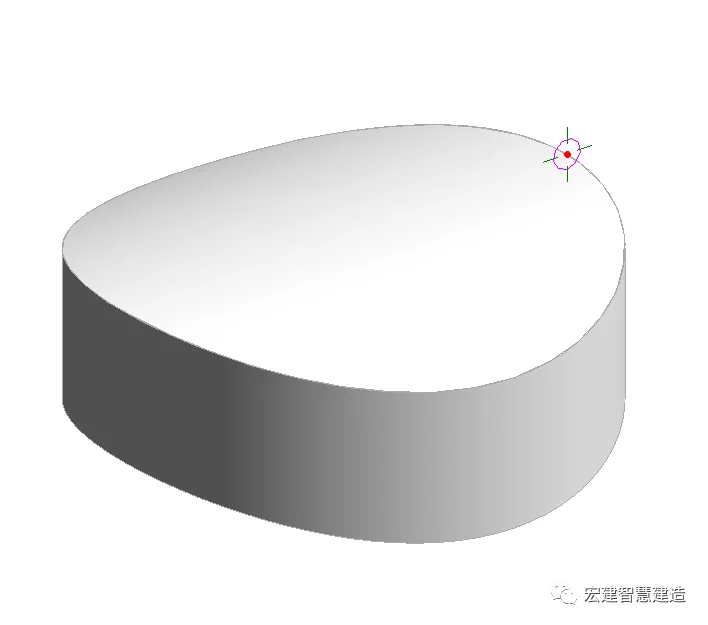
In the 3D view, select the “Pick Path” option to trace the circular outline, then create a circular ring.
At this stage, the shapes created in the first two steps have served their purpose and can be deleted.
What remains is the ring we need.
Summary: When working deeply with Revit, you often encounter shapes that cannot be created directly. In these cases, you need to change your approach and use the “borrowing” method to generate the desired forms.


Must log in before commenting!
Sign Up