This article is from the official account: Bai Xiaoliu LiX.
While enjoying working with Revit, you might often encounter situations where certain elements or entire models become invisible. This article summarizes 11 common reasons why elements might not be visible in Revit.
First, take a look at the summary chart:
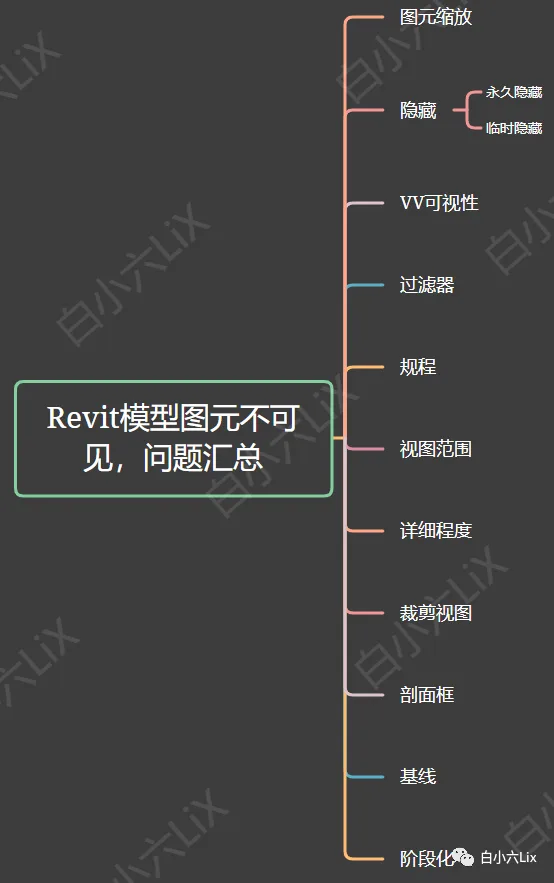
Once you’ve reviewed this chart, you might find little need to read further. Save your time and avoid unnecessary reading!
1. Element Scale
Description: The element is either scaled too small or located outside the visible view range.
Solution: This is the most basic issue. It’s unlikely anyone would be stuck on this for long.
2. Hide (Temporary and Permanent)
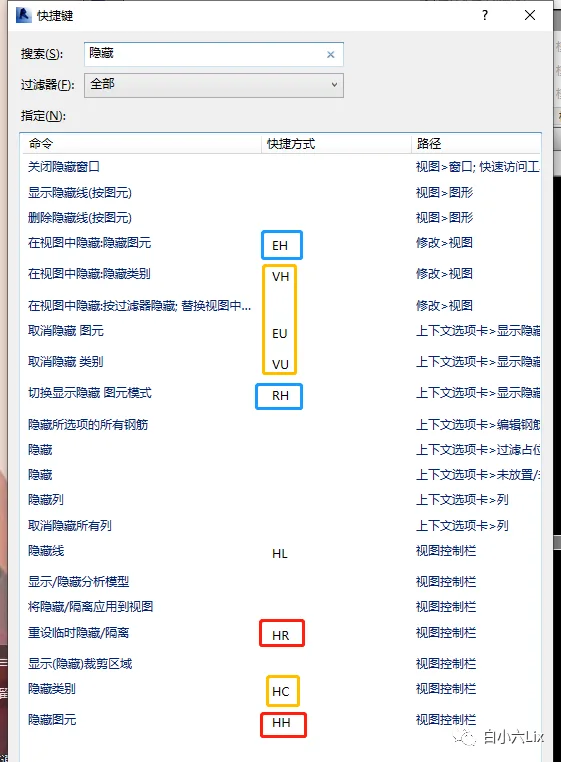
Elements can be hidden temporarily or permanently in Revit:
- Temporary hide graphic (HH): Temporarily hides elements.
- Unhide temporary graphic (HR): Restores temporarily hidden elements.
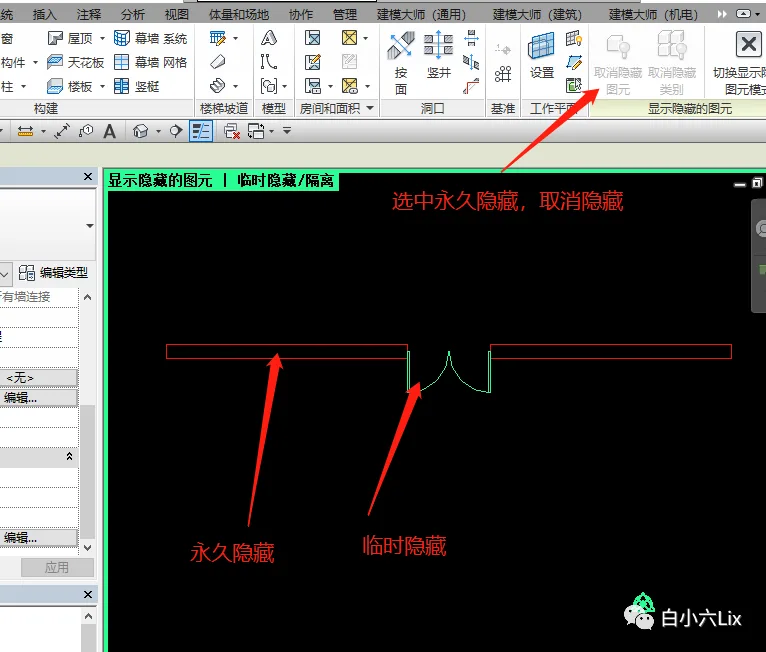
- Permanent hide element (EH): Hides elements permanently.
- Switch to display hidden (RH): Click the small light bulb at the bottom left of the viewport to toggle this mode. It reveals all temporarily (red) and permanently (green) hidden elements and categories.
There are additional hiding options such as category hiding. For more details, you can search online.
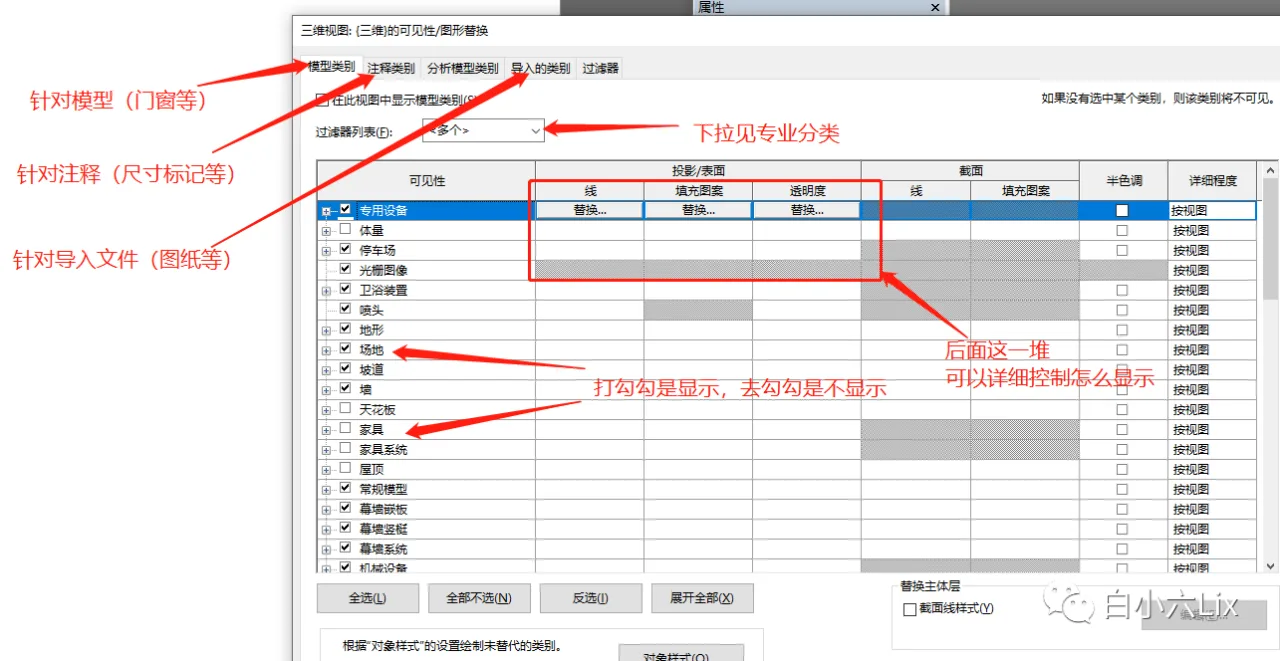
3. Visibility/Graphics Overrides (VV & VG)
View Visibility and Graphics settings control the visibility of different elements and categories in the current view.
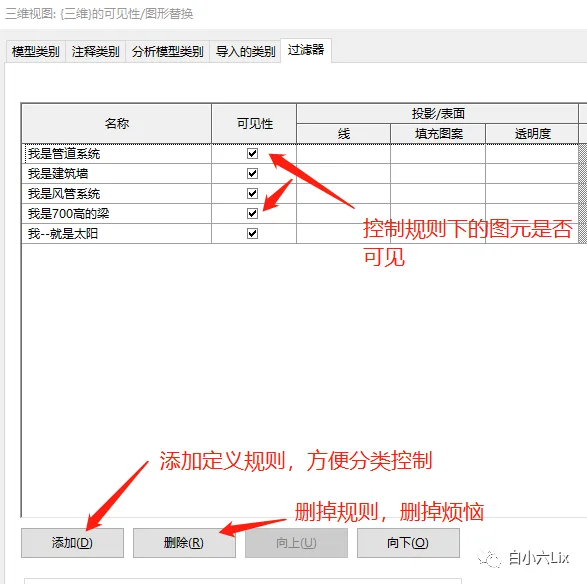
4. Filters (Similar to VV & VG)
Filters allow you to define rules that control the visibility and appearance of elements based on specific criteria, helping with classification and management.
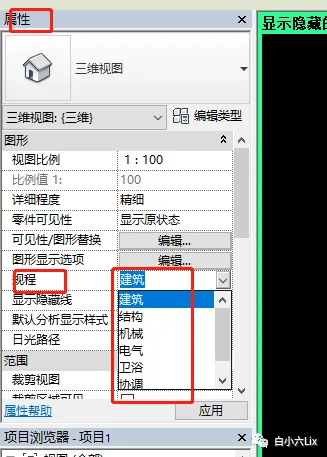
5. Discipline (Attributes – Graphics – Discipline)
Revit classifies model elements into five disciplines based on their nature: Architecture, Structure, Mechanical, Electrical, and Plumbing.
For beginners, choosing the “Coordination” discipline is usually the safest option.
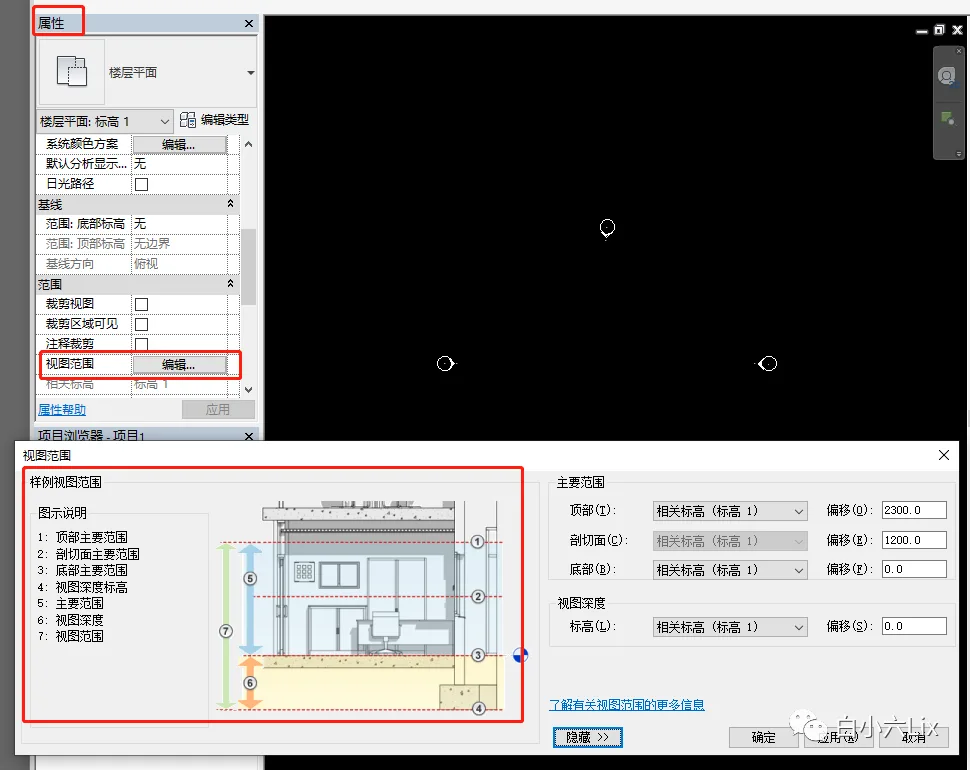
6. View Range (For Floor Plans, Properties – View Range)
The view range settings define the vertical range that is visible in floor plan views. If elements fall outside this range, they won’t be visible.
7. Detail Level
This setting controls the level of graphical detail displayed for families. When creating a family, you can specify which graphical elements appear at different detail levels. For example, the door handle may only be visible at a high detail level.

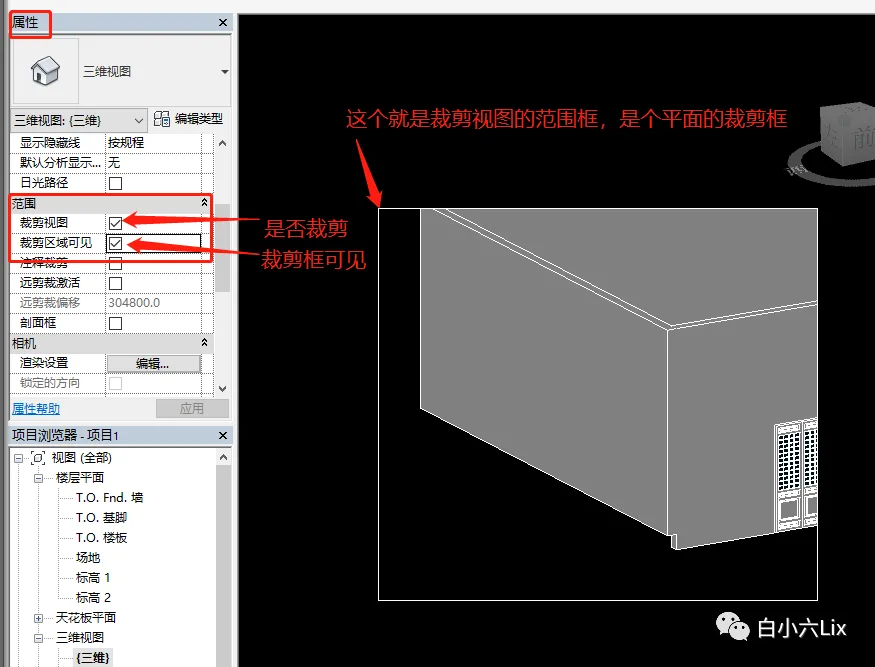
8. Crop View (Properties – Crop View)
Crop view limits the visible area of the view, so elements outside this boundary will not be displayed.
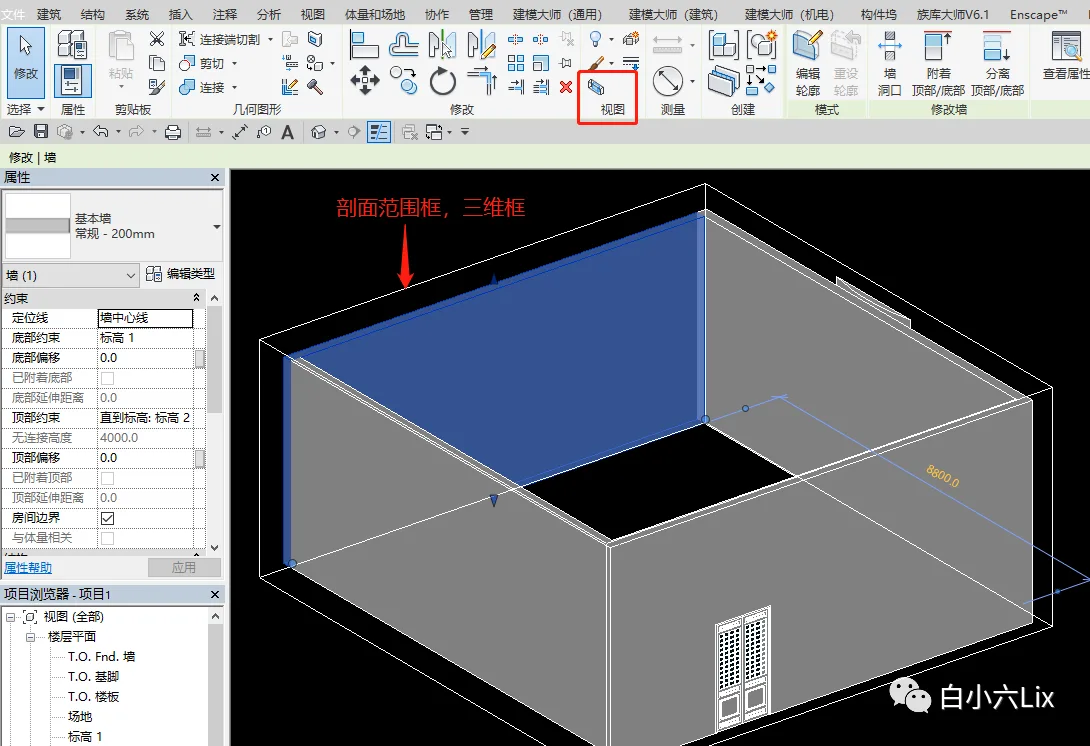
9. Section Box (Select Element – Modify – Section Box)
The section box allows you to isolate and view a specific 3D portion of the model. Elements outside the box will be hidden.
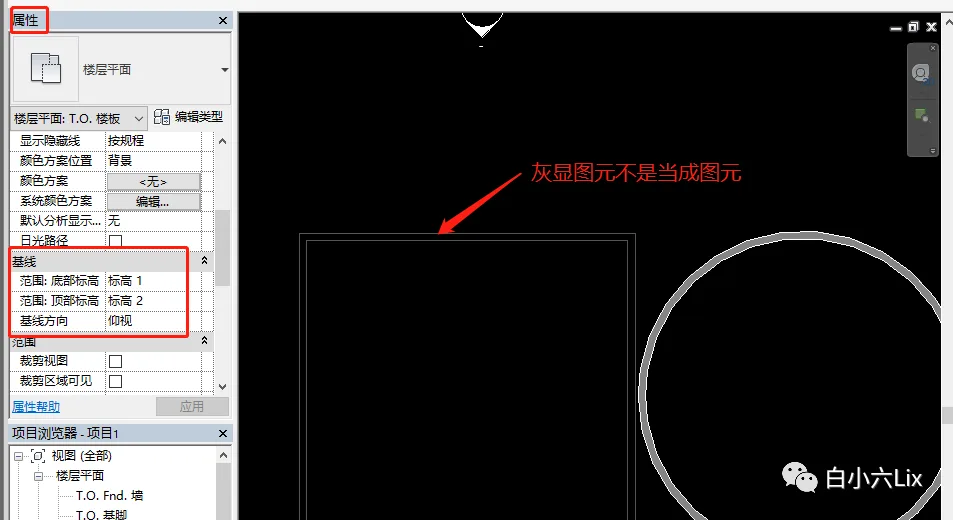
10. Base Level (For Floor Plans, Properties – Base Level)
The base level setting is used to display elevation elements not on the current level, often shown as gray lines.
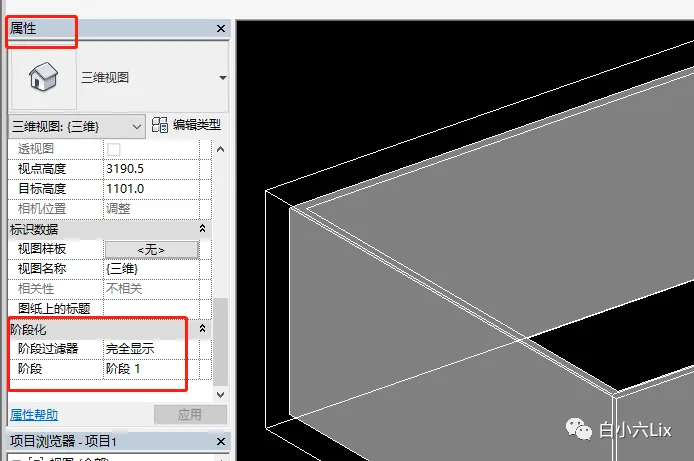
11. Phasing (Usually Not Used)
Phasing controls the visibility of elements based on project stages or construction phases.


Must log in before commenting!
Sign Up