In daily BIM workflows, creating the “elevation grid” can often feel tedious and monotonous. However, it remains a crucial and error-free element of any project.
In medium to large-scale projects, disciplines are typically modeled separately—civil engineering first, followed by mechanical and electrical engineering—with multiple team members collaborating simultaneously. Therefore, ensuring the accuracy of each team member’s benchmark information is vital, especially for controlling model positioning and maintaining the precision of the overall control axis network. Revit offers a solution to streamline this repetitive process. This article introduces a method for quickly transferring fundamental attributes such as elevation grids without the need for plugins. Usually, the project leader or manager prepares a template file tailored to the project’s specifics, including a set of elevation grids used to control each building individually.
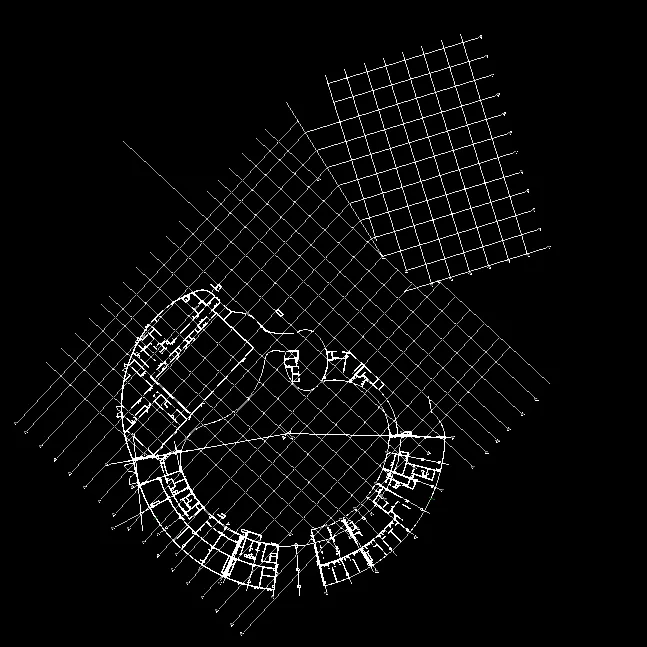
Here, we demonstrate using a two-story building with an irregular shape. After linking it into the project, we observe its unique form and unconventional horizontal and vertical axis networks. Besides the axis networks specific to each building, there is also a set of overall control axis networks.

We use the “Copy/Monitor” function from the Collaborate tab here, which offers two options: the current model and the linked model. Select the linked model.
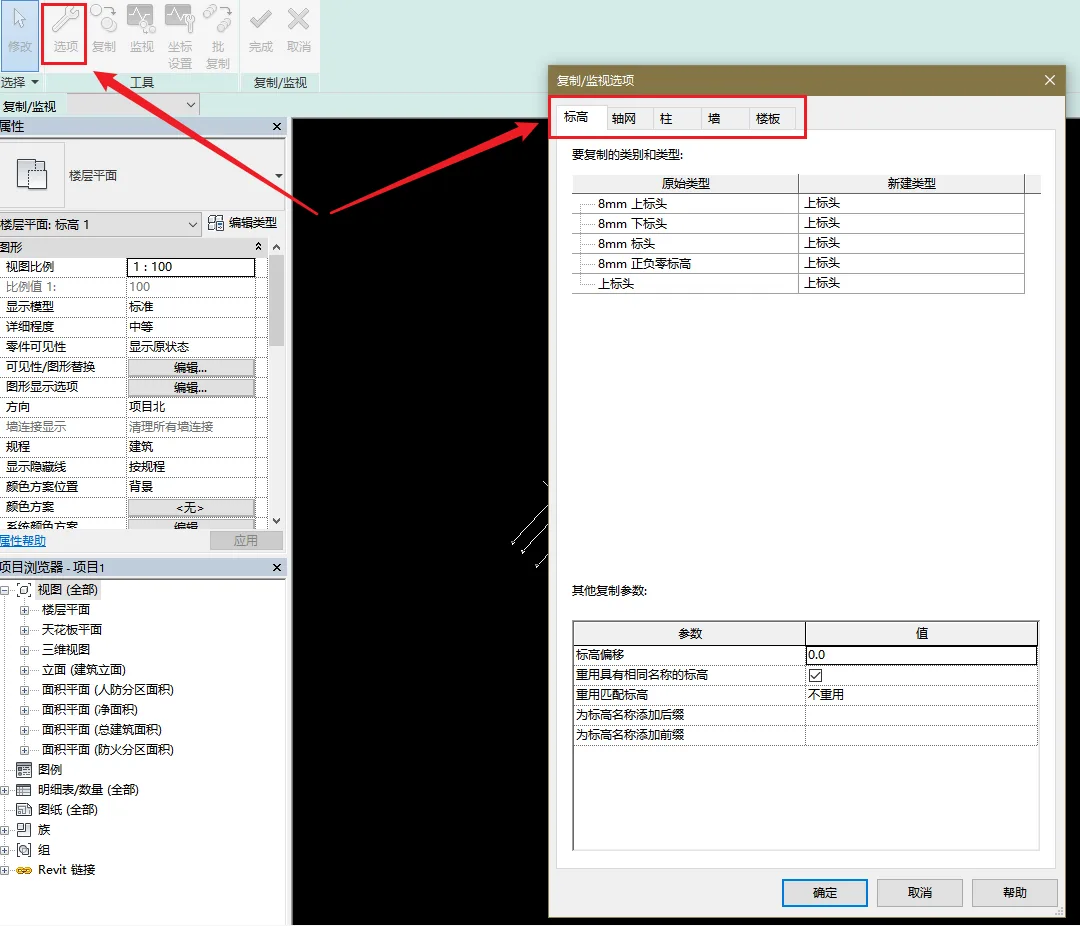
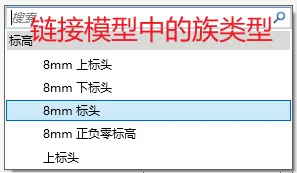
By opening the “Options” menu, you can view the family types of components present in the linked model. For example, the five family types shown under the “Elevation” tab correspond to those in the linked model. Likewise, if other component types differ, the “Copy/Monitor” function can be used to copy those family types into the local project.
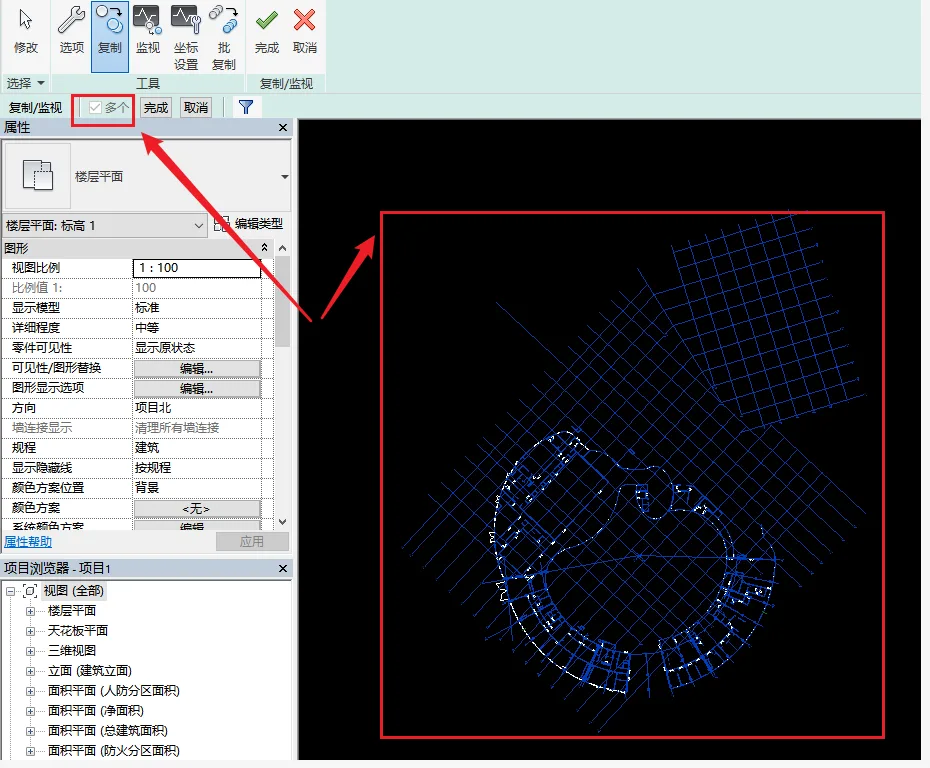
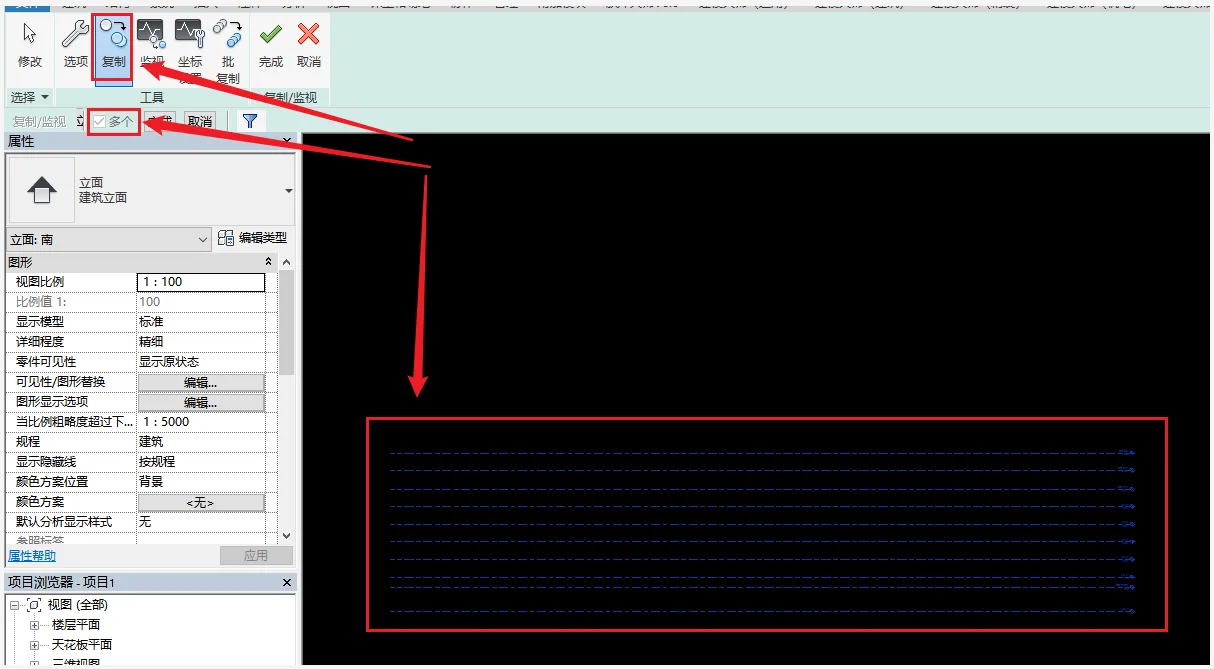
This example uses grids for demonstration. Click the “Copy” tab and select the “Multiple” option below (note: it is selected by default; when checked, it appears boxed). Then select all grids visible in the view and click the icon on the far right (as shown below).
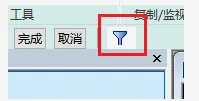
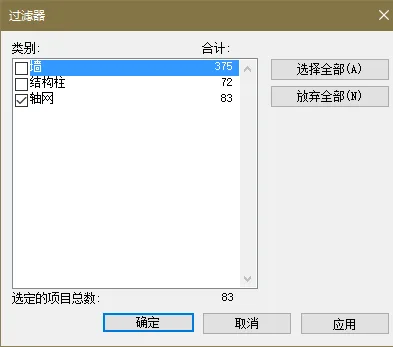
Filter out any unnecessary elements, leaving only the grids. Then click OK.
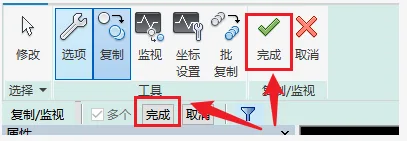
Next, double-click to complete the process.
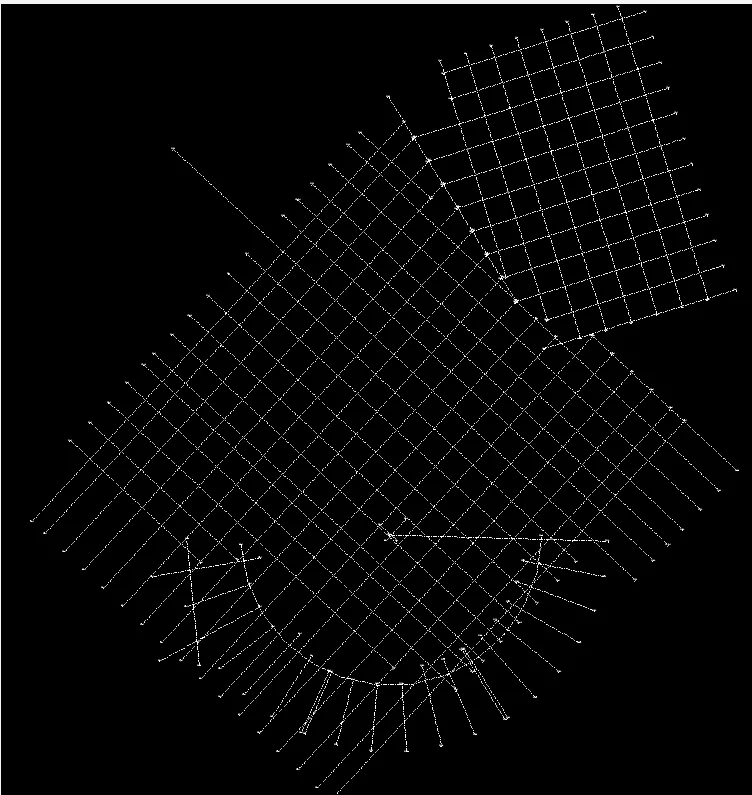
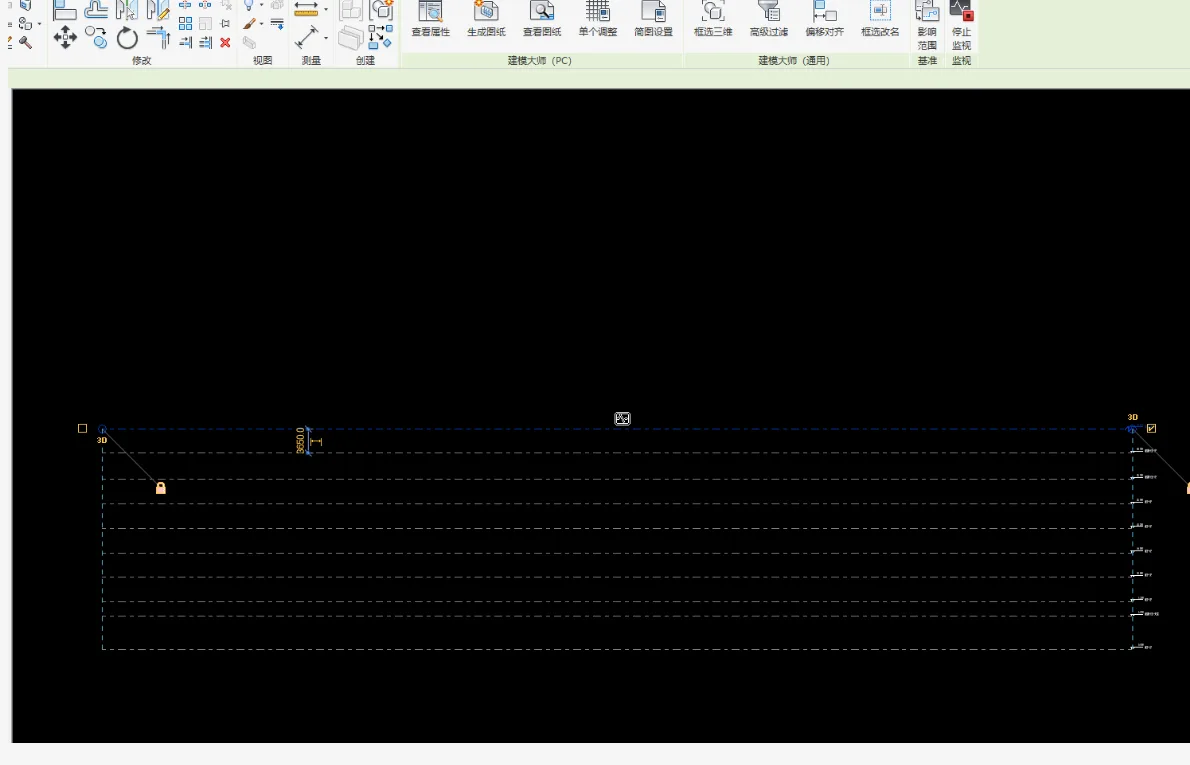
All grids from the linked model have now been imported. For elevations, switch to the elevation view first, then select “Collaborate” – “Copy/Monitor” – “Copy” – check the “Multiple” option and select all.
Finally, click “Finish” twice to complete the elevation grid transfer.
Another advantage of the “Copy/Monitor” function is its monitoring capability, which helps prevent both intentional and accidental modifications. After monitoring, copied elements display a specific icon, as shown below.

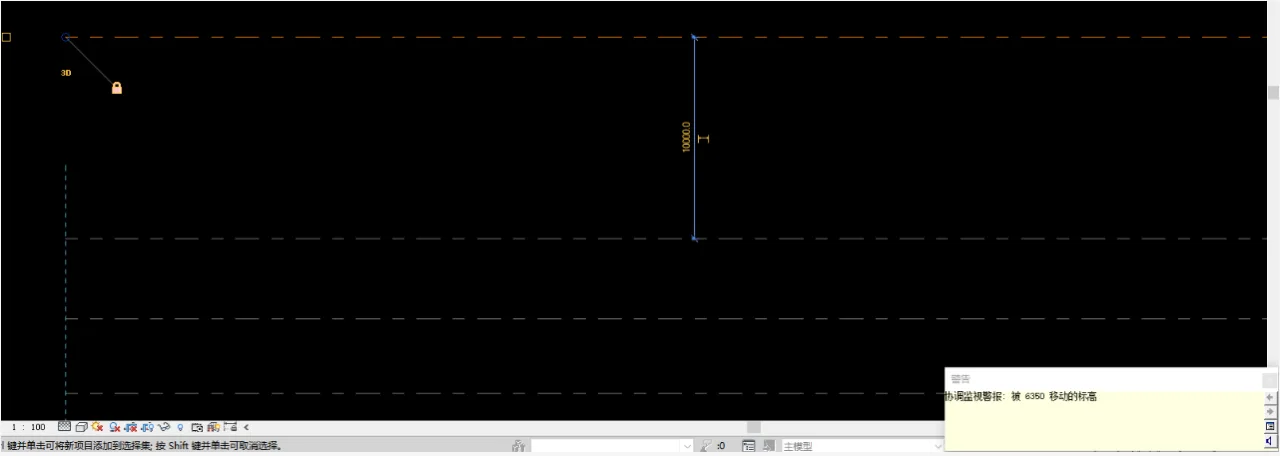
For instance, if an elevation spacing is adjusted to 10,000 mm, a warning box appears in the lower right corner indicating the elevation has shifted by 6,350 mm. This feature serves to alert users of unintended or unauthorized changes to monitored components.
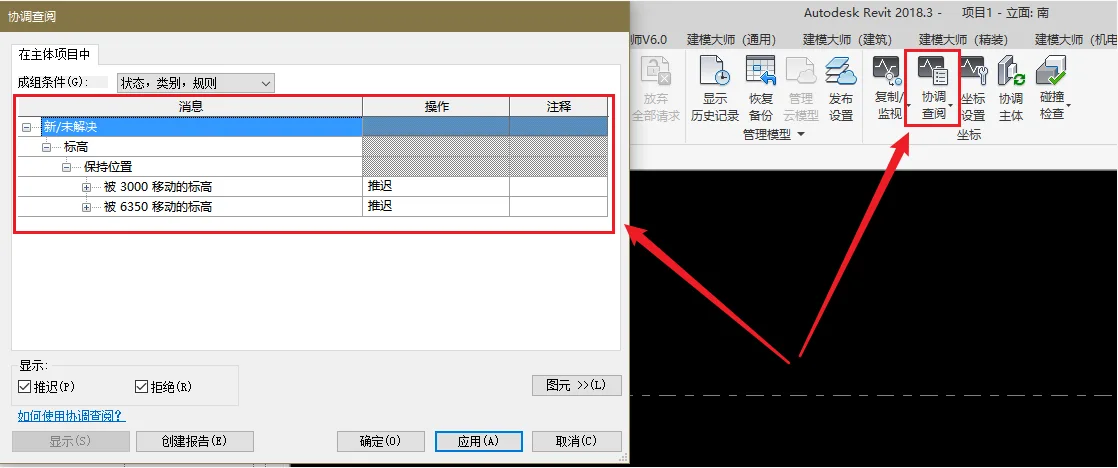
The “Coordination Review” tab also logs changes made to monitored elements and can generate related reports. This demonstrates Revit’s commitment to preserving the integrity and uniqueness of the model. Overall, the “Copy/Monitor” tool is ideal for projects without plugins or when plugin use is inconvenient. It enables fast transfer of common elements between the overall project and sub-project files. Its monitoring capability is particularly useful for project managers to verify consistency of fundamental project data across teams.
Source: official account BIMBANK


Must log in before commenting!
Sign Up