BIM Q&A | How to Download, Install, Register, and Activate Revit 2016
1. Gather all necessary tools before starting the installation. In this guide, we will use Revit 2016 as an example. You will need a Windows computer running Windows 7 or later, the Revit 2016 installation package, and the Autodesk Revit 2016 activation tool. (A little secret: you can find these tools linked at the end of this article.)


2. After extracting the installation package, double-click on Setup.exe in the folder to launch the installer. You will see the following screen.
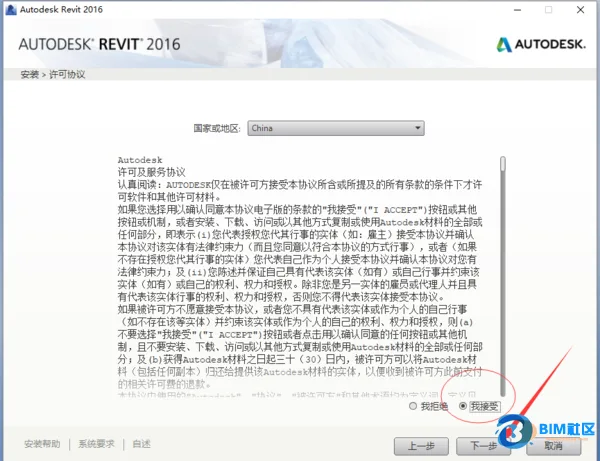
3. The installer defaults to China as the country or region. If it is not set correctly, click the arrow next to the country/region field and select China. Then, check the box to accept the license agreement (highlighted in red in the image) and click “Next”.
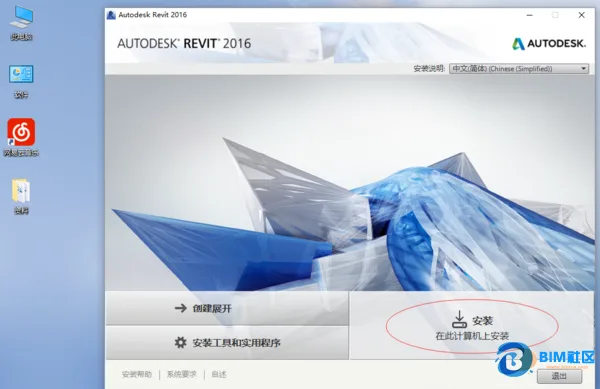
4. For beginners, it’s recommended to click the “Install” button circled in red in the image to proceed to the registration code input screen.
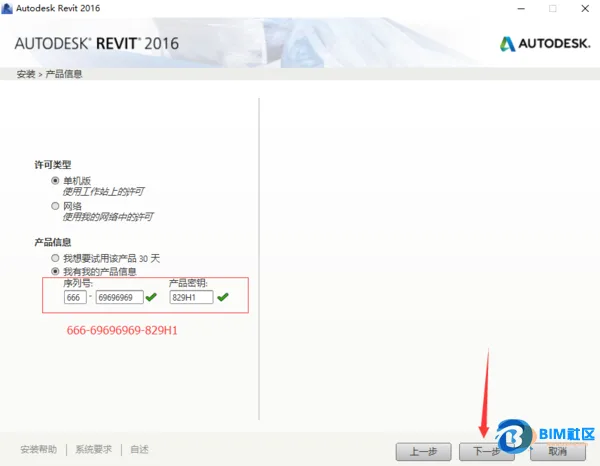
5. Enter the serial number 666-69696969 and product key 829H1, then click “Next”.
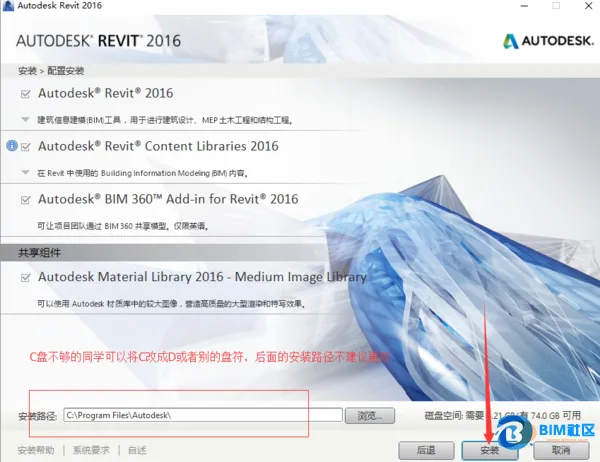
6. On this screen, choose the features you want to install and select your preferred installation path. Once satisfied, click “Install”.
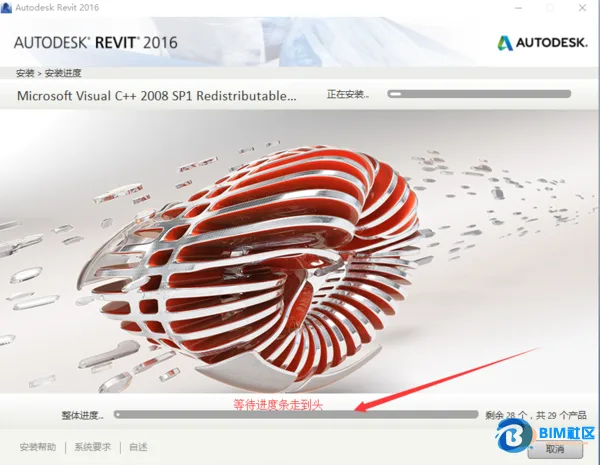
After the installation progress completes, the system will automatically proceed to the next interface as shown below.
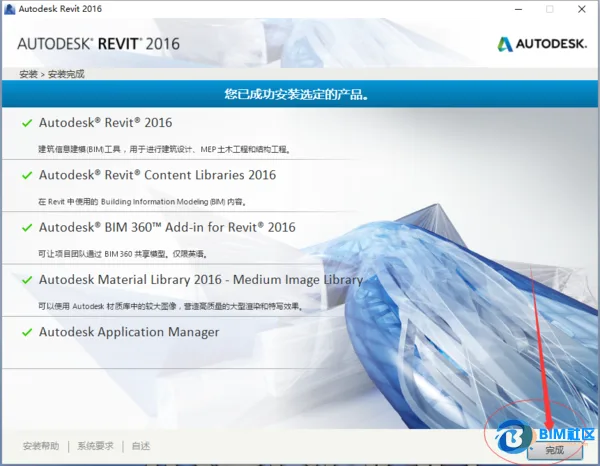
8. The installed features will be displayed here. Click “Finish” to complete the installation. Before proceeding to activation, it is recommended to disconnect your computer from the internet (if you’re unsure how, simply unplug your network cable). Then, double-click the Revit 2016 shortcut on your desktop and click “Activate” as shown below.
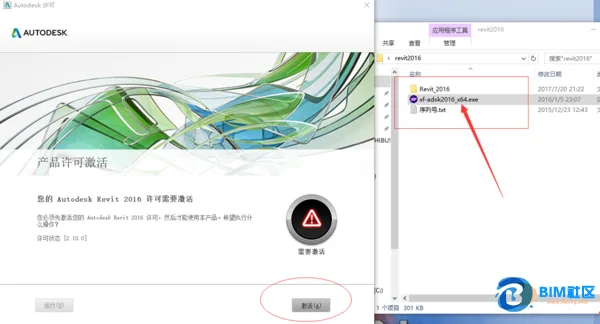
9. Locate the activation tool, right-click on it, and select “Run as administrator” from the context menu. This step is crucial and should be repeated three times.
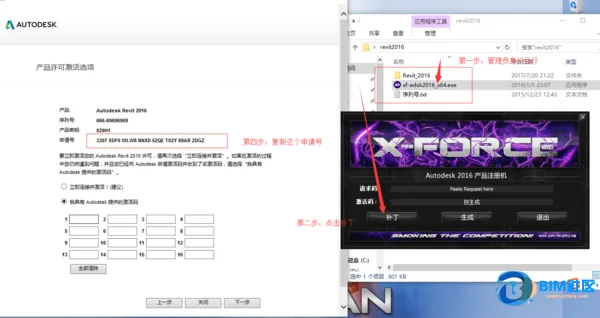
10. Once the activation tool is open, first click the “Patch” button. A prompt will confirm the patch was successful. Then, copy the “Application Code” from the activation screen and paste it into the “Request Code” field in the activation tool.
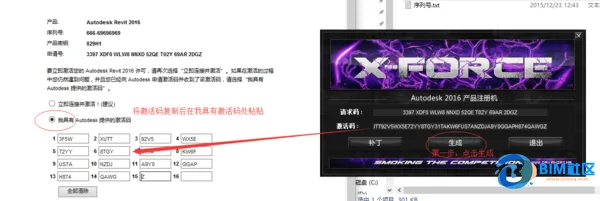
11. Click “Generate” to create the activation code. Copy this code back to the activation interface and click “Next”.
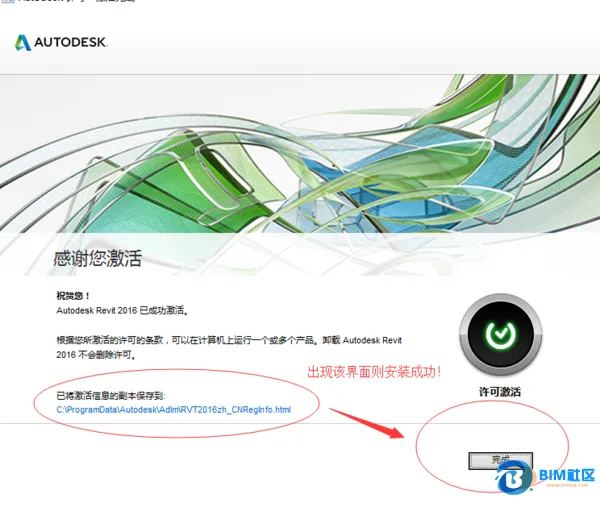
12. When the activation success screen appears, click “Finish”. Your Revit 2016 installation and activation are complete. How was your experience?


Must log in before commenting!
Sign Up