The process of rendering a 3D view in Revit involves several steps. The first four steps can be performed in any order:
1. Create a 3D view of the building model.
2. Specify the rendering appearance for materials and apply them to the model elements.
3. Set up lighting for the building model.
– If artificial lighting is required, add it to the building model. Please refer to the lighting settings.
– If natural lighting is preferred, configure daylight and shadow options.
4. (Optional) Add additional elements to the building model, such as:
– Plants
– People
– Vehicles
– Other environmental features
– Decals
5. Define rendering settings.
6. Render the image.
You can perform real-time rendering to display models using the “realistic” visual style, or render models to produce photo-realistic images. The following table illustrates both rendering types:
| Realistic (using the “realistic” visual style) | Photorealistic (rendered image) |
|---|---|
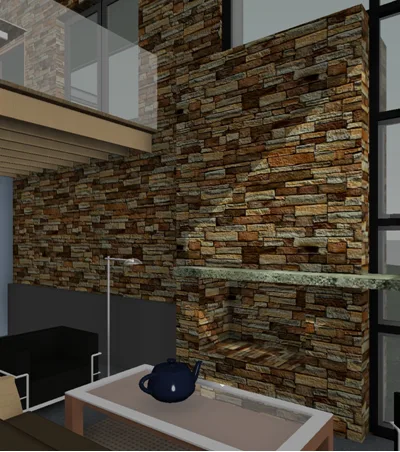
|
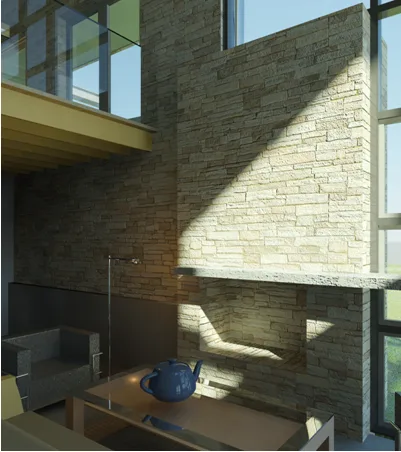
|
The “realistic” visual style instantly displays the appearance of actual materials within the model view. When shadows and depth settings are applied, the model can be rotated to display its surfaces under various lighting conditions.
Below are the steps to create a real-time rendering view:
- Create model elements or open an existing model.
- Specify the actual material appearance for graphic elements.
- Set graphic display options.
-
Open an editable view.
Attention
Real-time rendering views are not available in “Drawing View”, “Schedule”, or “Legend”. - Choose the ‘Realistic’ visual style from the View Control Bar.
To display materials in the “realistic” visual style, the “Use Hardware Acceleration (Direct3D)” option is enabled by default. When launching Revit, if your computer’s video card and drivers have not been tested by Revit, or do not meet the minimum requirements, a warning will appear describing the issue.
Warning: There is a hyperlink to the Autodesk website, which lists tested video cards and drivers.
Since only hardware acceleration is used to render materials, if hardware acceleration is disabled, the “realistic” visual style will appear the same as the “shading” visual style.
To access hardware acceleration settings, go to “Options” → “Graphics” tab → “Use Hardware Acceleration (Direct3D)”.


Must log in before commenting!
Sign Up