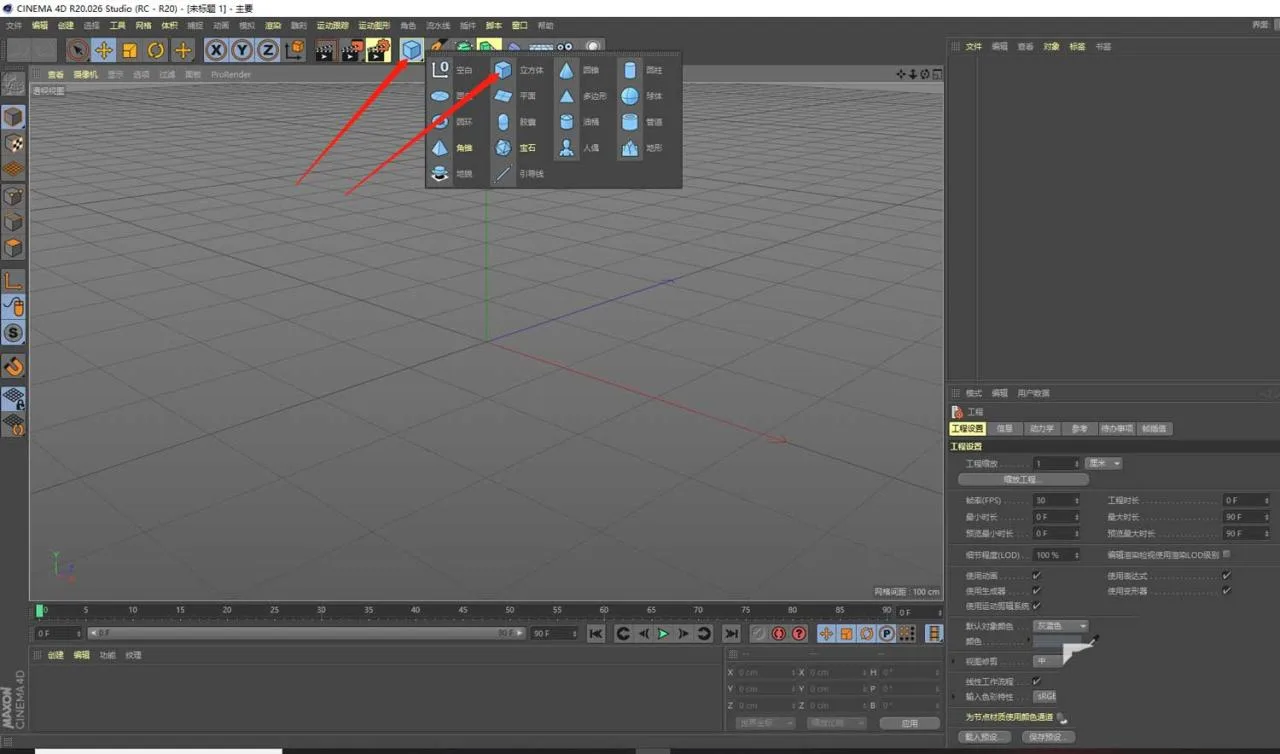
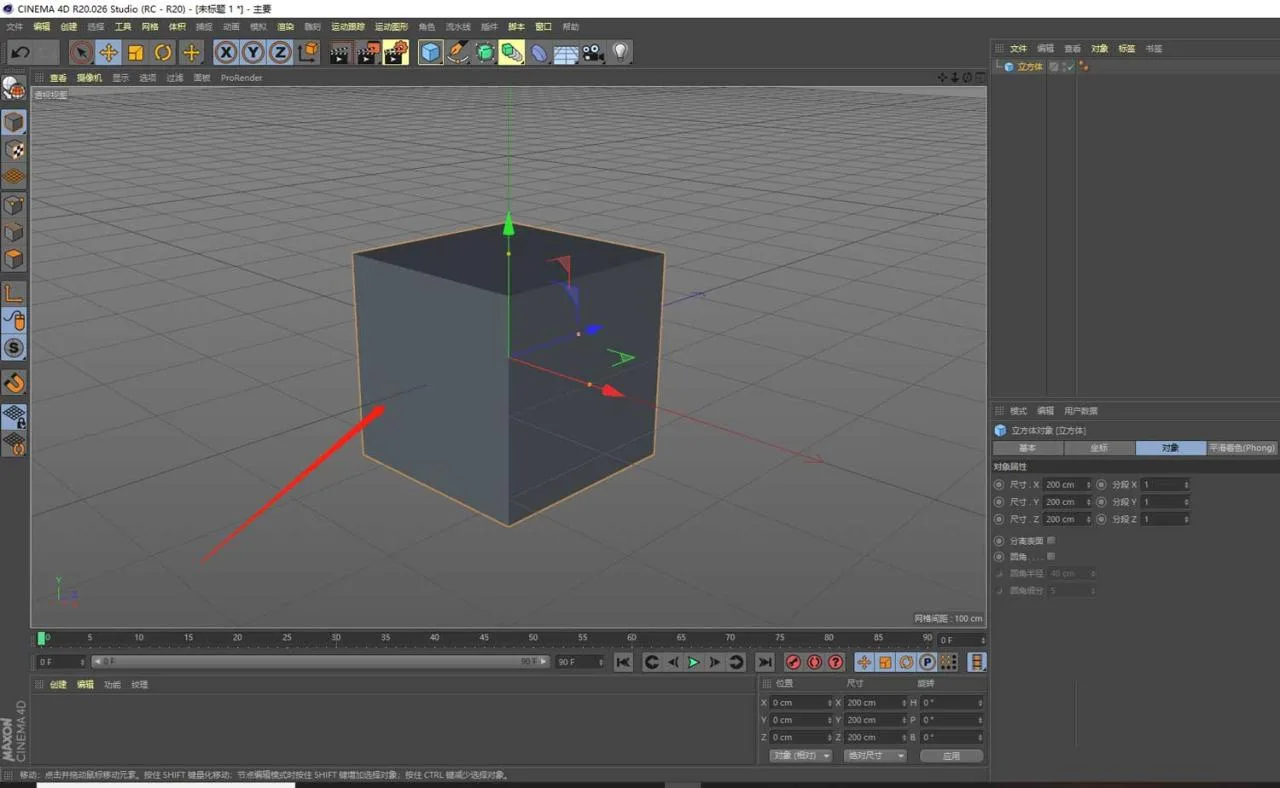
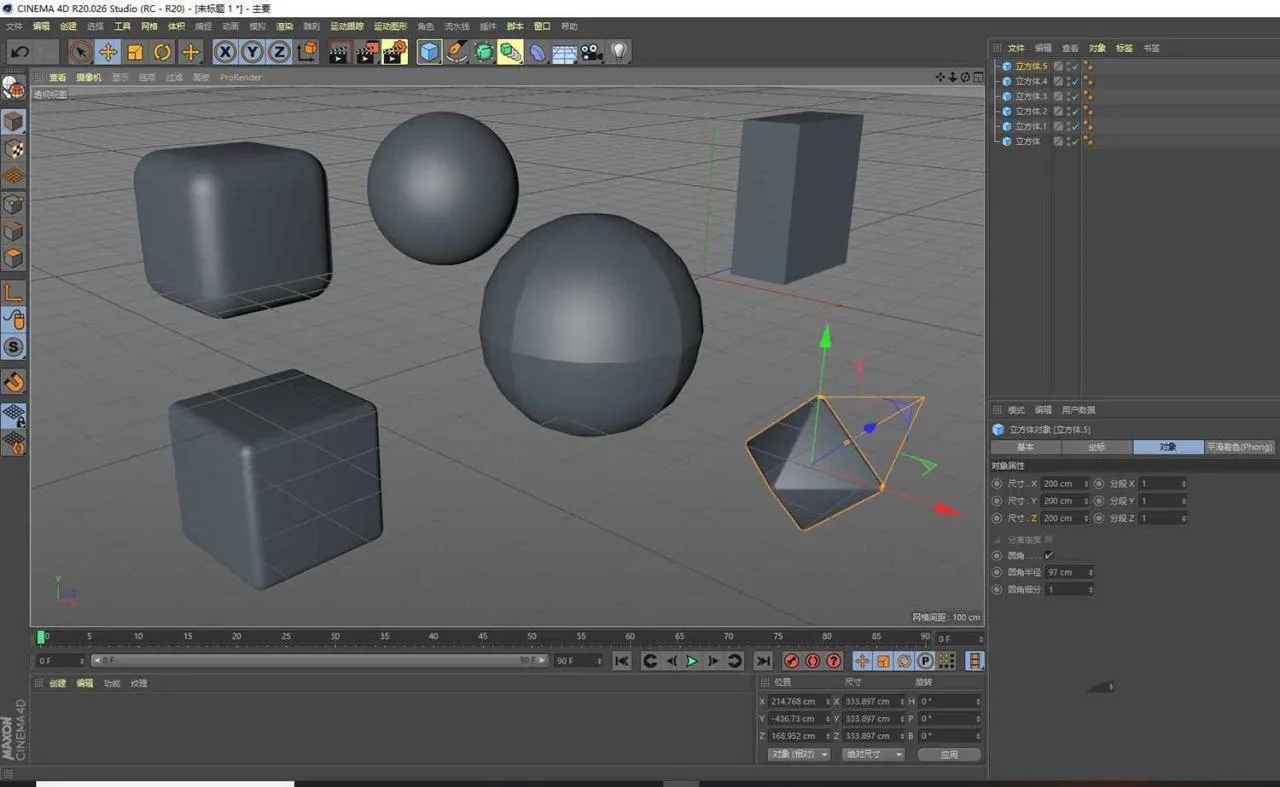
1. Launch Cinema 4D and create a cube object by clicking on the Cube icon.
2. To create a sub-object, select the cube, then hold Ctrl and click with the left mouse button to duplicate a sub-object. You can pull it out and adjust its position precisely using the Coordinate and Angle values in the Properties panel.
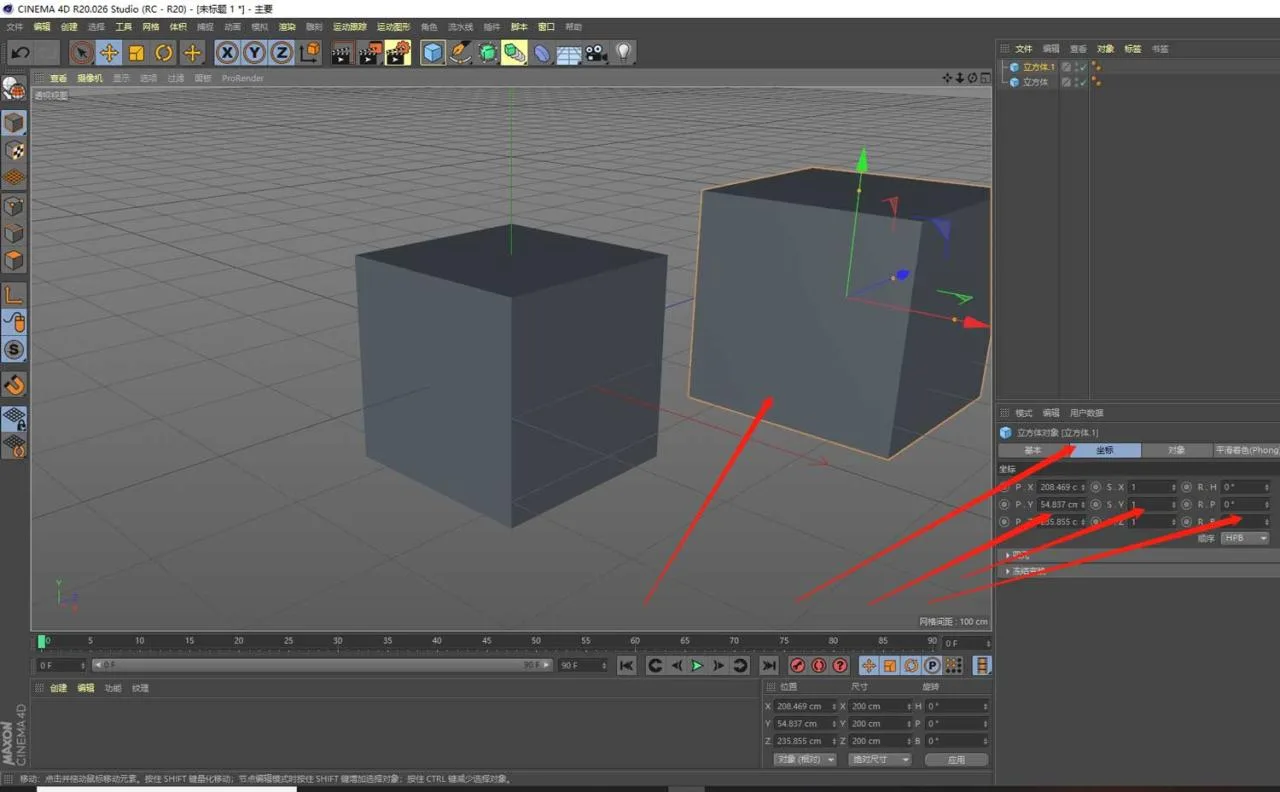
3. If you need to use a coordinate axis as the coaxial axis, select the desired axis (it will turn white when selected), then pull it out just like in step 2.
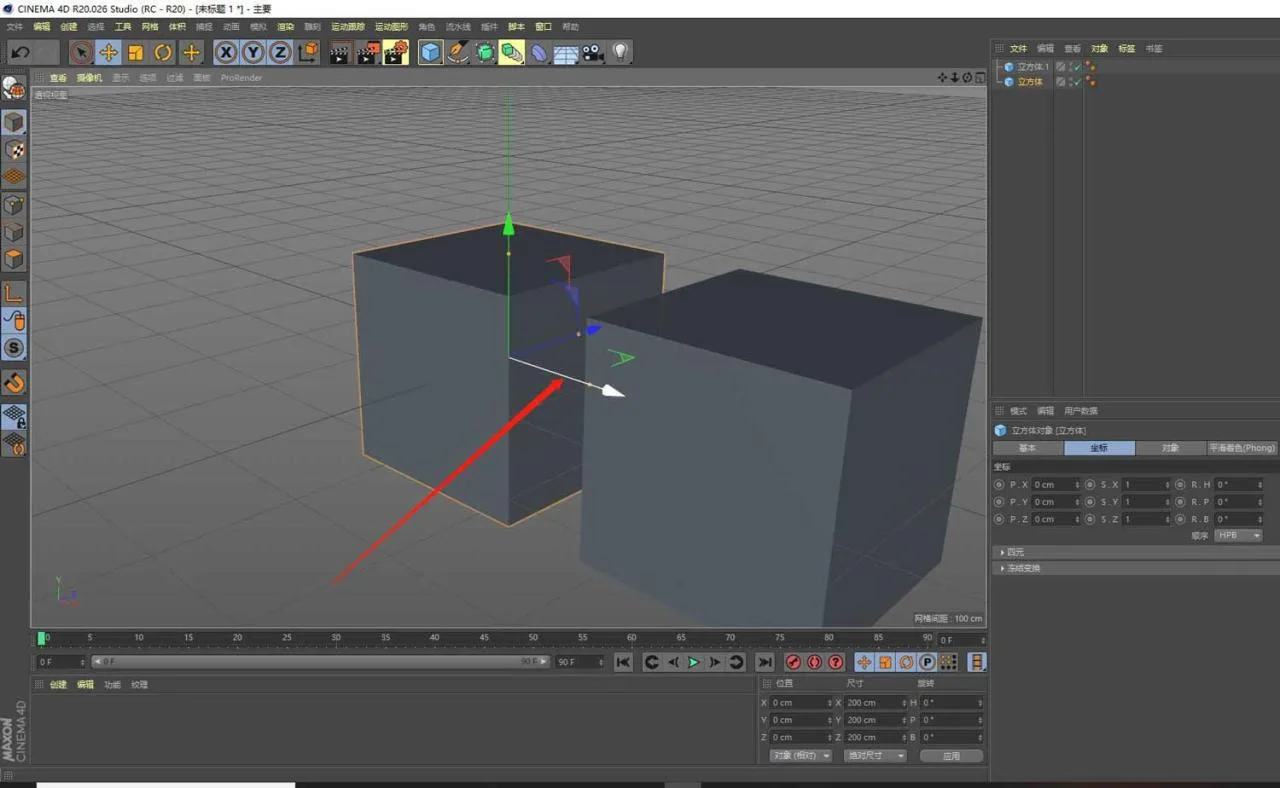
4. To move an object, select it and then choose the coordinate axis. Hold down the left mouse button to drag the object along the selected axis, or use the corner marker to move it freely in any direction.
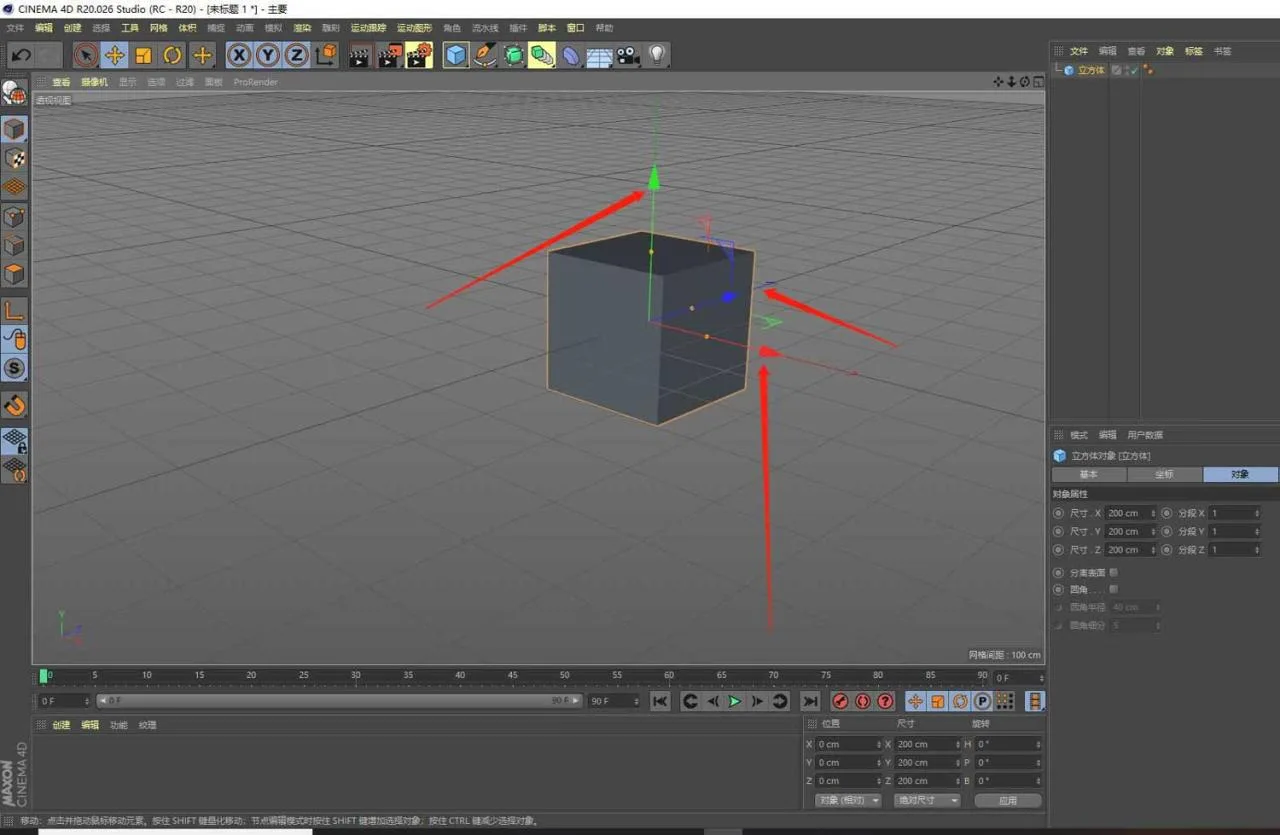
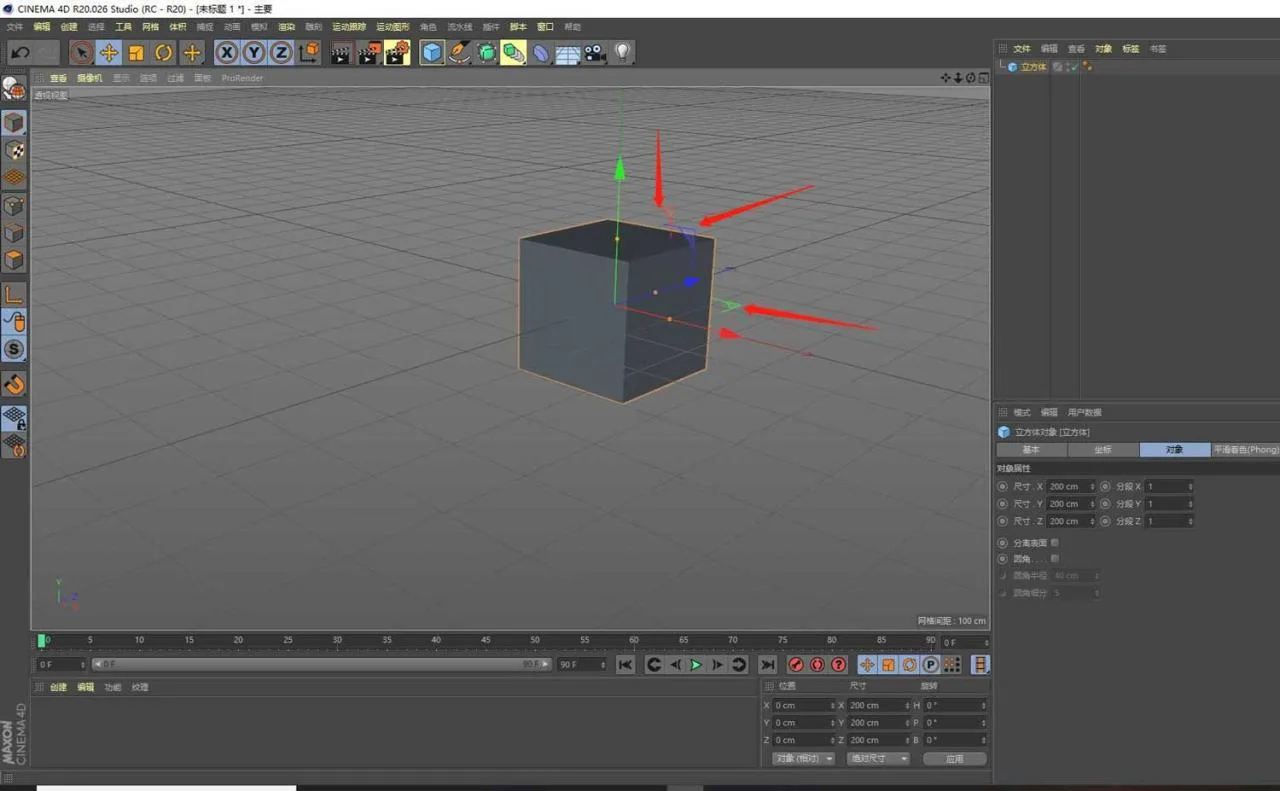
5. Select the object and then the corner marker; hold down the left mouse button to translate the object along the chosen coordinate axis, allowing movement in any direction.
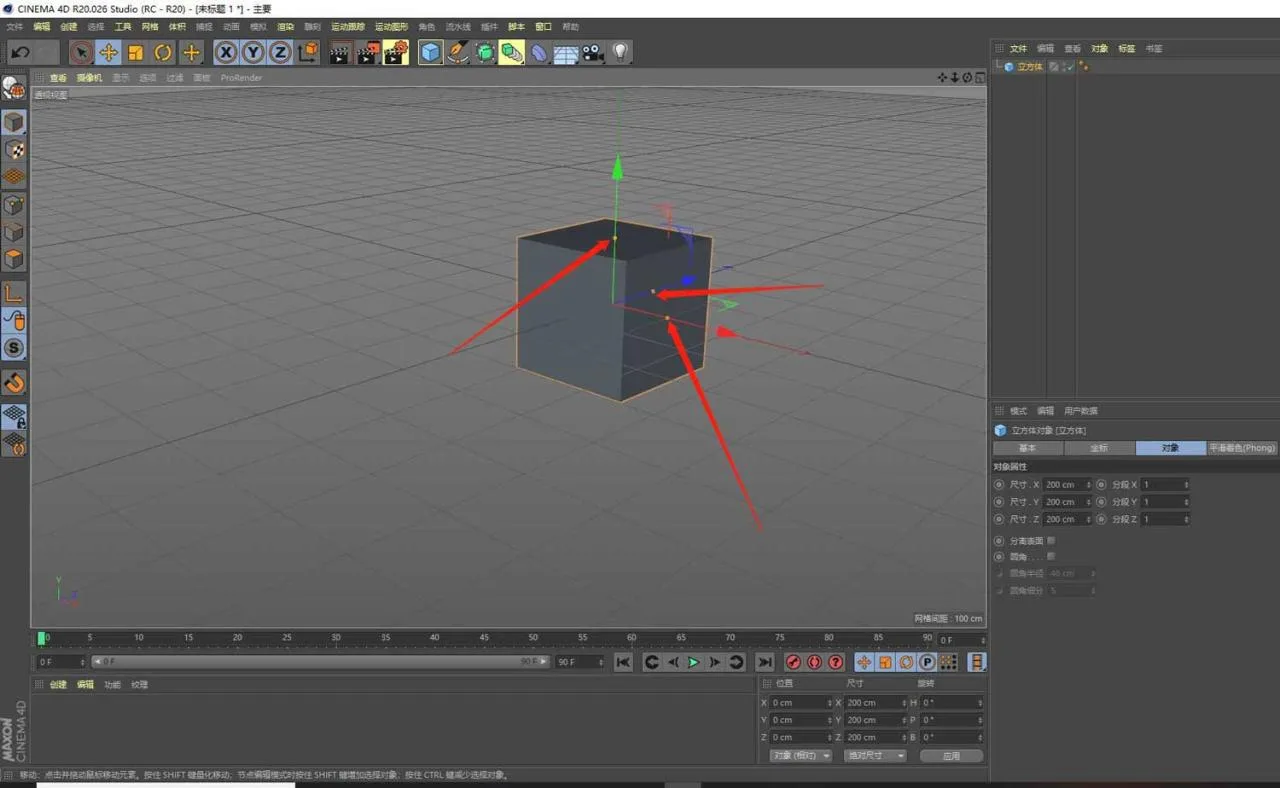
6. To deform the object, select it and you will see three small yellow dots appear on the coordinate axes. Clicking these dots allows you to stretch or compress the object along a specific axis. Holding down the number 5 key lets you stretch or compress the object simultaneously in all three directions.
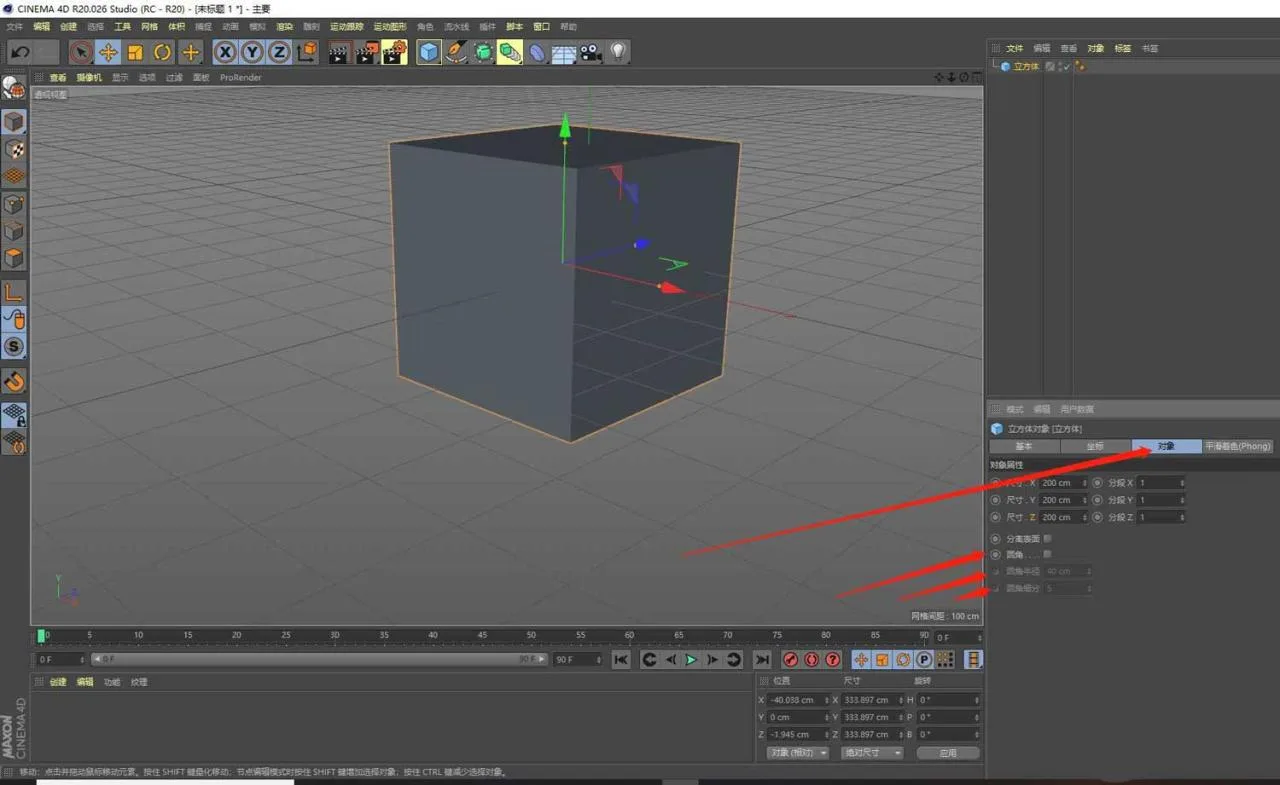
7. On the Object panel, click Rounded Corner to soften the edges of the cube. Adjust the Rounded Corner Radius and Rounded Corner Subdivision settings to create various shapes.
This concludes the tutorial on object deformation in Cinema 4D. I hope you find these steps helpful.


Must log in before commenting!
Sign Up