Content source: Jizhi Numerical Science

When modeling, you might encounter a prompt indicating that some graphics are not visible. Often, conventional solutions don’t resolve this issue. Below are additional methods to help you troubleshoot invisible elements in your projects.
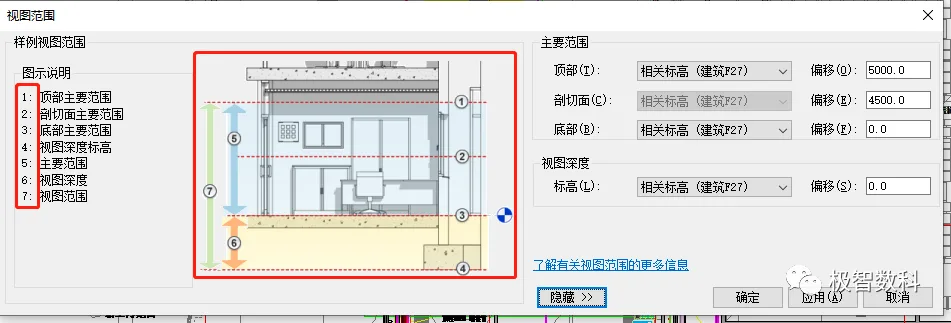
Tip 5: Adjusting the View Range
The view range feature allows you to control the visible depth and cutting planes in your view, helping you draw graphics more accurately and efficiently. It also governs which graphic elements are visible on the plan. This setting can confuse beginners, so it’s important to verify that your plan view includes the elements you’ve created by adjusting the view range parameters. Proper use of this feature aids in modeling different floors and elevations effectively.
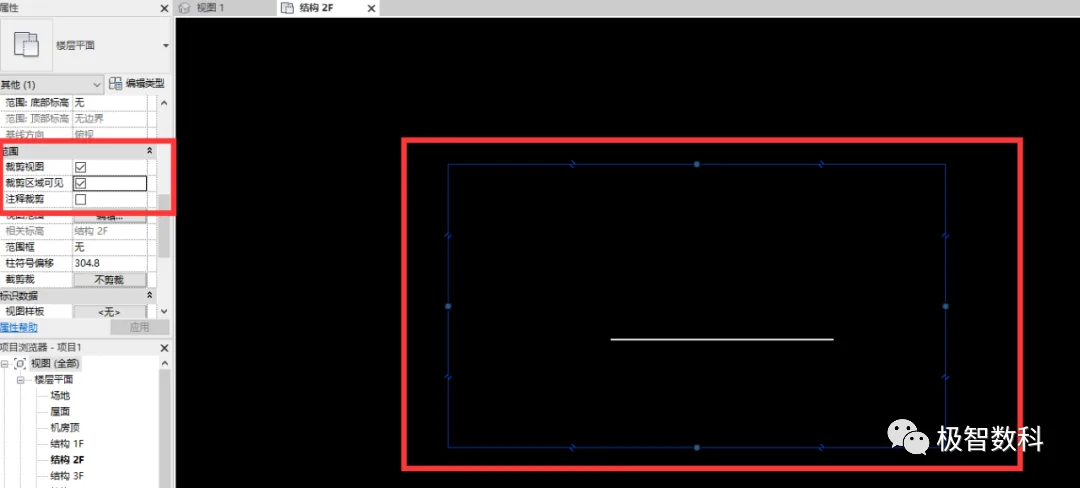
Tip 6: Crop View Range Settings
Normally, all elements are visible in a view. However, for large projects or to reduce computer workload, you might enable the crop view and crop area options in the properties bar to display only a specific section—elements outside this border won’t be shown. If the crop area is unchecked, the crop view remains active but the border is hidden. Therefore, when using cropped views, always ensure the crop area is visible to properly limit the displayed elements.
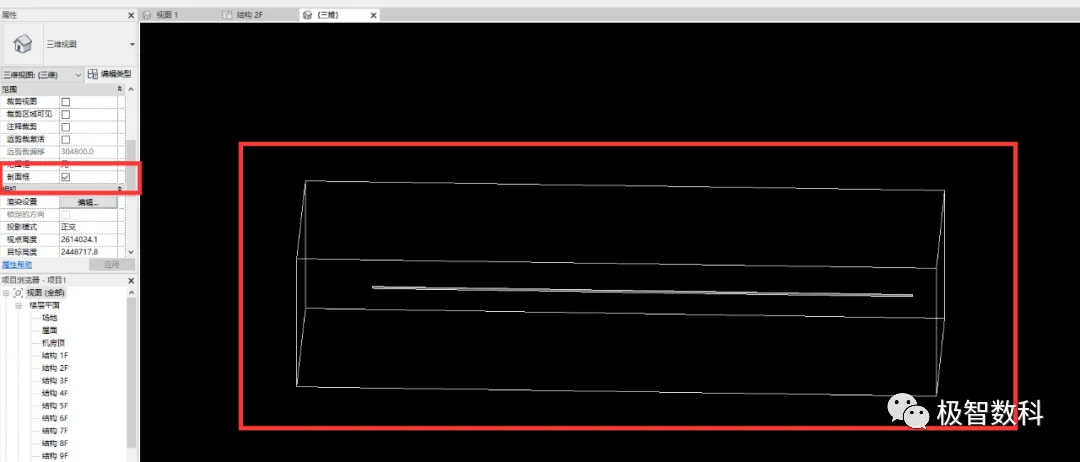
A similar function in 3D views is the section box. Like a cropped view, it confines visibility to elements within a 3D boundary. When the section box is active, a 3D frame appears, and only elements inside this frame are shown. Unlike cropped views, the section box’s boundary maintains its relative position to the elements when you rotate the view, preventing elements from unexpectedly disappearing outside the boundary. Because of this, section boxes are typically preferred for 3D views.
Tip 7: Elements Hidden Permanently
Sometimes, elements might be accidentally hidden permanently during modeling. To check for such elements, use the “Show Hidden Elements” button located on the toolbar below the view. This will reveal all elements that have been permanently hidden.
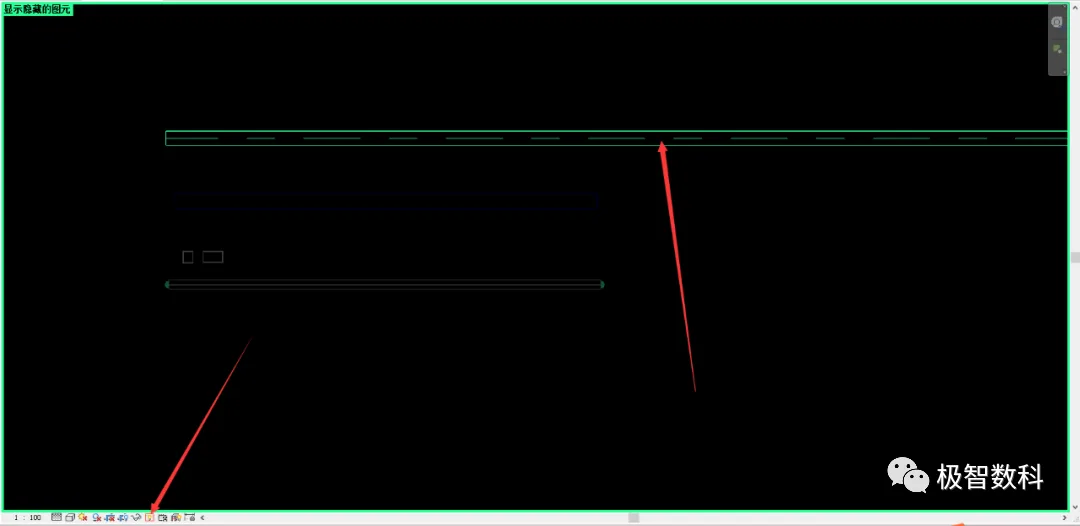
Once you identify a hidden element, select it and click the “Unhide Element” button in the upper right corner to restore its visibility in the viewport. Afterward, click the “Show Hidden Elements” button again to return to the normal view.

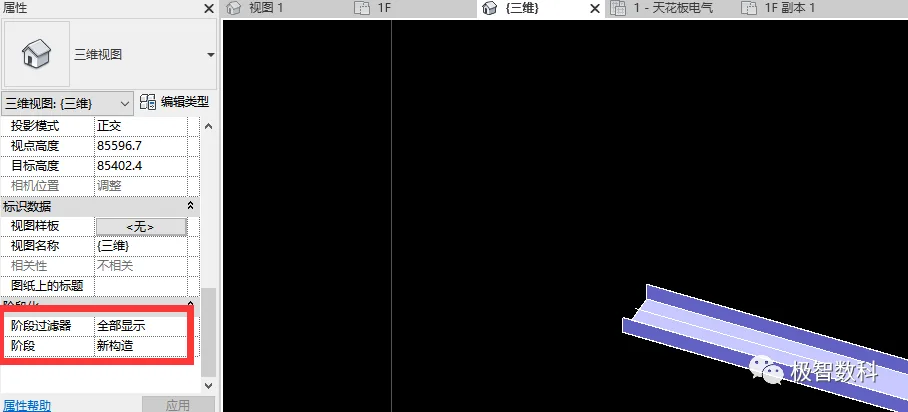
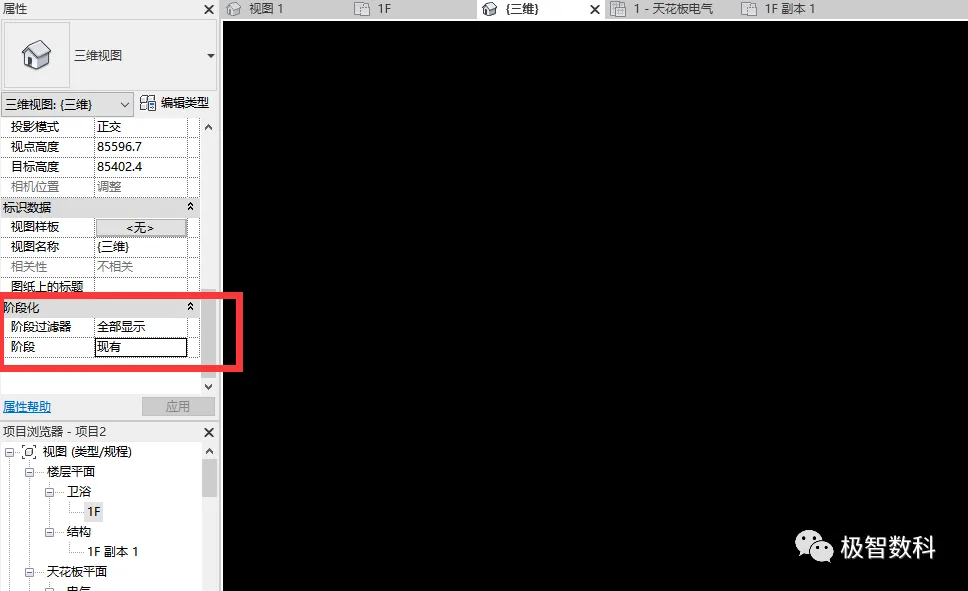
Tip 8: Using Phase Settings
Each element created in Revit is assigned a phase. Depending on the project’s requirements, elements may belong to different phases.
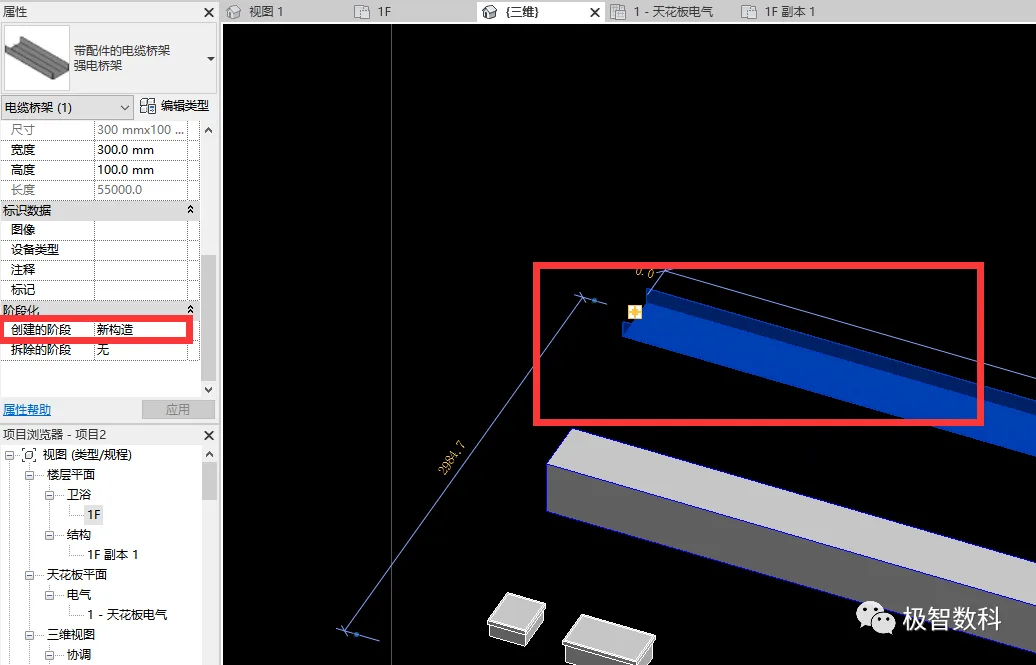
If your view is set to display elements by phase and an element’s phase does not match the current view’s phase, that element will not be visible. If you’re unsure which phase an element belongs to, set the phase filter to “Show All” to ensure all elements are visible regardless of their phase.


Must log in before commenting!
Sign Up