Content source: Xiao Jiang said BIM

Typically, the families we create—whether devices, parts, or pieces of furniture—do not possess self-illuminating properties. If you try to render a scene with these families installed in a six-sided opaque room without additional lighting, the rendered image will appear completely dark. This is where lighting comes into play. So how is a lamp family created in Revit? Today, let’s explore lighting effects by creating a spotlight.
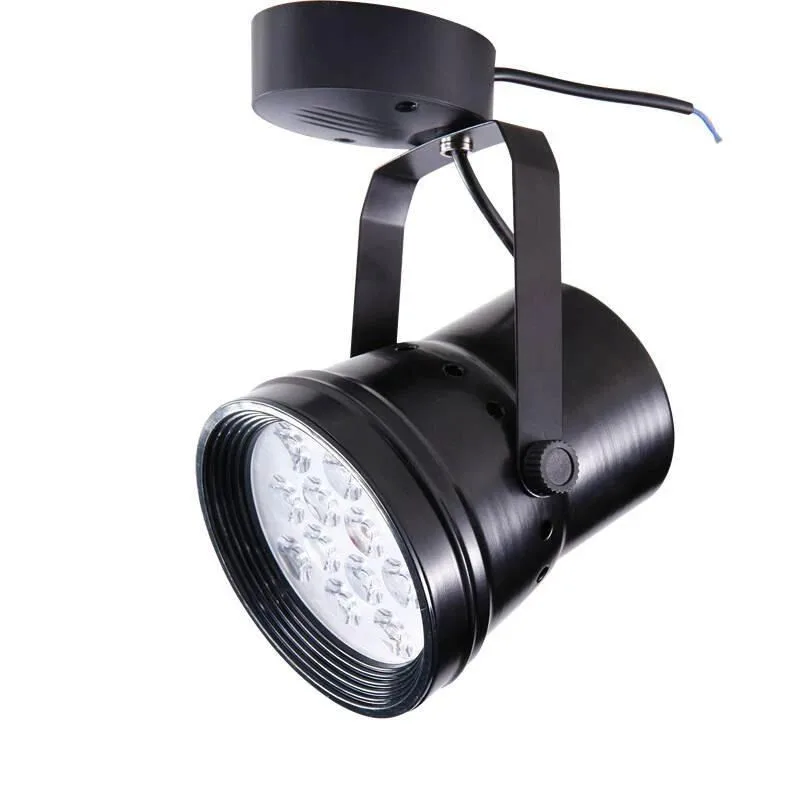
1. Reference Physical Image
Let’s use the spotlight shown above as an example. A spotlight’s structure generally consists of three parts: the base, the lamp bracket, and the spotlight body. The external structure can be modeled using the Metric Generic Model template, while the lighting itself should be created using the Metric Lighting Fixture template.
2. Modeling the Lamp Family
1. Appearance
The shape of the lamp is roughly established using the Metric Generic Model template. We won’t delve into the detailed modeling process here.
2. Adding the Light Source
The light source is created using the “Metric Lighting Fixture” template.
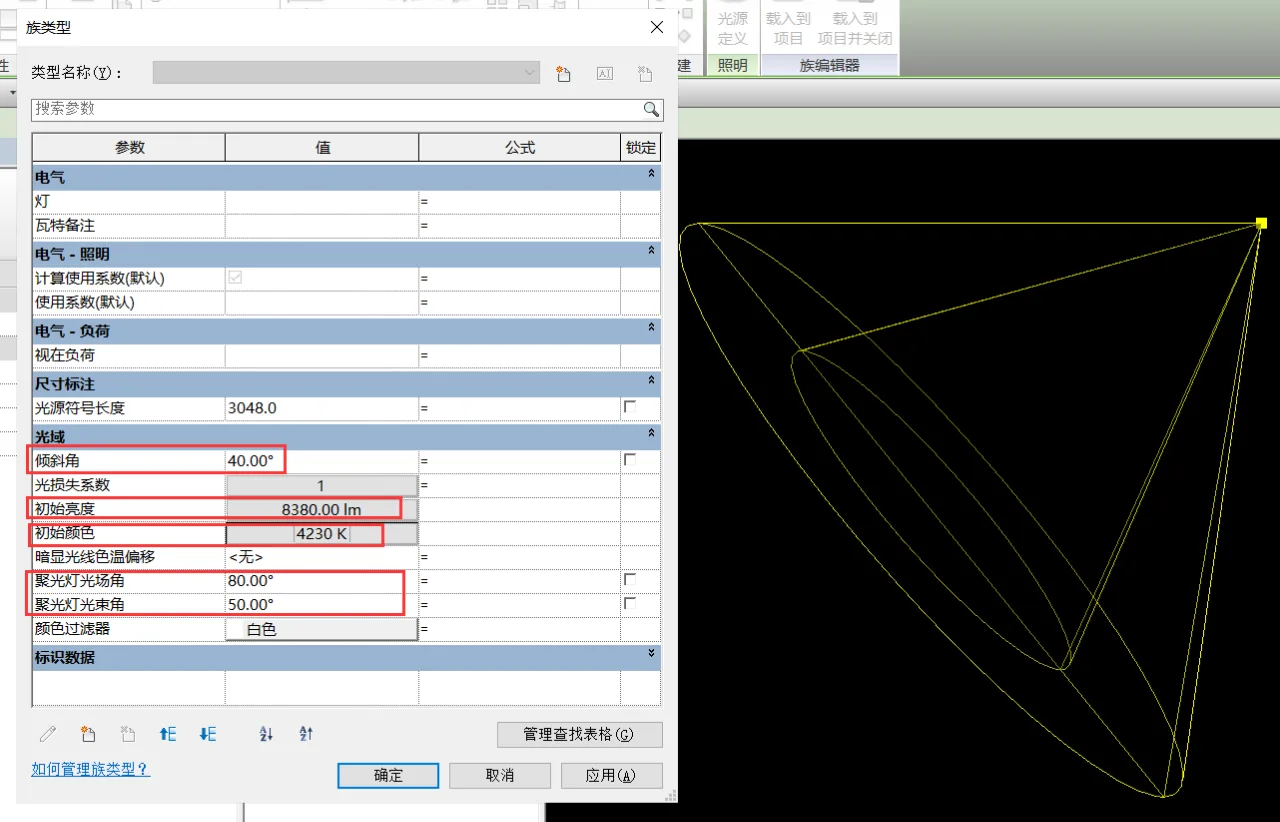
In the 3D view, select the light source and set its shape and light distribution to “Point and Spotlights” under the “Light Source Definition”.
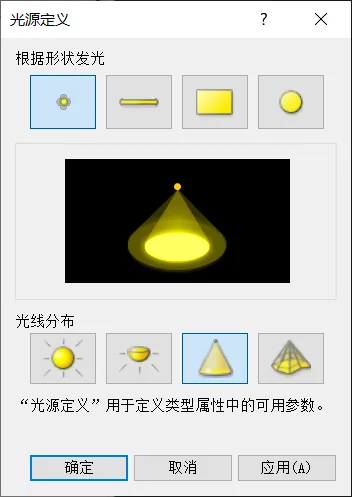
Next, adjust the light source shape to match a spotlight. Since the light angle may slightly differ from the lamp model’s orientation, modify it in the “Family Types” dialog. Set the tilt angle to 40°, increase the initial brightness to approximately 50 watts, and adjust the spotlight’s field and beam angles to 80° and 50°, respectively.
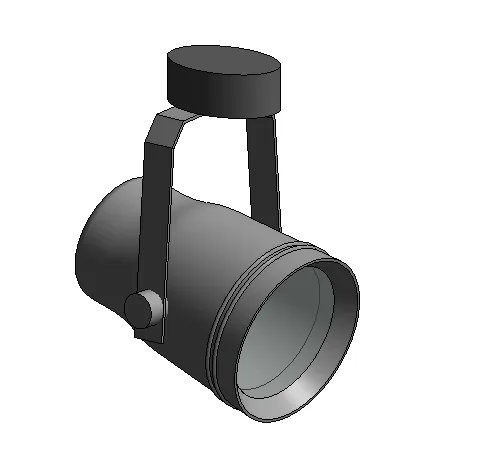
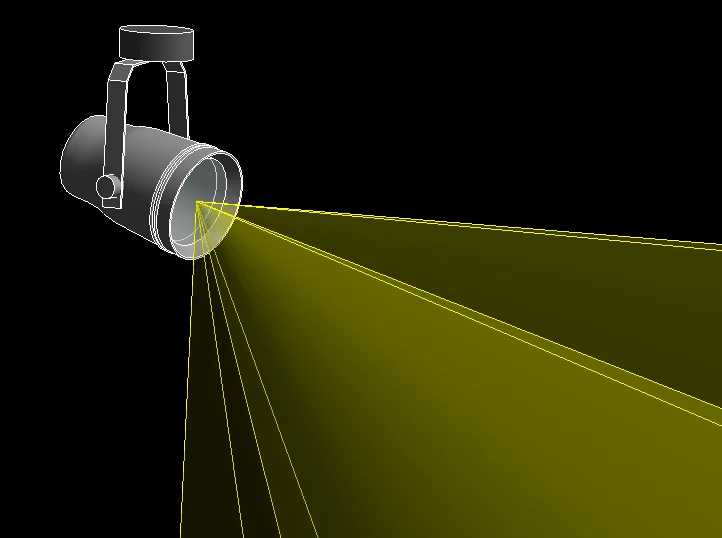
Afterwards, load the light source into the spotlight family. Ensure the conical light source is precisely positioned on the glass surface of the spotlight. Use plan, front elevation, and right elevation views to verify alignment. If the light direction does not match the lamp body, use the space bar to rotate the light accordingly. The final adjusted spotlight should look like the image below, completing the spotlight family setup.
3. Load into Project and Render Test
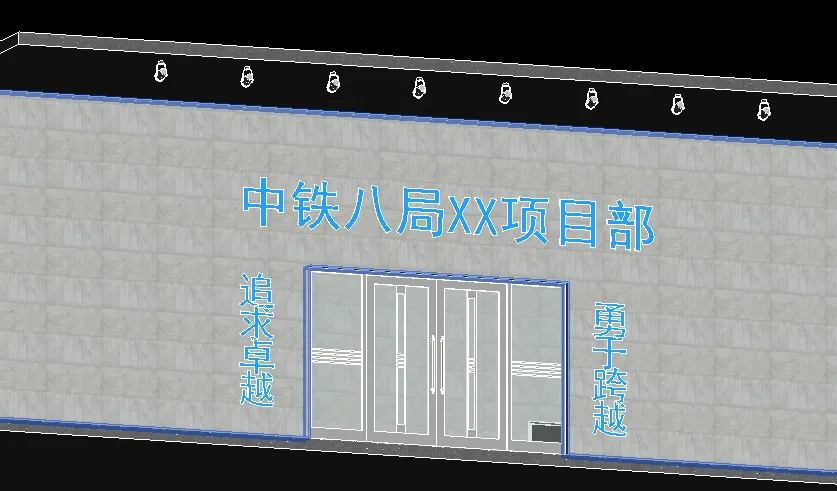
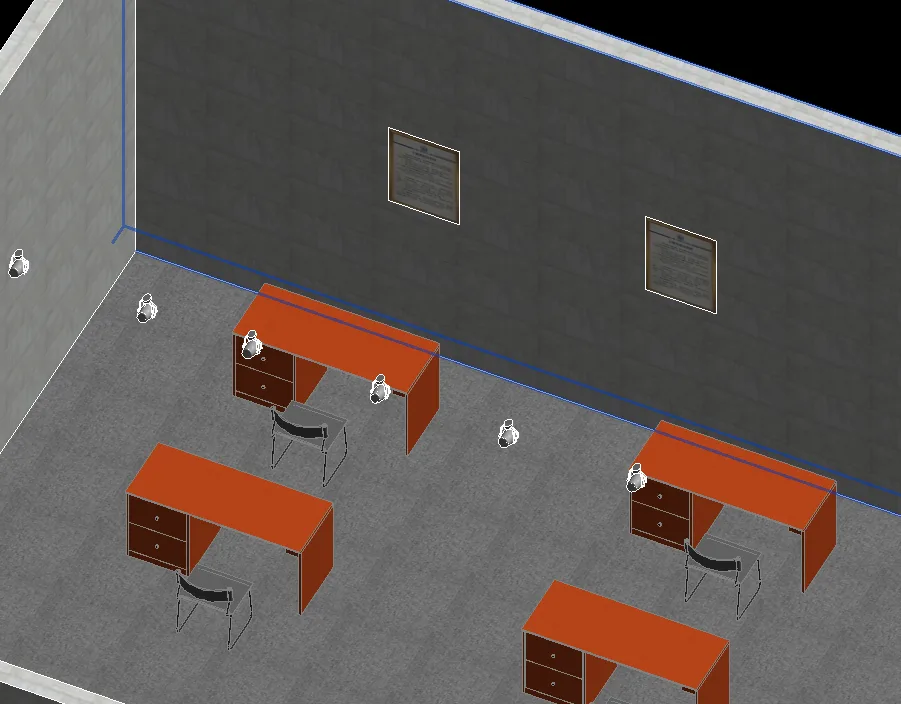
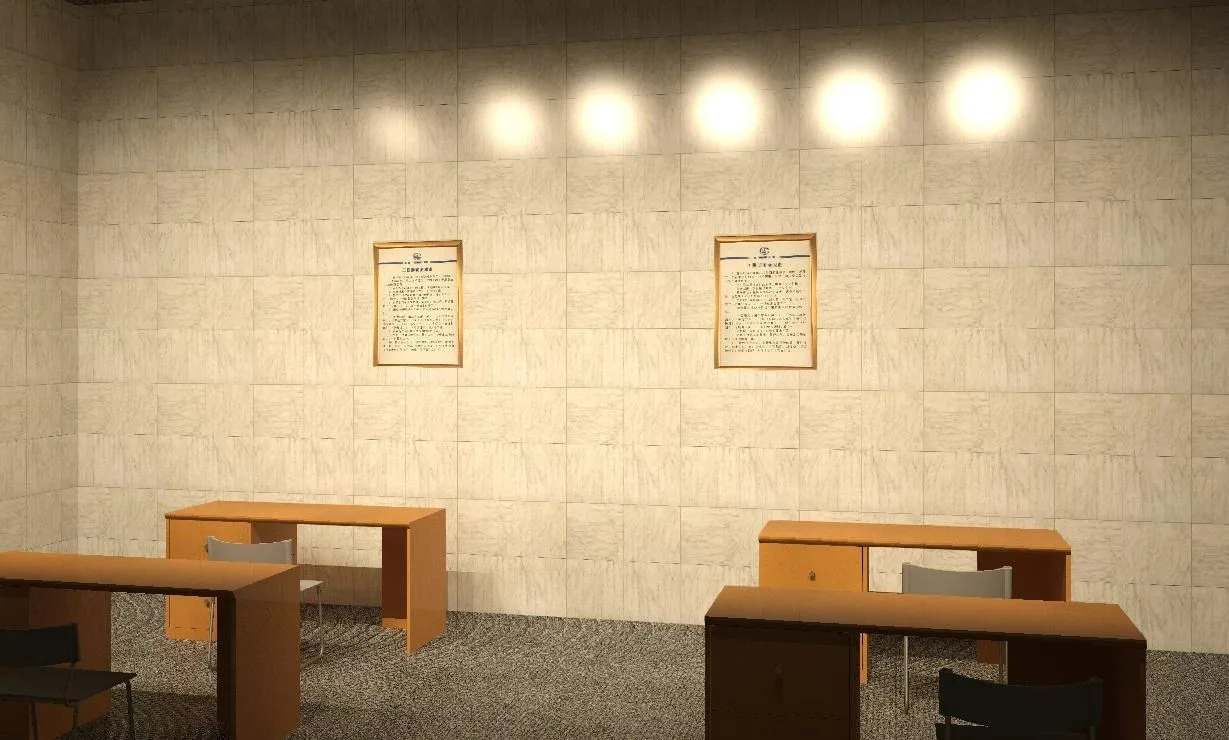
Import the spotlight family into a new construction project. Here, a simple room is built using boards and walls, furnished with tables and chairs, and safety responsibility signs are posted on the walls. Spotlights are installed inside the room and outside the door. In the model, it appears as shown below (note that the spotlight only illuminates in rendered views when turned on):
Using the built-in rendering tool, the result is as follows:
The spotlight functions successfully, though the color temperature and brightness require fine-tuning. The indoor lighting effect from spotlights alone may not be ideal; fluorescent lamps might be more suitable. Whether modeling fluorescent or incandescent lamps, the process is similar to spotlights: start with the appearance, then add the light source.
That concludes this tutorial. Thank you for reading!


Must log in before commenting!
Sign Up