This article is from the WeChat official account: Departure Cost School.

The “Camera” feature in Revit is a highly practical tool. Many users rely on it to create renderings, and it is also essential for BIM certification exams.
So, how exactly do you use the “Camera” function in Revit? What are the key steps and techniques? Today, we’ll explore this topic in detail.
Overview of the “Camera” Function
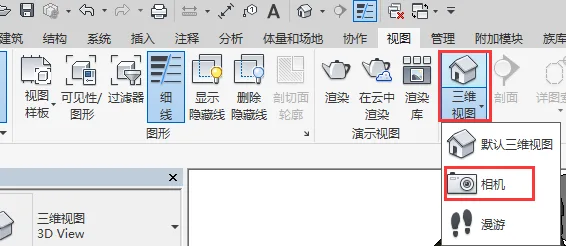
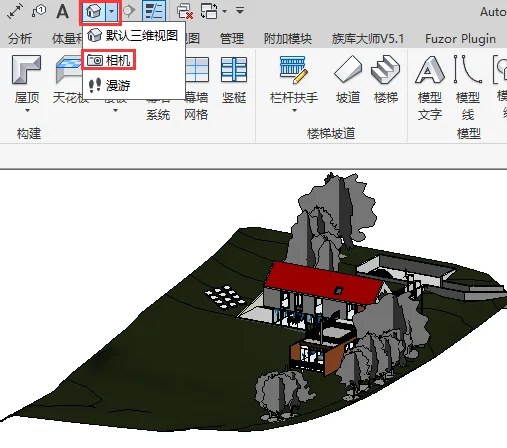
First, you need to locate the “Camera” tool. It can be found under the “3D View” dropdown menu within the “View” tab. Alternatively, if you’ve added the camera tool to your Quick Access Toolbar, you can access it directly from there.
How to Use the “Camera” Function
Next, you’ll place the camera in a plan view. For example, if your first floor plan’s elevation is set at “± 0” and you want to observe from that height, open that plan view. Then, set the camera offset, which represents the camera’s height. For instance, an offset of 1750 millimeters means the camera is positioned at eye level, about 1.75 meters above the floor.
After setting the offset, click on the point where you want to place the camera. Then, adjust the camera’s angle to frame the desired view. Keep in mind that the length of the camera’s range line controls the shooting distance.

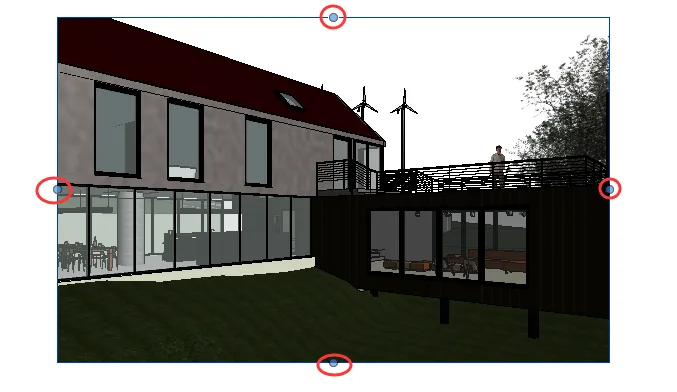
Once you finish setting up the camera, Revit will automatically switch to the camera view. If the current viewing range doesn’t meet your needs, you can modify it by adjusting the four control points in the camera view.
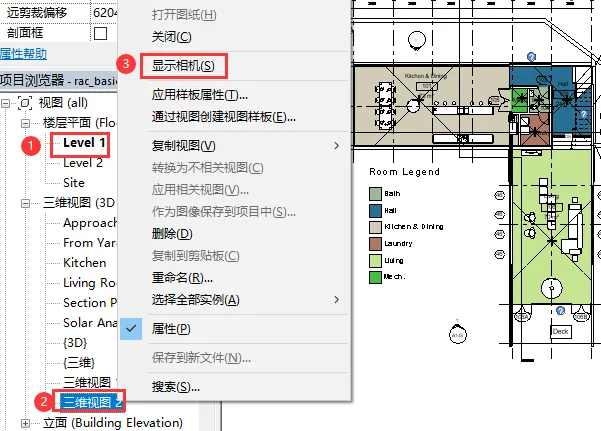
If you need to reposition the camera, return to the plan view, right-click on the camera view, select “Show Camera” to display the camera, and then adjust its placement as necessary.
That covers the basics of using the “Camera” function in Revit. With this understanding, capturing views using the camera tool should become straightforward for everyone.


Must log in before commenting!
Sign Up