This article is sourced from the WeChat official account: BimLearning.
Tekla Structures is a versatile structural BIM software that enables the creation, composition, management, and sharing of multi-material 3D models enriched with valuable construction data. Tekla Structures supports the entire project lifecycle — from conceptual building and infrastructure planning to manufacturing, construction, and maintenance — providing tools for design, detailed specification, and information management.
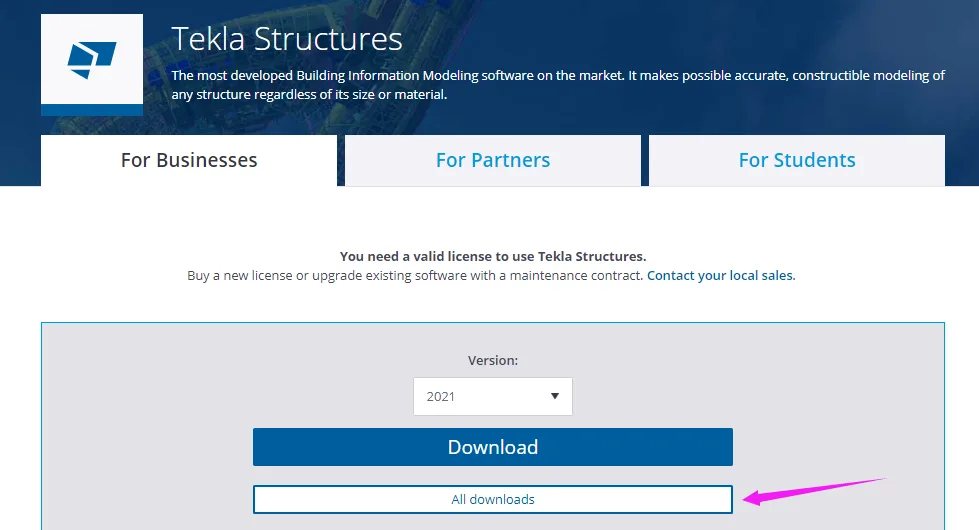
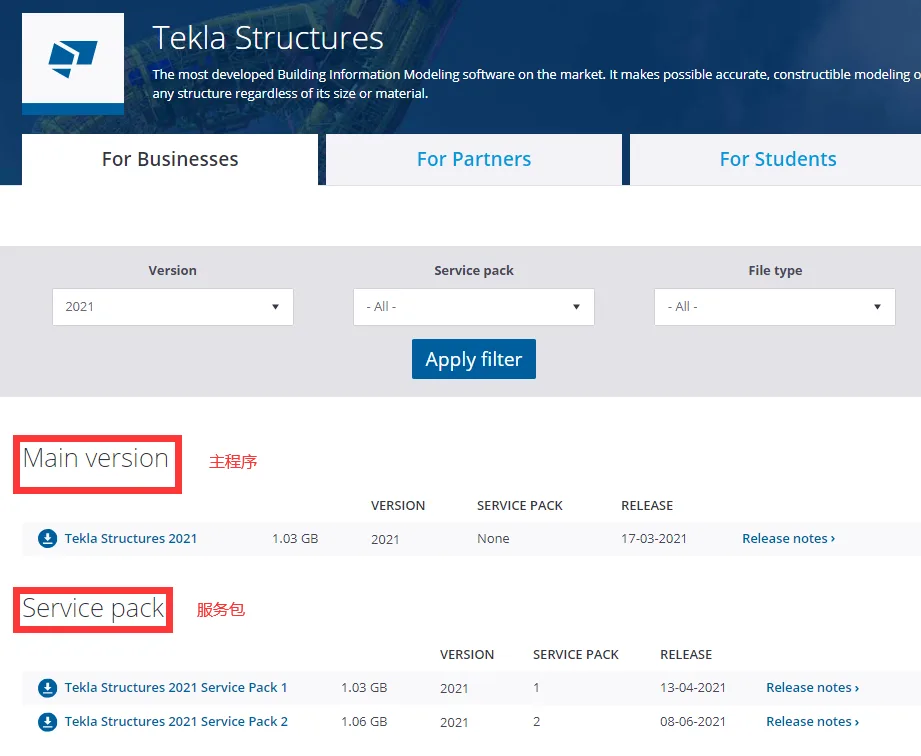
Step 1: Download the Main Program and Service Pack
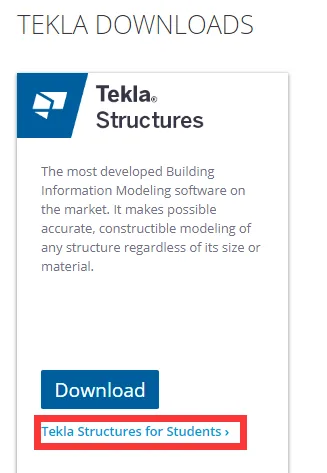
You can download the software from the official website: __AI_S_TURL_0__
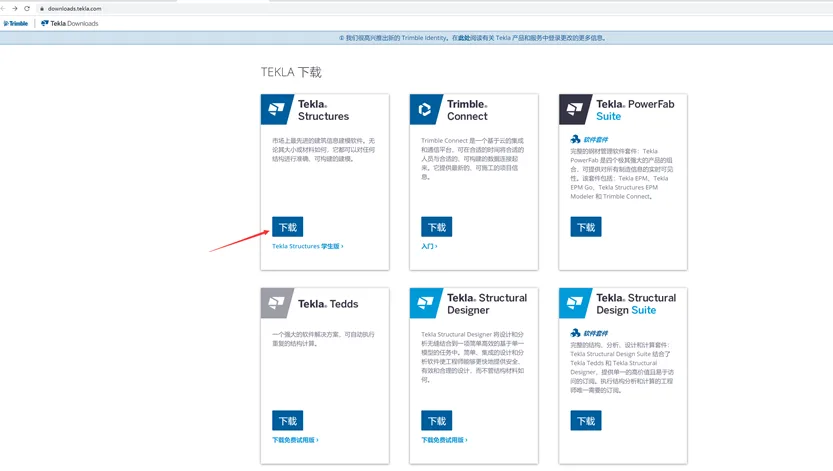
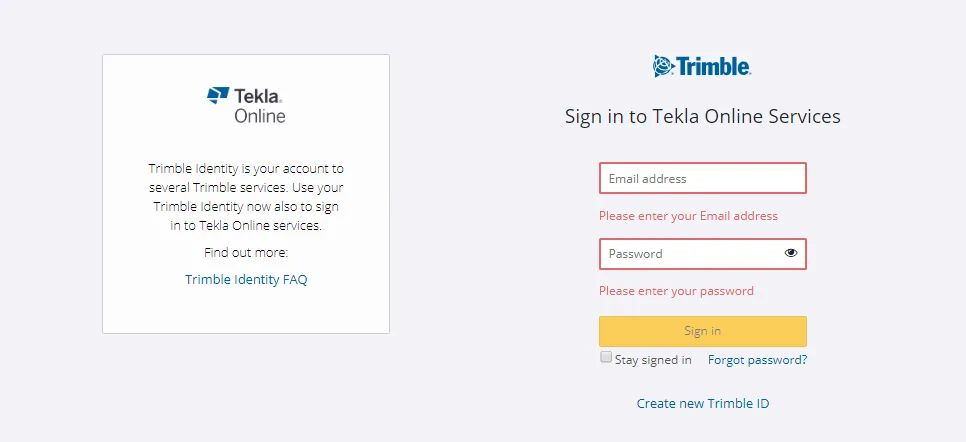
Currently, Tekla requires users to register and log in before downloading. After registering with your email, you can proceed with the download.
Students can download the student version of Tekla Structures for educational purposes.
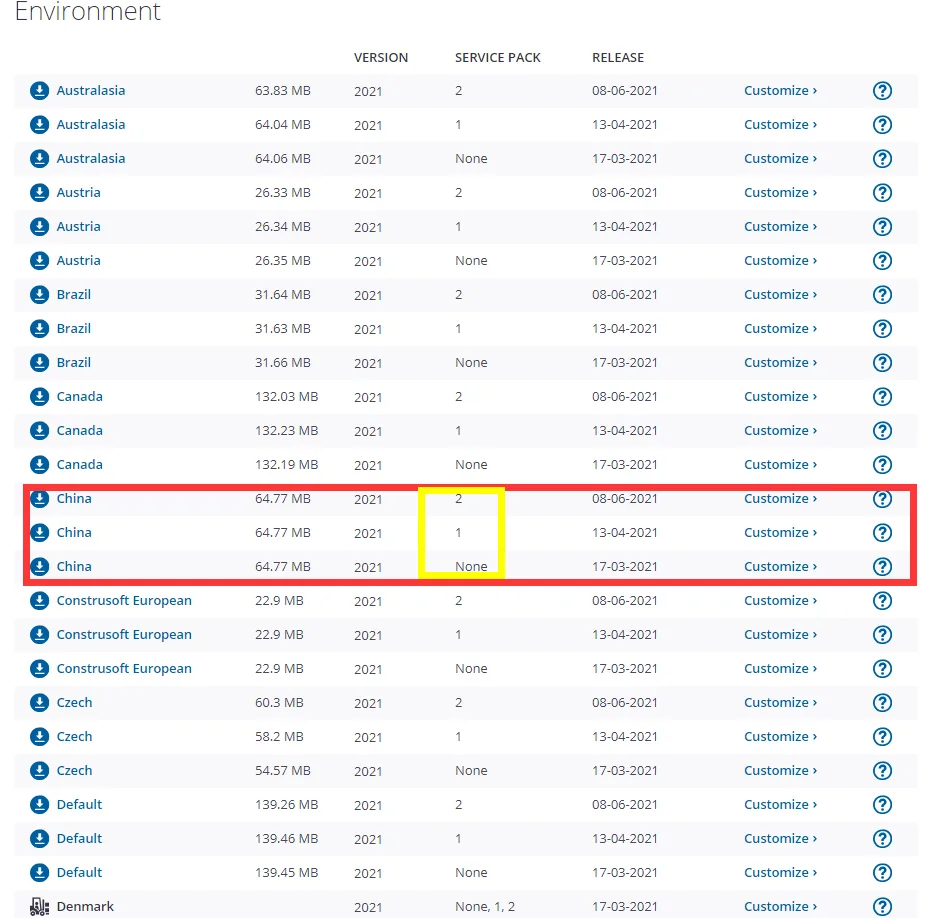
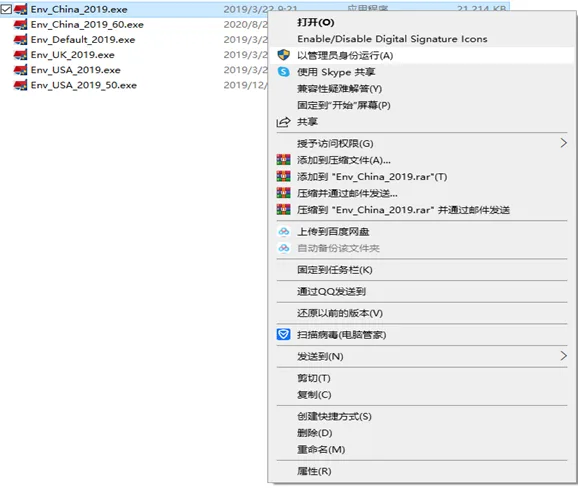
Step 2: Download the Software Environment
Download the environment installation package matching your country. Note that service packs labeled none, 1, and 2 correspond to the main program type and upgraded service packs. Ensure you download the matching environment package.
Step 3: Download the Service License
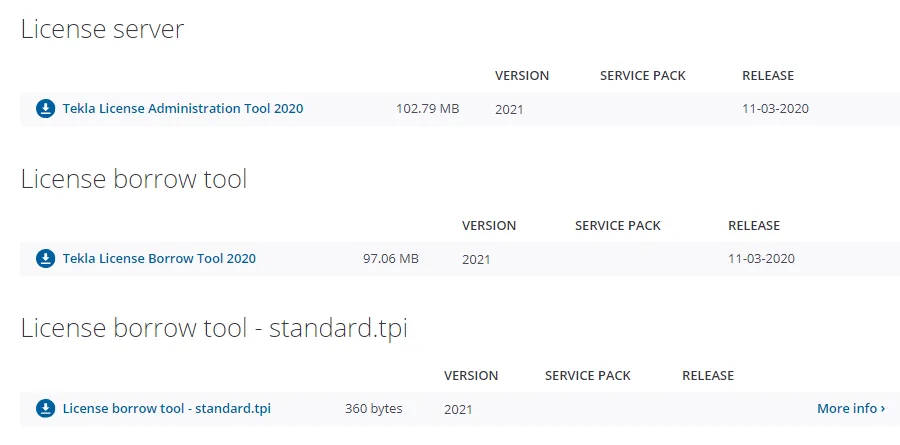
Tekla now operates on a leasing model, so you need to download a license service package. Use the Tekla License Administration Tool for online activation, and the Tekla License Borrow tool for offline activation.
Step 4: Install the Main Program
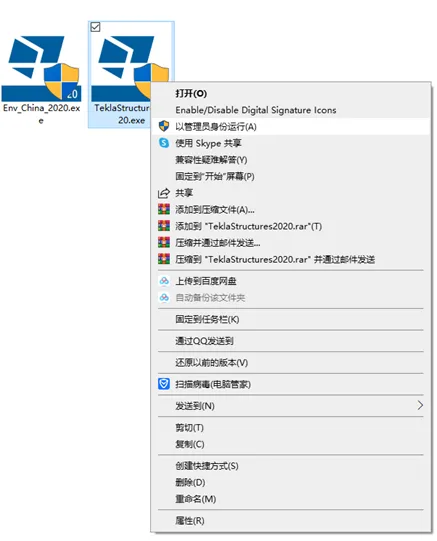
(1) Right-click the installer and select “Run as administrator”.
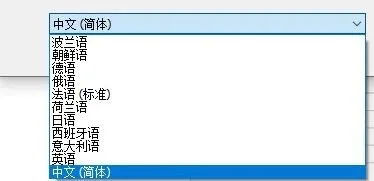
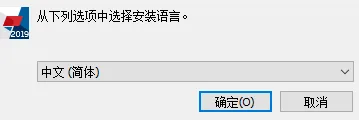
(2) Choose your preferred installation language.
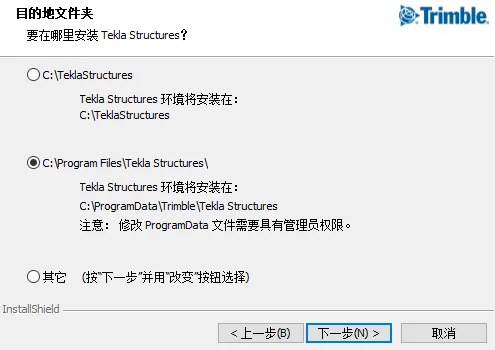
(3) Select the installation folder — there are three options available.
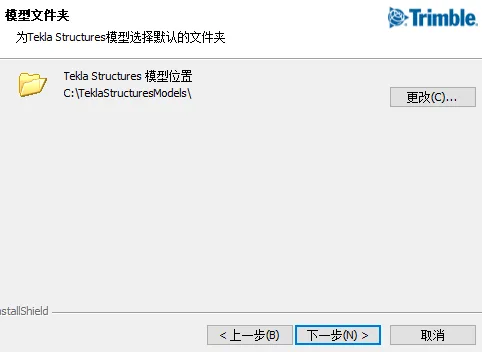
(4) You can modify the default location for saving models according to your preference.
(5) Follow the system prompts and allow the installation process to complete. Installation time varies depending on the version and your computer’s performance.
Step 5: Install the Environment Package
(1) Right-click the environment installer and run as administrator.
(2) Choose the installation language and proceed by following the on-screen instructions until the installation is complete.
Step 6: Install the License Package (Example: FlexNet License)
(1) On a standalone machine, right-click the license installer and run as administrator. It’s recommended to use the default installation path. The current license package has been upgraded to version 2020; if you have an older version, there’s no need to uninstall it first — the newer version will overwrite it. Follow the prompts to complete installation.
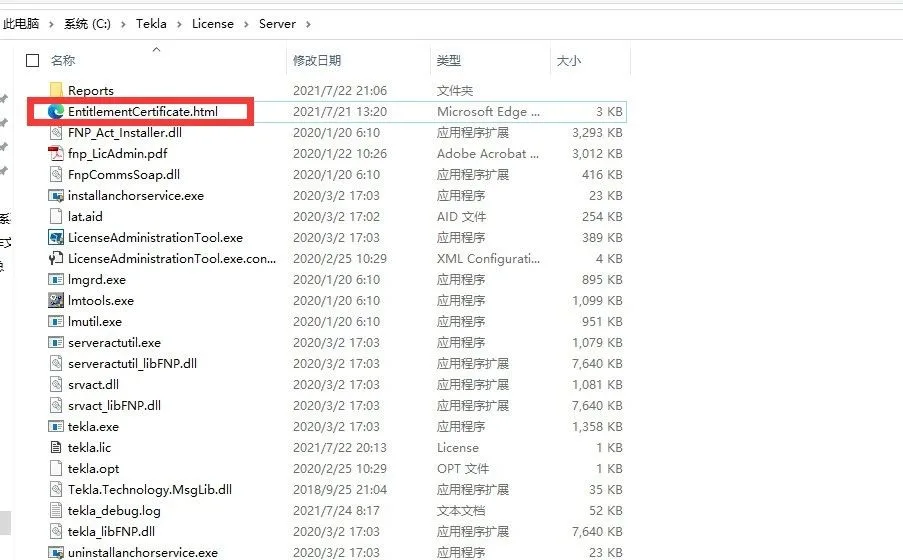
(2) Copy the official license file to C:TeklaLicensing Server or another custom location.
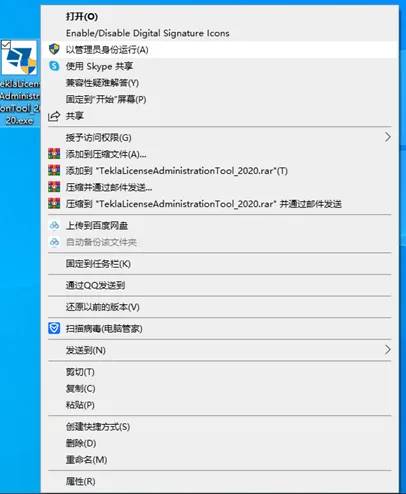
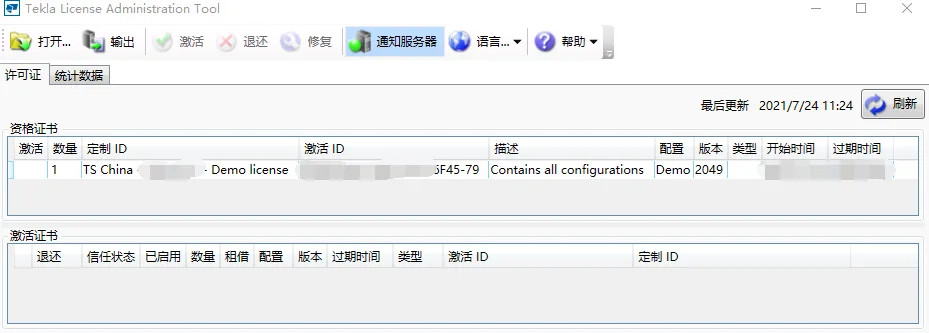
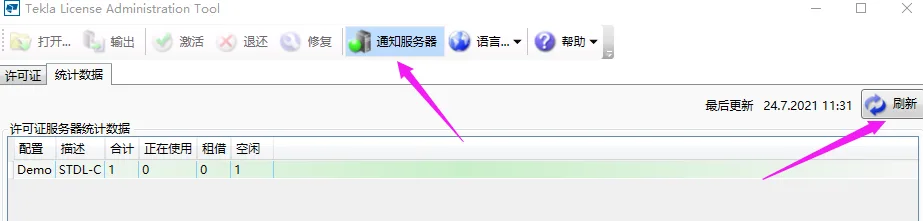
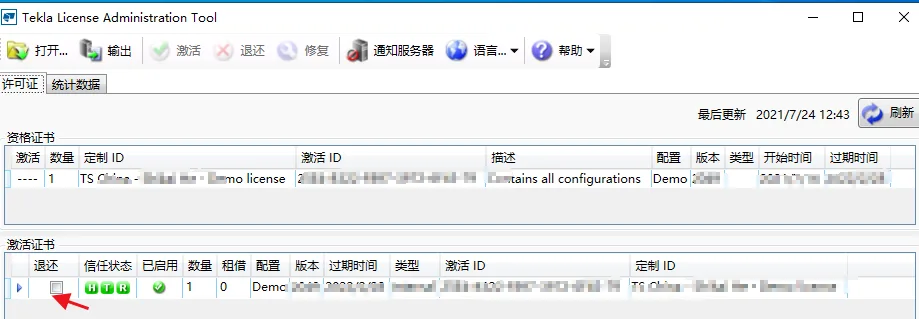
(3) Open the Tekla License Administration Tool from the Start menu.

You will see an interface like the one below. If your license certificate doesn’t appear automatically, locate it via the options menu.
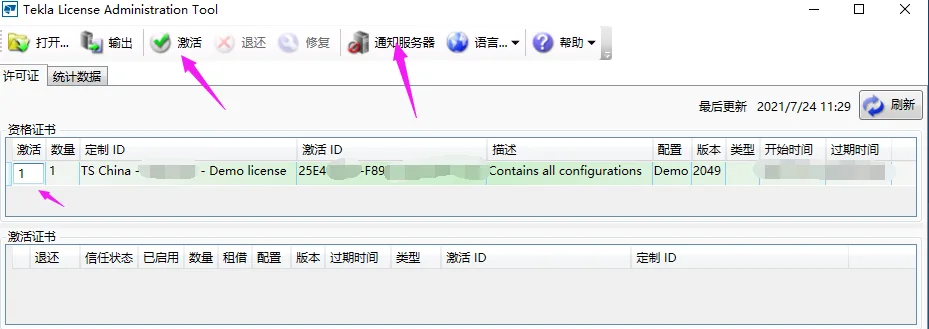
(4) To activate, select the number of licenses you want to activate, click on the notification server, then hit the activation button.
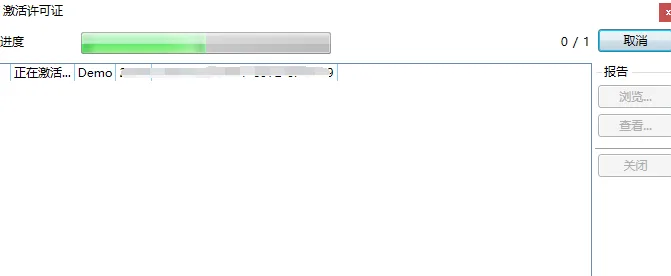
Wait a few seconds for the activation to complete.
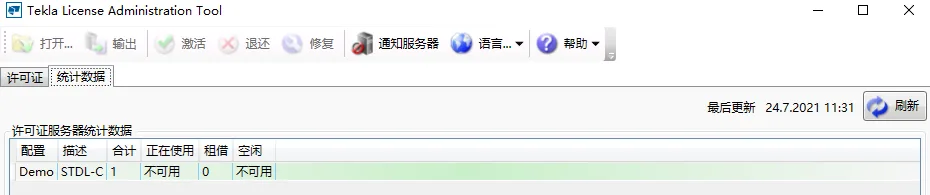
Check your computer’s license status in the statistics panel. When you see the “idle 1” status, your Tekla software is activated and ready to use.
Activation Failure Solution:
If activation fails, locate the imtools.exe file in the License folder.
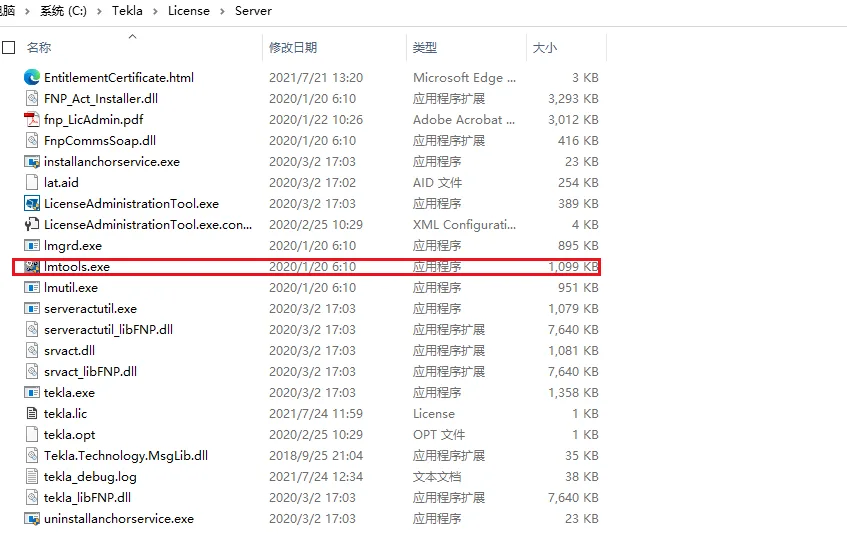
Click “Stop Server” first, then “Start Server”. Once you see “successes” displayed below, the toolkit has successfully restarted.

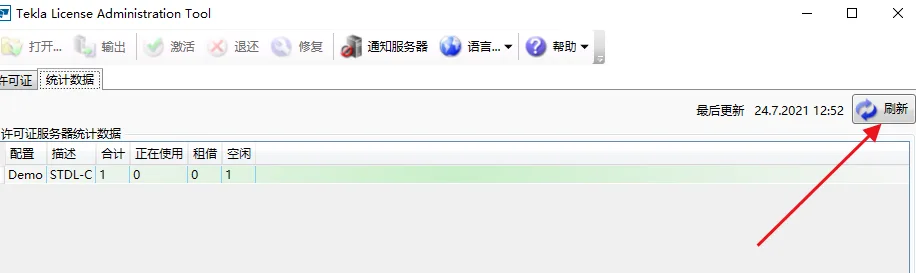
Repeat the activation process in the Tekla License Administration Tool and refresh. You should then see that the software has been successfully activated.
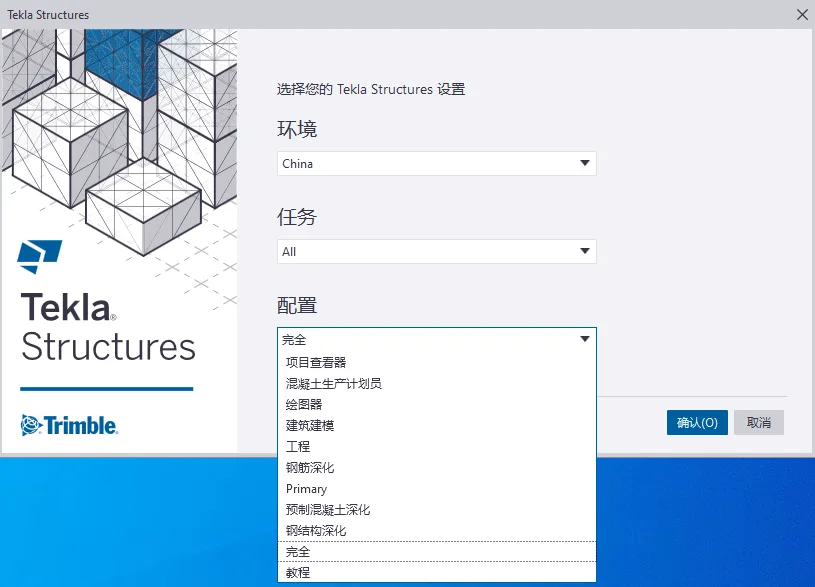
(6) Open Tekla Structures, and select the environment, tasks, and configurations you require.
Step 7: License Return and Using Tekla on Multiple Computers
If you have multiple computers but only one license certificate, copy the license certificate to C:Tekla License Server (or a custom location) on the additional computers. Then repeat the activation steps on those computers to use Tekla software there.
Note: The activation process requires an internet connection.
We hope this summary helps you with your Tekla learning journey. Let’s grow together!


Must log in before commenting!
Sign Up