This article is from the WeChat official account: Revit Decoration
Question:
Sometimes, it is necessary to completely uninstall Autodesk Revit 2018 from your workstation to perform a clean installation. The following process ensures that all leftover files are correctly removed.
Solution:
Follow these steps to uninstall Revit 2018 products and remove all residual files from your system. After completing this process, your system will be reset to a clean state, ready for a fresh installation.
Note: The default paths below correspond to Revit 2018. If you are using the LT version, replace “Revit 2018” with “Revit LT 2018” or “RLT 2018.” Also, replace %USERNAME% with your current Windows login name.
Important: Before proceeding, back up all your custom families and template files.
- Log in as a local system administrator and disable all antivirus software.
- Uninstall Revit 2018 products via the Windows Control Panel:
Control Panel > Programs and Features > Uninstall specific Revit 2018 products - Uninstall the 2018 Material Library:
Control Panel > Programs and Features > Uninstall Autodesk Material Library 2018 - Using Windows Explorer, delete the following folders if they exist:
C:Program FilesAutodeskRevit 2018
C:ProgramDataAutodeskRVT 2018
C:Users%USERNAME%AppDataLocalAutodeskRevitAutodesk Revit 2018
C:Users%USERNAME%AppDataRoamingAutodeskRevitAutodesk Revit 2018 - Open the system registry editor:
Windows Start menu > Run >Regedit
Locate and delete the following registry entries if present:
HKEY_CURRENT_USERSoftwareAutodeskRevitAutodesk Revit 2018
HKEY_LOCAL_MACHINESOFTWAREAutodeskRevitAutodesk Revit 2018
Warning: Incorrect registry edits may cause your operating system to become unstable or unusable. Before proceeding, back up your registry, system.dat, and user.dat files as recommended in the Microsoft Knowledge Base and solution TS66513 for your OS version. Use the Registry Editor at your own risk. For more information, consult the Help topic in Microsoft Registry Editor.
- Restart your workstation.
Before reinstalling Revit products:
- Open Windows Explorer and delete the contents of the Windows Temp folder (do not delete the Temp folder itself). You can access it by typing
%TEMP%in the Windows Explorer address bar. - Use the “End Task” function to terminate all antivirus programs completely.
Note: Simply disabling antivirus software from the system tray may not be sufficient. Antivirus programs often block actions like registry access or DLL modifications during installation or removal, even if these are normal operations.
You can disable antivirus software by right-clicking its taskbar icon and selecting “Disable” from the shortcut menu. For detailed instructions, consult your antivirus software provider.
Important: In addition to disabling your antivirus software, make sure to end the antivirus process via Task Manager:
- Press Ctrl + Shift + Esc to open Task Manager.
- In the “Processes” tab, find the antivirus program process and click “End Process.”
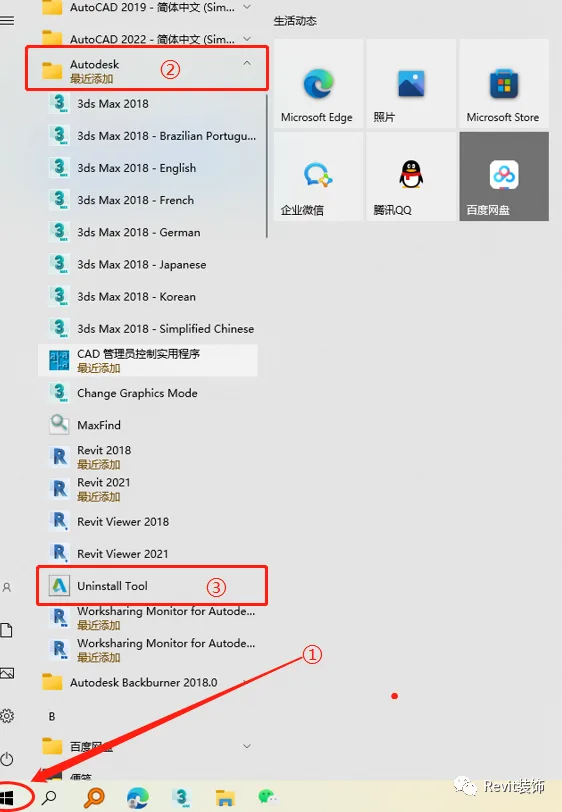
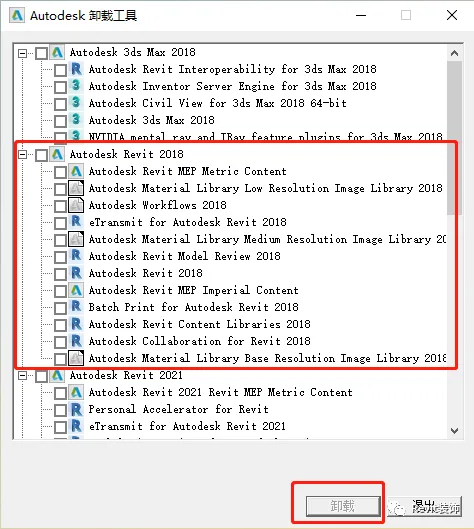
You can also open the Uninstall Tool as shown below, select Revit 2018 for uninstallation, and then proceed with reinstalling the software.
After completing these steps, your system will be ready for a fresh installation of Revit 2018 products.


Must log in before commenting!
Sign Up