This article is from the WeChat official account: Huazhu Building Science Research Institute
Author: Tiantian
When working with BIM, you’ll quickly learn about its five key features: visualization, coordination, simulation, optimization, and drawing capabilities. While many BIM professionals master the first four features, the challenge often lies in producing high-quality, practical CAD drawings directly from Revit due to local drawing standards and software limitations.
Today, we’ll walk you through some essential Revit export settings to help you generate better CAD drawings.
**Note:** To ensure broad applicability, this article uses an older version of Revit as an example. The settings are similar in newer versions, so you can explore accordingly.
1. Layer Settings
Most CAD export settings are found under *File > Export > CAD Formats > Modify Export Setup*.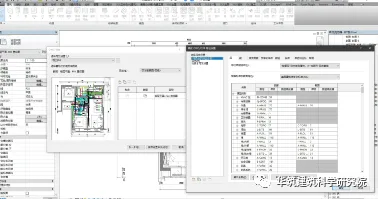
*Figure 1-1: CAD Export Settings Interface*
Revit export relies on an export setup table that controls how different families are represented in CAD, including layers, colors, and special display options. This article does not delve into detailed layer modifiers, so you may skip that for now.
1.1 Layers
Layers are essential for CAD standardization. Since Revit does not use traditional CAD layers, it applies a conversion during export. For example, you can assign the duct family to the same layer as the wall family by specifying the layer name in the export table. This ensures that the exported CAD file organizes families into layers properly for easier editing.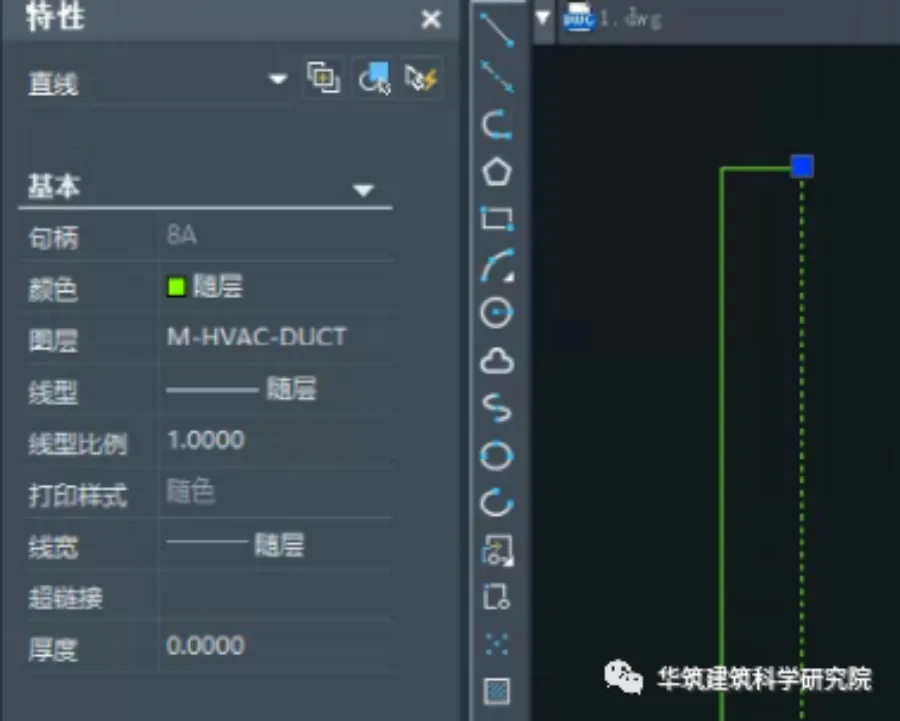
*Figure 1-2: Revit Exported CAD Parameters in Zhongwang CAD*
1.2 Colors
Layer colors in Revit correspond to the colors assigned in the export table. For example, to make the duct layer green, simply enter the CAD color index for green in the export table under the corresponding layer. Different colors within the same family can be controlled using layer export options, explained below.
*Figure 1-3: CAD Layer Settings (top) and Revit Export Settings (bottom)*
1.3 Export Layer Options
Revit offers three common export options that control layer output and graphic overrides:
*Figure 1-4: Layer Export Settings Options*
Before discussing these, it’s important to understand *graphic replacement*. Experienced Revit users are familiar with filters and graphic overrides in views. Note the distinction here between material display and simple color overrides.
– **1.3.1 Export category attributes by layer and replace by element:**
This option exports graphics according to layer settings. However, for elements with graphic overrides, color changes are applied without changing layers. For instance, all ducts remain on the same layer, but some elements change color individually.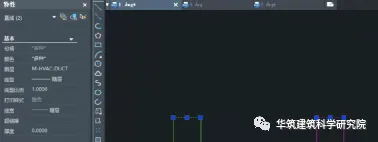
*Figure 1-5: Export using option 1, where the duct layer is consistent and color changes are applied to specific elements.*
– **1.3.2 Export all attributes by layer, without exporting overrides:**
This option ignores graphic overrides and exports strictly as per the export table. It is rarely used since it does not align with common national drawing standards.
– **1.3.3 Export all attributes by layer and create new layers for overrides:**
Elements without overrides are exported according to the table, while overridden elements are exported on separate layers with a suffix (e.g., “-1”) to distinguish them.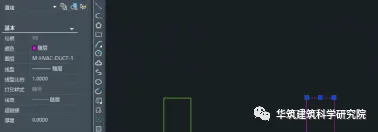
*Figure 1-6: Export with separate layers for overridden elements.*
2. Line Type Settings
Line type settings in Revit can be complex and differ from traditional CAD methods. Here’s a brief overview.
2.1 Line Types
You can find line type settings under *Manage > Additional Settings > Line Patterns*. These control how lines display in Revit but do not directly affect CAD exports. When exporting to CAD, Revit converts these line types, so you need to match them in the exported line type table to achieve the desired effect.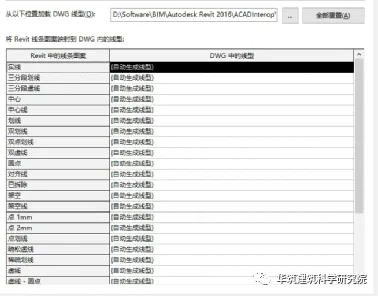
*Figure 2-1: Revit Line Type Settings for CAD Export*
By default, Revit generates line types automatically, which usually suffice. For special styles, you can load DWG line type files separately.
During export, you have three scale options:
– Proportional line type definition (commonly used) ensures the exported scale matches the view scale.
– Line type scale corresponding to the CAD model space.
– Line type scale corresponding to the CAD paper space.
*Figure 2-2: Line and Scale Options for Revit CAD Export*
2.2 Line Width
Line width settings are less commonly used and are found under *Manage > Additional Settings > Line Weights*. Revit allows 16 line width options, which correspond to numbers used in layer and line width overrides in CAD. These can be set differently for various view scales.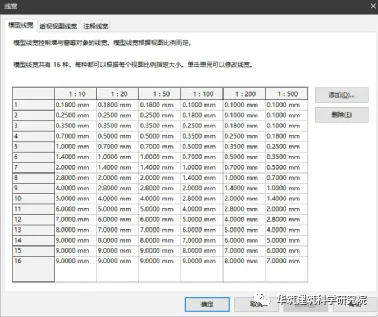
*Figure 2-3: Revit Line Width Settings Interface*
However, note that Revit exports line widths as line attributes on straight lines, not polylines, which conflicts with some domestic drawing standards. Therefore, it is recommended to adjust line widths within CAD instead.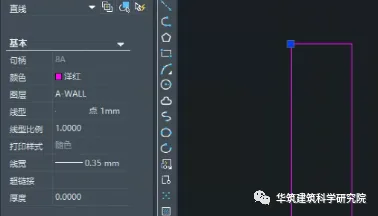
*Figure 2-4: Line Width Export Parameters*
3. Fill Pattern Settings
Fill pattern settings are relatively straightforward and similar to line type settings. Revit generates fill patterns automatically by default, but you can load additional DWG fill pattern files and modify them under *Manage > Additional Settings > Fill Patterns*. When assigning fill patterns in views, try to use either drawing fills or model fills consistently to simplify later processes.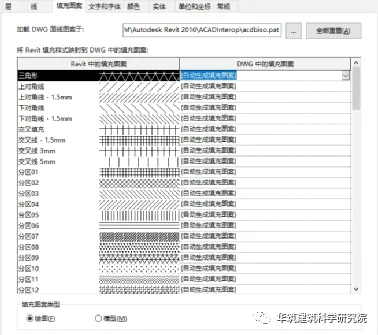
*Figure 3-1: Revit Fill Pattern Export Settings*
4. Other Drawing Settings
Other settings mainly involve drawing habits. For color, CAD’s indexed color system includes only 255 colors, which is currently the standard for drawings. RGB colors can also be used for more options, but the visual difference is minimal.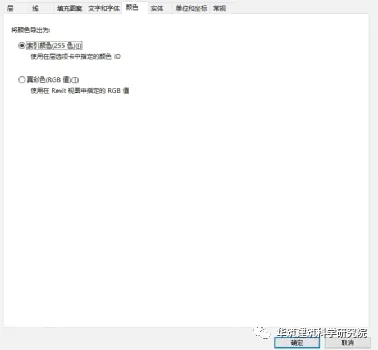
*Figure 4-1: Revit Export Color Settings*
You can also manage layer visibility, decide whether to export linked models as CAD references, and other minor options. Generally, the defaults suffice for drawing quality, but detailed settings may be necessary when creating enterprise-standard drawing templates.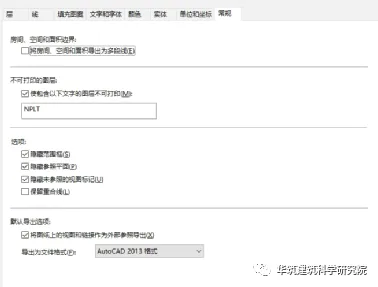
*Figure 4-2: Other Export Settings in Revit*
—
The above provides an overview of exporting CAD drawings from Revit. The specific settings should be tailored to your project needs. Below is an example project drawing produced using these settings for your reference. Thank you for reading.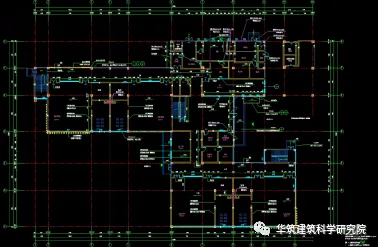
*Figure 4-3: Final Output Result Using the Above Settings (Direct Export from Revit)*


Must log in before commenting!
Sign Up