Source: BIM Center of Guangdong Heavy Industry Institute
Today’s Tip: Editing Curtain Wall Panels and Facade Shapes
Default Shortcut Key: None
First, launch ARCHICAD and locate the Curtain Wall tool on the left side of the interface. Click the Curtain Wall tool, then draw a curtain wall. Next, switch to the elevation view to modify the curtain wall.
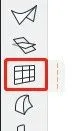
(The curtain wall tool location is shown above.)
After switching to elevation view, select the curtain wall you drew. An “Edit” option will appear—click it to proceed.
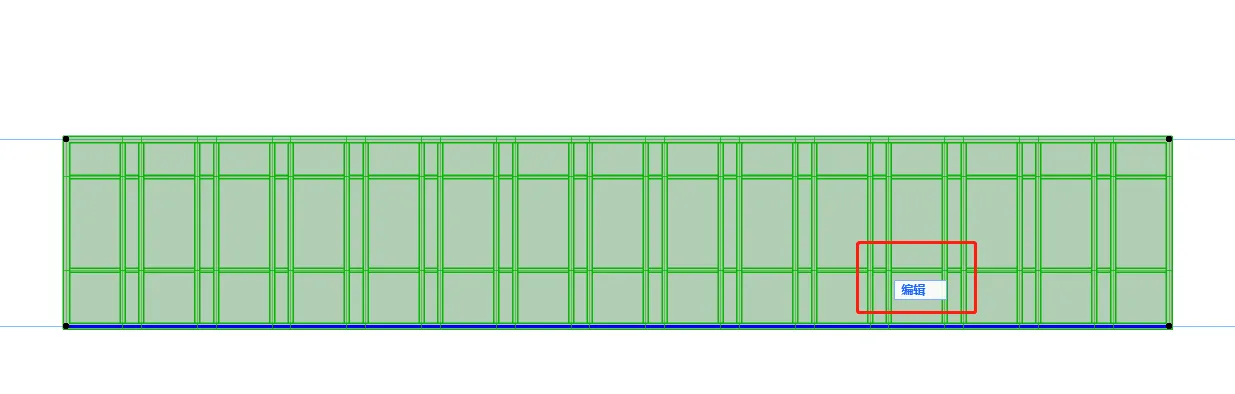
(The editing options panel is shown above.)
Clicking the “Edit” option opens the “Edit Mode” panel, where you can access the curtain wall settings.
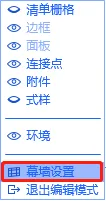
(The “Edit Mode” panel is shown above.)
Within the curtain wall settings panel, you can adjust the frames and panels for the entire curtain wall system. This is useful for global changes affecting all frames and panels.
If you only need to modify a specific section of the frame, select the curtain wall, click “Edit,” then drag or reposition the frame to alter its layout.
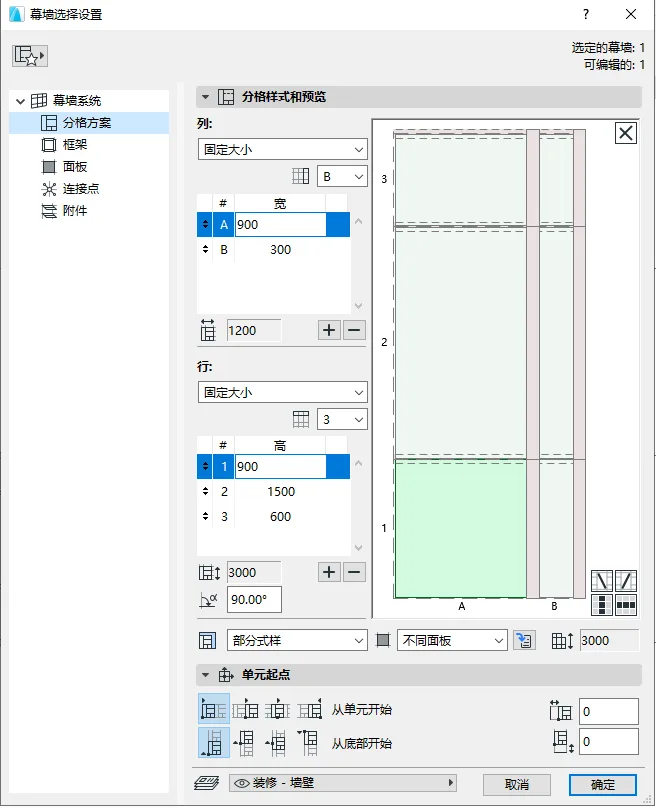
(The “Curtain Wall Settings” panel is illustrated above.)
To convert a panel into a door, select the desired panel and locate the “Component Type” option in the menu bar at the top of the interface. From the dropdown menu, choose the door panel type. The door will then be sized according to the existing curtain wall frame divisions.
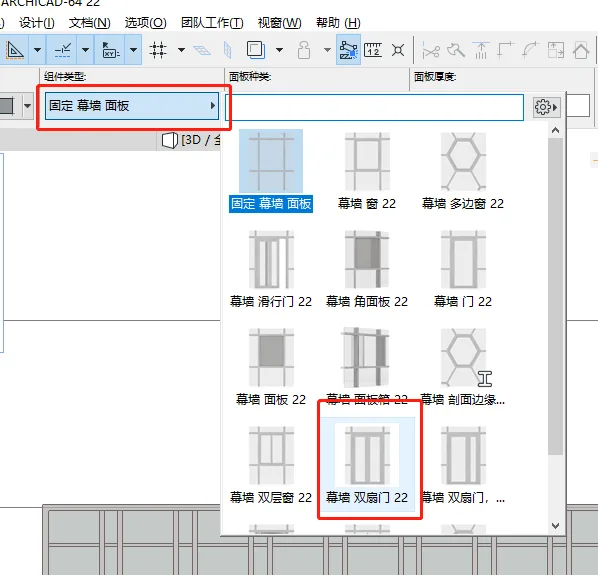
(The location of the “Component Type” menu is shown above.)
To alter the overall facade shape of the curtain wall, enable the eye icon next to “List Grid” in the “Edit Mode” panel. Then click on the outer border of the curtain wall to modify its shape directly.
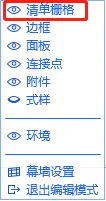
(The position of the “List Grid” toggle in “Edit Mode” is shown above.)


Must log in before commenting!
Sign Up