This article is from the official account of the BIM Center at Guangdong Heavy Industry Institute.
Today’s Tip: Using Elevation Tools on Stairs
Default Shortcut Key: None
Location of the Floor Elevation Annotation Tool: Vertical menu bar on the far left of the interface → Documents → Floor Elevation Annotation Tool
Location of Stair Tools: Vertical menu bar on the far left of the interface → Design → Stair Tools
picture
01 Drawing Stairs
To draw stairs using the stair tools, double-click the stair tool icon. Then, set the stair parameters in the default settings dialog box before drawing the stairs.

(The default settings dialog box for stairs is shown above.)
02 Placing Floor Elevation Annotations
After drawing the stairs, select the floor elevation annotation tool. Hover the mouse over a stair tread, press the Tab key to highlight the tread surface, then click the left mouse button to pick the elevation of that tread.
(The floor elevation annotation tool is illustrated in the image below.)
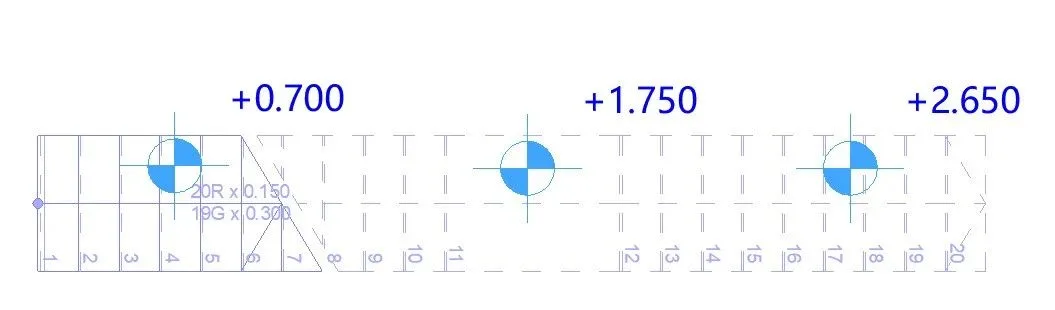
(The final result is shown above.)
03 Important Notes
There are two scenarios where the floor elevation annotation tool cannot pick up the stair tread height:
- When selecting the floor elevation annotation tool, clicking on the stairs without pressing the Tab key will not allow you to pick the tread height.
- After pressing the Tab key to select the tread and moving the mouse, clicking on the stair tread may still fail to pick the elevation.


Must log in before commenting!
Sign Up