When working with Revit software, it’s common to collaborate across different disciplines using workspace tools. However, there are times when you may want to hide other users’ models. So, how can you hide someone else’s workspace in Revit?
Follow these steps:
1. Open the central model and navigate to the View tab, as shown below.
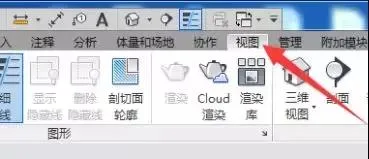
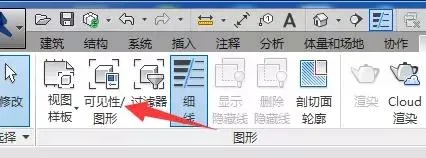
2. Click on the Visibility/Graphics icon in the toolbar that appears.
3. In the pop-up dialog box, select the Worksets tab from the menu bar.
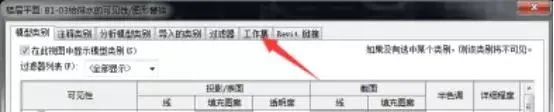
4. Choose the workspace you want to hide, then click on Visibility Settings.

5. Click on Use Global Settings (Visible) under visibility settings. A dropdown arrow will appear.

6. Click the dropdown arrow and select Hide from the menu, then click OK.

In summary, by following this guide, you can easily hide other users’ models within your workset, making your own modeling process more efficient.


Must log in before commenting!
Sign Up