1. Scope of Application
1) This process is designed for one-time reservation and pre-embedding of aluminum formwork in cast-in-place concrete structures.
2) It is suitable for installing and positioning primary piping for both strong and weak electrical currents, wire boxes, and electrical boxes. The process helps reduce the risk of blockage after concrete pouring and ensures a clean appearance after demolding.
3) The method is also applicable for pre-embedding water supply and drainage systems, installing and positioning water stop joints and sleeves, ensuring a smooth finish after pouring, and maintaining the appearance of water pipes during later installation.
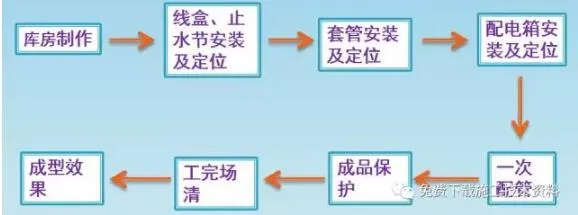
2. Process Flow
3. Warehouse Production
Prepare PVC wire boxes, water stop joints, electrical boxes, and sleeves in the warehouse following the curing diagram. Protect these components using sealing glue, applying at least four layers. Organize and stack them neatly to prepare for the subsequent pre-embedded construction.

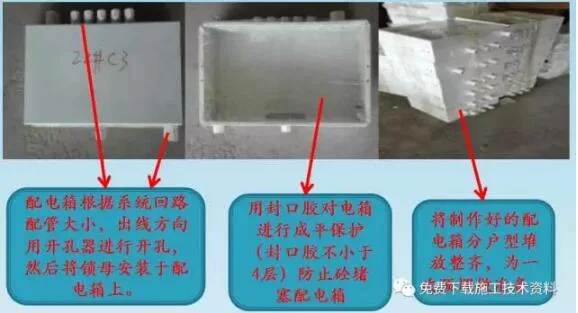
Distribution Box Production in Warehouse
Steps: First, drill holes in the distribution box. Next, install locking nuts of various specifications according to the circuit design shown on the drawings. Finally, seal the distribution box securely with extruded boards and protect it with sealing glue.
4. Installation and Positioning of Wire Boxes and Water Stop Joints
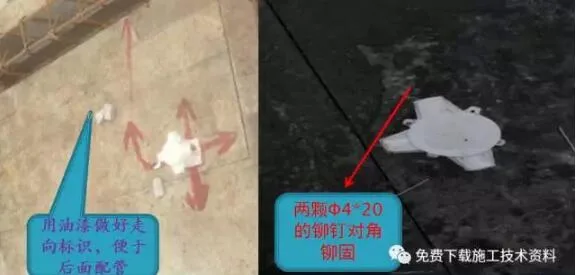
1) Installation and Fixation of Roof Light Box
Process:
Using the curing diagram, measure and position the size and orientation of the light box with a tape measure. Drill diagonal holes in the aluminum formwork using a Φ4 drill bit. Secure the box with two Φ4×20 rivets diagonally and mark the direction with paint for easier future piping.
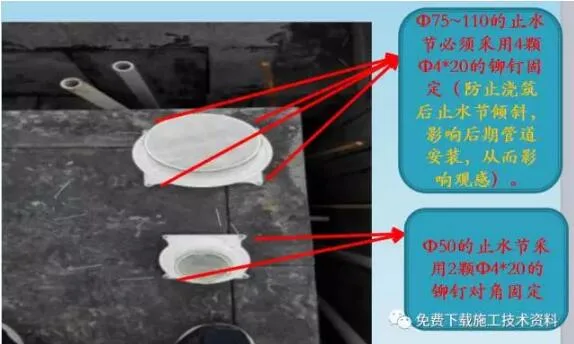
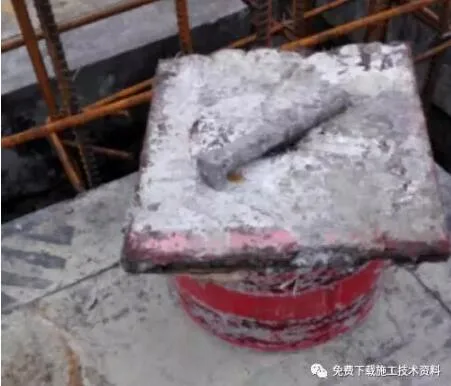
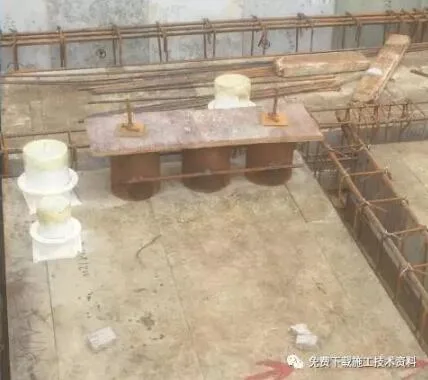
2) Installation and Fixation of Water Stop Joints
Process:
Referencing the curing diagram, measure the position using a tape measure. Drill holes in the aluminum mold corresponding to the water stop joints with a Φ4 drill bit. Secure Φ110 and Φ75 water stop joints with four Φ4×20 rivets, and fix Φ50 joints diagonally with two Φ4 rivets.
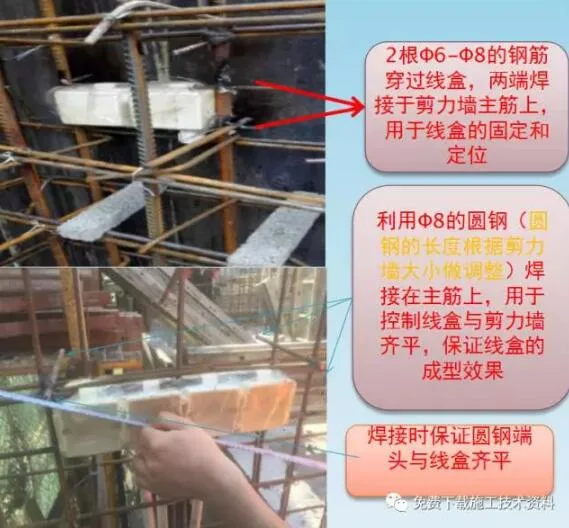
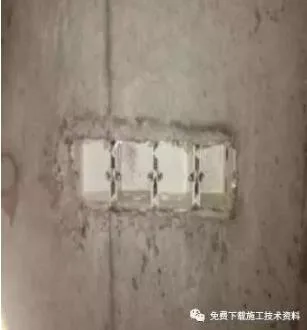
3) Installation of Shear Wall Wire Box
Process:
Using a 77×77×65 connected ear wire box (same method applies to individual wire boxes), thread two Φ6 steel bars vertically through the box. Spot weld these bars to the main reinforcement of the shear wall or column to fix horizontal and vertical positioning. Then, weld a 195mm round steel bar (195mm for 200mm thick walls, 95mm for 100mm thick walls) perpendicular to the formwork on the main reinforcement. After sealing with plates, this ensures the wire box will be flush with the concrete wall after pouring, providing a clean final finish.
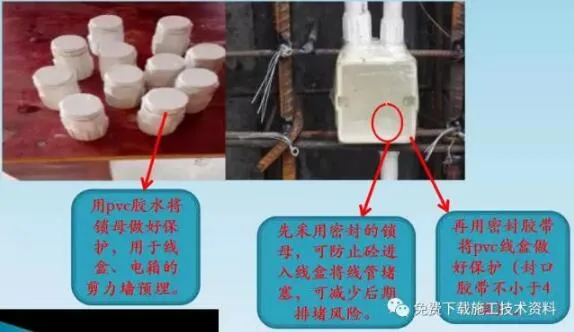
4) Protection of Locking Nuts Embedded in Shear Walls
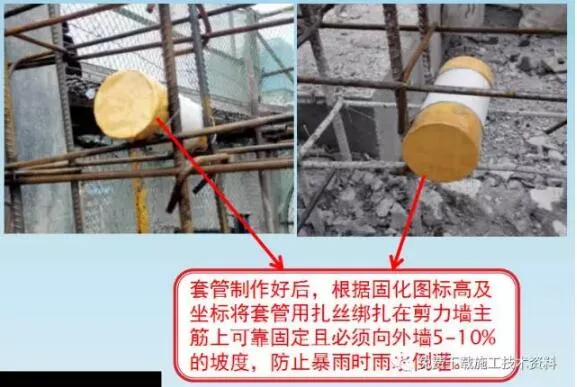
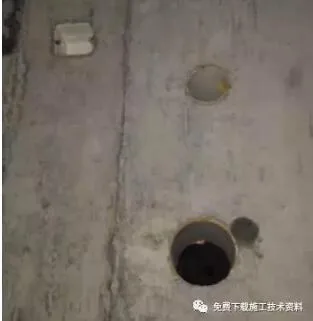
5. Installation of Casings
1) Shear Wall Casing Installation
2) Beam Casing Installation
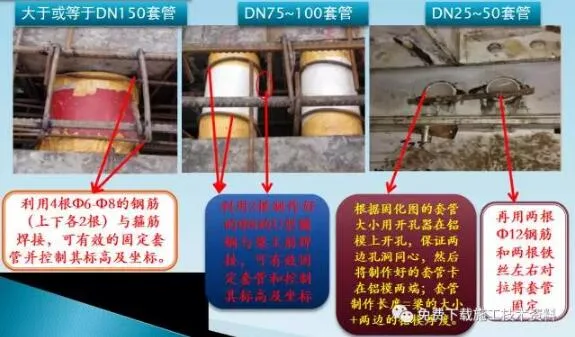
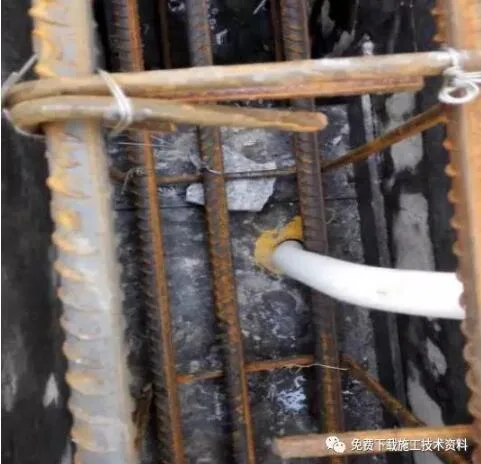
3) Installing Conduit Through the Board
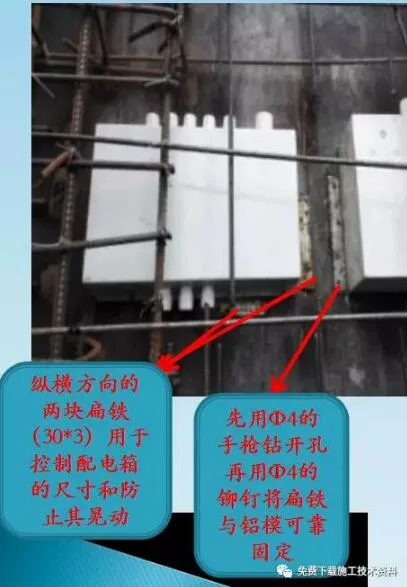
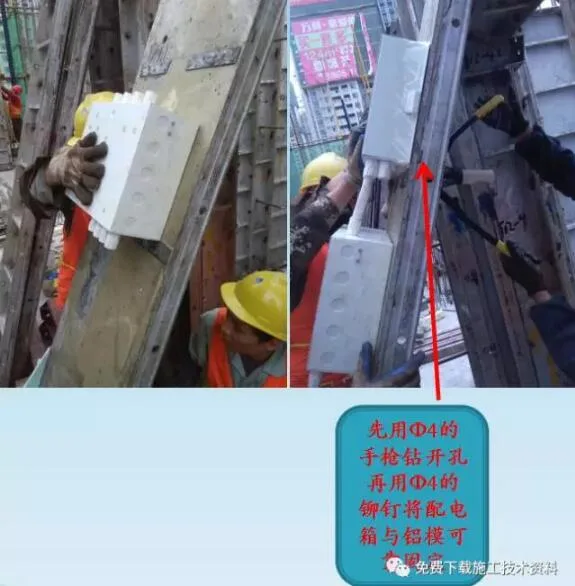
6. Installation of Shear Wall Distribution Box
Process:
First, complete and protect the distribution box production in the warehouse. Then, attach two 30×3 hot-dip galvanized flat irons vertically and horizontally on the aluminum mold using rivets. The vertical flat iron controls the lateral position and prevents shaking, while the horizontal flat iron controls elevation and restricts vertical movement. Finally, drill holes at corresponding positions on the aluminum mold and distribution box edges with a Φ4 pistol drill, securing them together with Φ4 rivets.
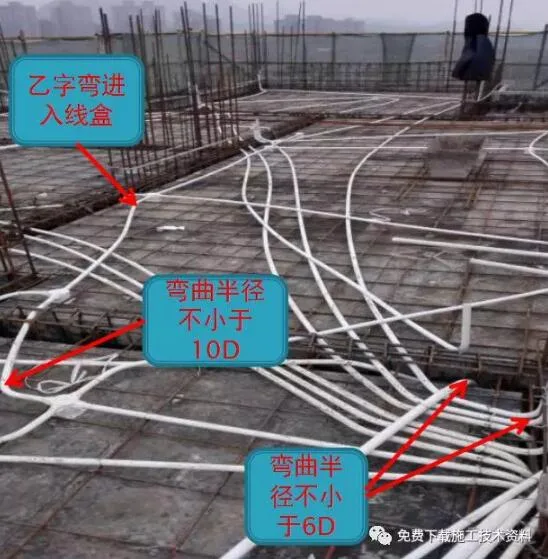
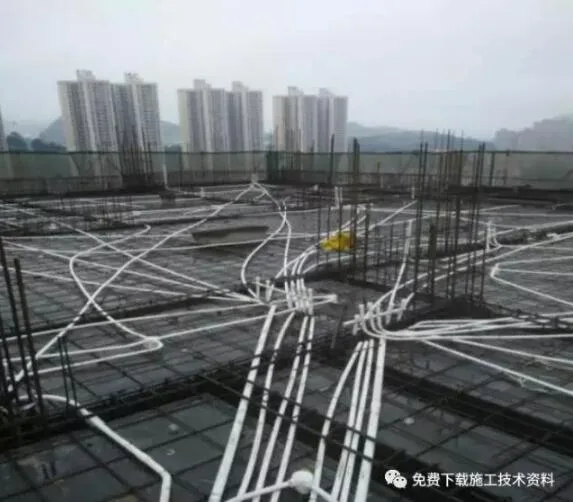
7. One-Time Piping Installation
For one-time piping, bend the conduit into a “B” shape and smoothly insert it into the box to ensure a straight and unobstructed entry. Depending on the pipeline length, intermediate junction boxes should be added as required. When bending pipes, use spring-bent pipes to maintain cross-section integrity (for pipes larger than 32mm diameter, hot bending should be used). The bending radius must be at least 10 times the outer diameter of the pipe, or at least 6 times in special cases (measured from the start of the bend inside the conduit). PVC pipe connecting sleeves should be glued with special adhesive. After completing strong and weak electrical pre-embedding, proper markings must be applied.
After assembling the first layer of aluminum formwork, drill holes at the bottom of the beam using a hole puncher, following the curing diagram precisely. Hole size and coordinates must strictly adhere to the diagram, with no additional holes drilled later; holes should be staggered layer by layer. After completing beam and bottom plate reinforcement, insert the conduit through the beam bottom hole and securely tie it.
Conduit Binding
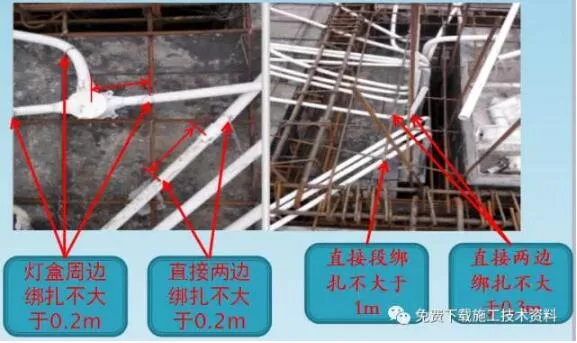
Once pipelines are laid, fix them using cross tie binding:
- For straight segments, binding spacing should not exceed 1 meter.
- At bends, double-sided binding must be within 0.30 meters.
- At direct joints, bind on both sides with no more than 0.20 meters spacing from the joint center.
- Wire box junctions must be tied within 0.20 meters from the edge.
8. Prefabricated Components and Site Cleanup
After binding, all short pipes on site should be cleared and placed in the waste pool. Remaining usable materials must be stored neatly on the N-1 layer, prepared for the next pre-embedding phase. Finally, notify the supervisor for inspection.
9. Finished Product Protection
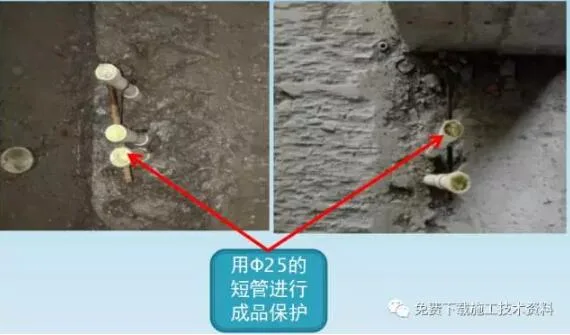
After structural pouring, protect the PVC pipes as finished products. Seal one end of each PVC pipe with a 25mm diameter short pipe and sealing glue instead of a cap to prevent wall panels from entering and blocking the conduit.
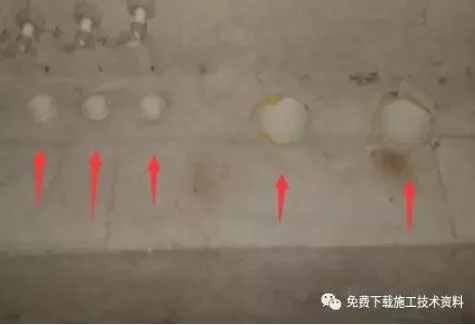
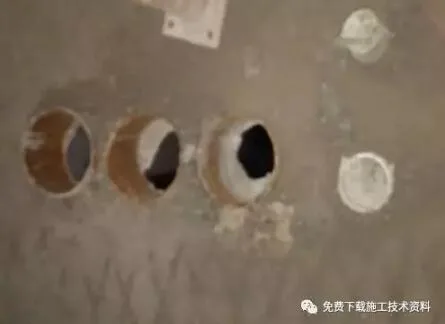
10. Molding Effect


Must log in before commenting!
Sign Up