
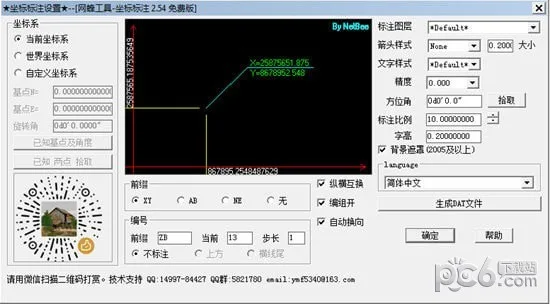
The NetBee CAD Toolbox is a measurement plugin designed for AutoCAD software. It allows users to extract coordinate data and upload it directly to the total station, significantly reducing human error. This tool is especially useful for measurement professionals working in pile foundation construction.
Key Features
1. Functions related to precise measurement
2. Extension for CASS software
3. Axis drawing (compatible with Tianzheng and Lizheng)
4. Pile position drawing for pile foundation engineering
5. Pile location numbering (capable of handling tens of thousands of piles with ease)
6. Extraction of layout coordinate data
7. Upload data seamlessly to the total station
Usage Instructions
1. Download and extract the NetBee Toolbox files.
2. Place the extracted files into the software’s installation directory, typically the support folder, or into the commonly used CAD software directory.
3. Open AutoCAD, enter the command ap, and press Enter. This opens a dialog box. Click on the Startup Suite icon, which looks like a briefcase (or select Contents…).
4. In the Startup Group 1 dialog box, click Add…. Locate the plugin file you saved earlier, select it, and click Load (Add).
5. Within AutoCAD, locate the plugin name, open its settings page, and click OK after configuring.
6. The plugin will now be available for use within AutoCAD indefinitely.
Frequently Asked Questions
How do I customize the toolbar in AutoCAD?
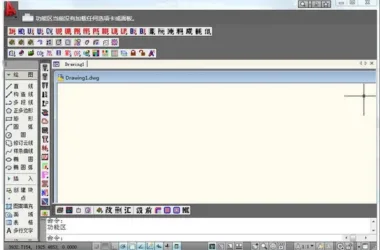
Start by opening AutoCAD, which will display the familiar interface with toolbars on both sides.
The toolbar on the left includes commonly used “Draw” and “Modify” toolbars, as well as the “Object Snap” and “Draw Order” toolbars. Personally, I mainly use two commands from the “Object Snap” toolbar: endpoint snap and midpoint snap. The rest of the commands are hidden inside the window, which wastes screen space. Here’s how to customize the toolbar step-by-step.
Right-click on any blank area in the toolbar layout, then select Customize.
This opens the “Customize User Interface” window. Click the right arrow at the bottom right corner to expand it.
Expand the window further, then select the Transfer tab and click on Toolbar to display all toolbars.
Right-click on any toolbar and choose New Toolbar from the context menu. It’s best not to modify the default AutoCAD toolbars directly. Instead, create a new toolbar for your custom setup.
For example, create a new toolbar named “Object Snap (Simplified).” Copy several frequently used commands from the default “Object Snap” toolbar — such as endpoint snap, midpoint snap, and center snap — and paste them into your new toolbar. Once finished, click OK.
Right-click again in the toolbar area, close the original “Object Snap” toolbar, and enable your newly created “Object Snap (Simplified)” toolbar. Adjust its position as needed, and you’re all set!
Changelog
1. Added a new command to change pile type: NBTC_Stake_SetType
2. Introduced multi-station variable number addition with specified range functionality
3. Added a progress indicator for searching and deleting related information in the pile tool


Must log in before commenting!
Sign Up