In conventional residential construction, cast-in-place shear walls are constructed using plastering methods, such as using a 20mm thick layer of 1:3 cement mortar to be applied twice, resulting in a large construction volume and common quality issues. The Nantong Second Construction Project has innovated its construction technology by adopting the “clear water shear wall no painting construction technology”, effectively eliminating common quality problems such as hollowing and cracking in the painting layer, while also bringing good economic benefits. It is shared with engineering friends for reference and reference.
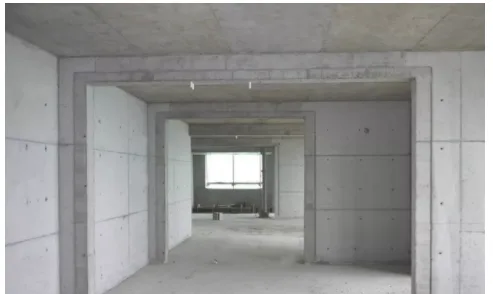
This process ensures the quality of the formwork and forming of the primary structural shear wall. At the junction of the masonry, shear wall, and connecting beam, a stop is reserved at the external corner of the primary structure as a 30cm wide steel wire mesh working surface, effectively ensuring that there is no cracking at the junction of the plain water shear wall without painting and the aerated block masonry painting layer. Suitable for shear walls, connecting beams, frame columns, and frame beams in the main structure.
Based on engineering examples
Let’s take a look at the non painting process of shear walls
When erecting the formwork at the external corner of the structure, place 15cm wide plywood strip → reinforce and accept the formwork → concrete pouring → remove the formwork → fill the wall masonry → draw the groove from the mortar joint at the junction → embed elastic putty in the groove → lay steel wire mesh at the seam stop → fill the wall painting → apply cement putty on the whole surface → acceptance
1 Place Flat noodles at the external corner of the structure
When the shear wall and coupling beam formworks are pre assembled, the vertical and horizontal plywood strips are added at the external corners of the structural molding inside the formworks. The width of the Flat noodles is 15cm and the thickness of the plywood strip is 12mm.
Place Flat noodles at external corner
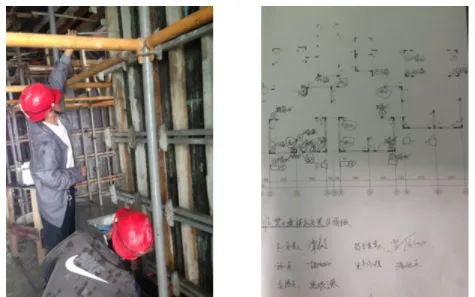
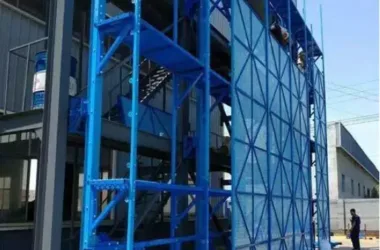
2 Template reinforcement and acceptance
After the reinforcement of the shear wall and connecting beam formwork is completed, the team will conduct a self inspection and pass the BIM training. The project department’s quality inspector will then conduct a dedicated acceptance inspection. For the unqualified points found during the special inspection, detailed records shall be kept, and only after rectification and re inspection can the next construction process be carried out.
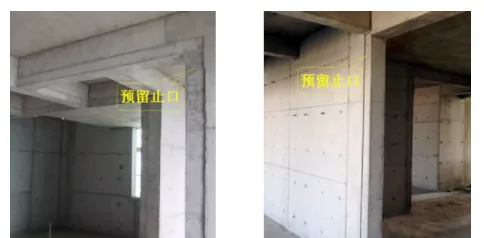
3. Concrete pouring and formwork removal
After the pouring is completed, the vertical shear wall panels and the concrete on the side of the connecting beams reach a certain strength, and the formwork is removed. The figure below shows the formation of a stop at the external corner of the structure after formwork removal.
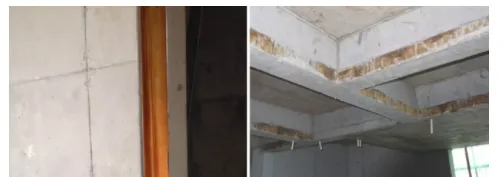
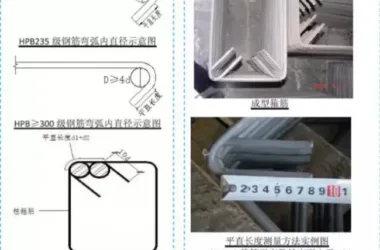
4. Drawing grooves at the junction of masonry and structure
For a 20cm thick infill wall, a 17cm wide aerated block is used for central masonry, with 15mm left on each side of the masonry as a painting layer. During masonry, the mortar joints at the junction with the main structure concrete shall be pre grooved with round steel, with a width of 15mm and a depth of 15mm.

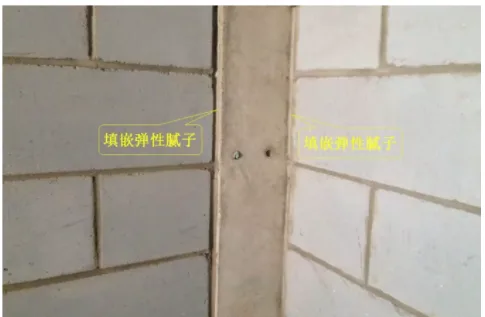
5 groove joint
Before adding steel wire mesh, use specialized elastic putty to fill and compact the pre drawn groove of the mortar joint.
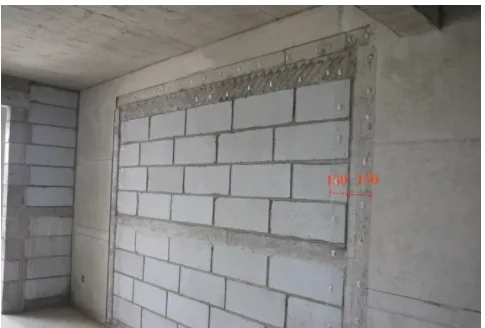
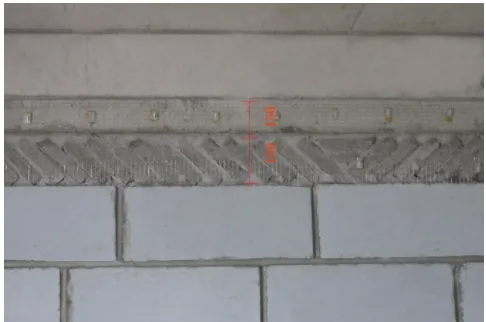
Laying steel wire mesh at the 6 stops
Before painting, lay anti crack steel wire mesh at the junction of the reserved joint and the masonry wall, with a lap width of 150mm between each substrate.
7. Wall filling and painting
After completing the laying of the net and spraying the mortar on the block wall, the masonry wall is painted with a thickness of 15mm. The prefabricated research and development of the shear wall requires no painting with clean water, and the wall filling is painted until the reserved end of the structural shear wall and connecting beam.
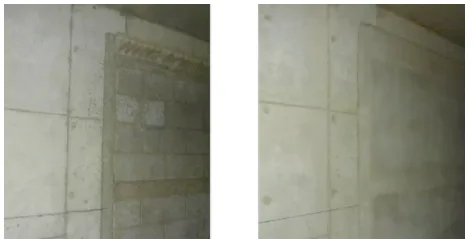
8 whole surface batches of putty
First, perform detailed treatment on the clear water shear wall or connecting beam: local depressions are filled with plaster, and local protrusions are ground or chiseled. After finding the corners, carry out large-scale putty construction in two layers (including masonry wall painting layer).
apply putty
It should be noted that the non painting construction process has high requirements for the construction quality of clear water walls and beams. This project uses high-quality phenolic mirror wood formwork, and the cost of formwork and support has increased compared to conventional projects; However, due to the fact that shear walls and beams do not require painting, the cost of large-scale painting and the cost of repairing hollowing and cracking in the later stage are saved. Overall, this process saves costs and improves quality.


Must log in before commenting!
Sign Up