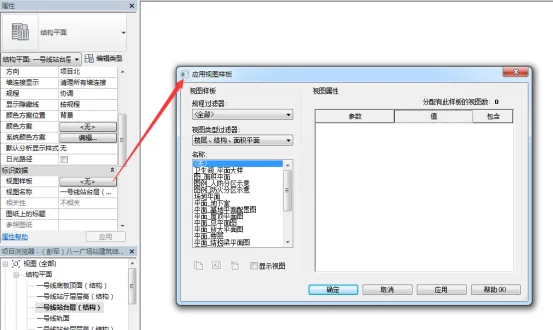
Before diving into how to create and transfer Revit view templates, it’s important to first understand what a view template is. Essentially, a view template is a collection of view properties—such as view scale, discipline, detail level, and visibility settings—that you can apply to standardize views across your project.
How to Create a View Template
There are two main ways to create a view template:
1) Copy an existing view template and modify it as needed.
2) Create a view template directly from project views or through the “Graphics Display Options” dialog box.
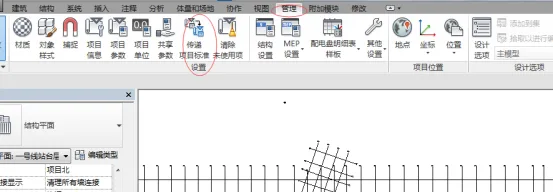
Transferring View Templates
View templates can be created for various styles to control settings such as category visibility, graphic overrides, view scale, detail level, graphic display options, and more.
Exporting view templates refers to transferring them between projects. When using the “Transfer Project Standards” tool, keep the following points in mind:
1) If a system family depends on other system families, all related families must be transferred simultaneously to preserve their relationships. For example, text types and annotation styles use arrows—so text types, annotation styles, and arrows should be transferred together.
2) View templates and filters must be transferred at the same time to maintain their link.
3) When transferring view templates and filters from a source project to a target project, if the target already contains templates or filters with the same name, delete those first to avoid conflicts.
4) Note that certain items cannot be transferred between projects, including elevation view types, section view types, and visibility settings for Revit links.


Must log in before commenting!
Sign Up