This article is from the WeChat official account: Revit Decoration.
In this tutorial, I will show you how to create sloping railings using adaptive families in Revit.
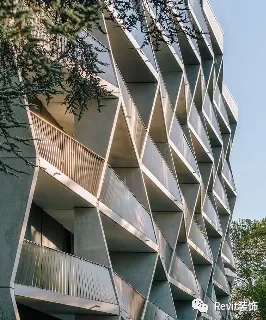
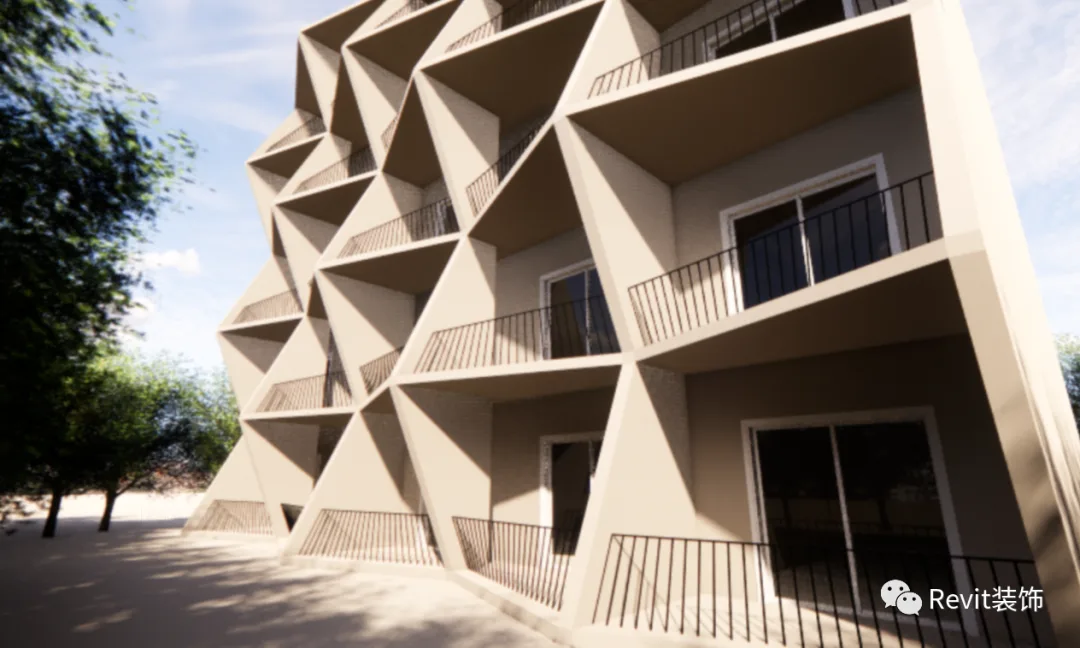
Wondering how to create the railing shown below? Let me share some helpful tips.
First, start by modeling the building’s exterior facade. This part is straightforward—simply edit the wall outlines, draw a pair of walls, and duplicate them. Since this is not the main focus, we will concentrate on how to use adaptive families to build sloping stair railings.
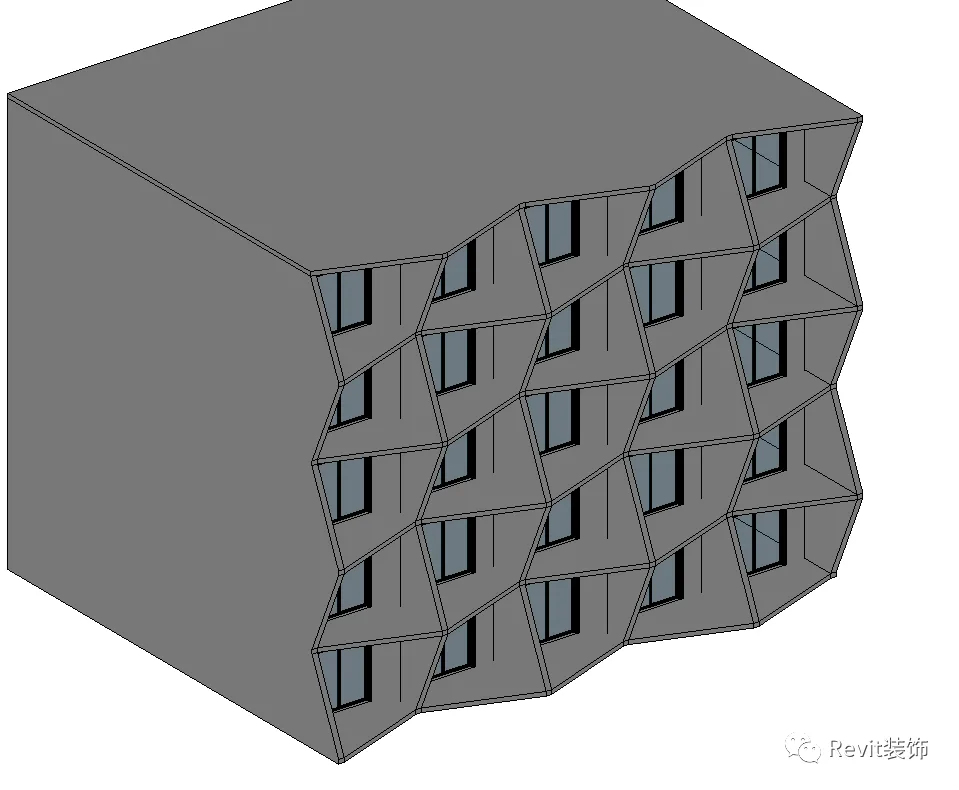
We will break down the process into two main steps:
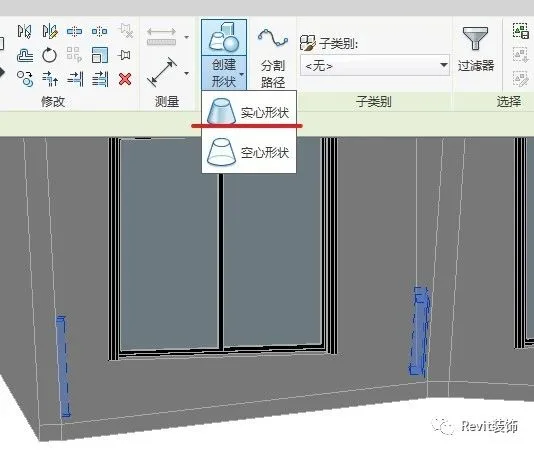
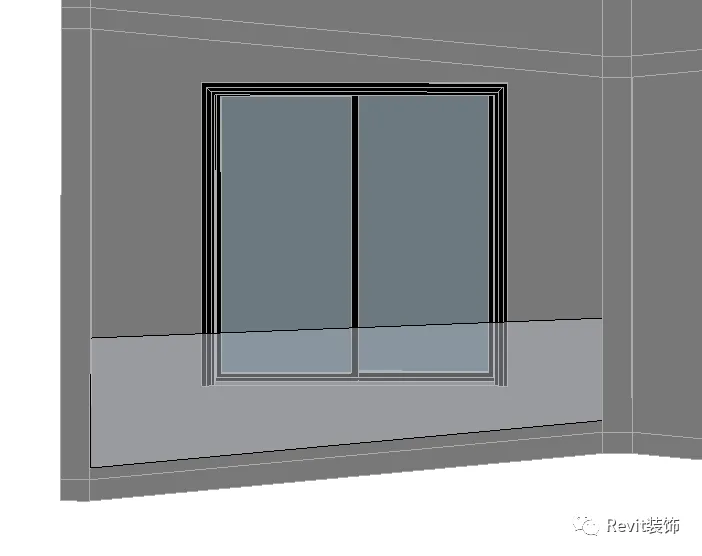
Step 1: Create a volume on the model. Draw two model lines or reference lines along both sides of the wall.
Select the two lines and create a solid shape.
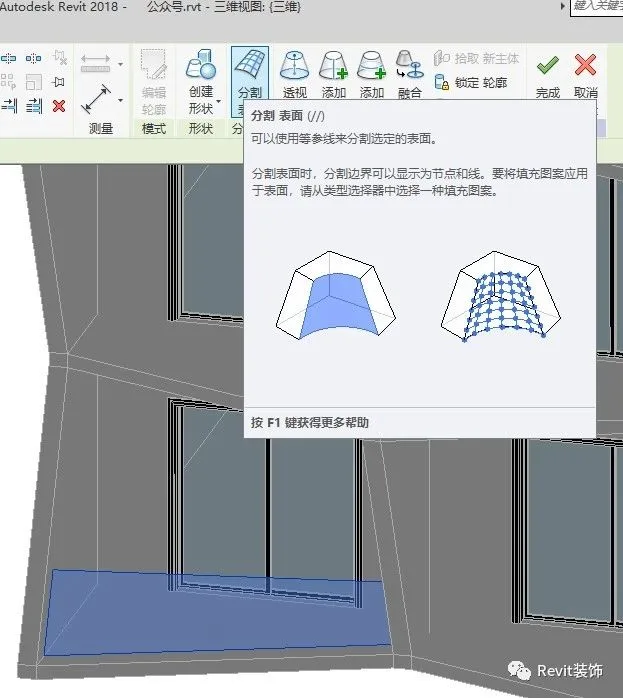
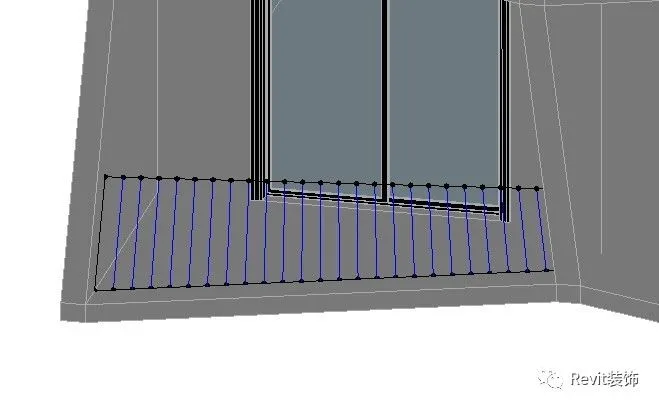
Next, select the face and divide the surface. Only divide the U-grid, not the V-grid. Adjust the number of U-grid divisions (which controls the quantity) in the left properties panel. Then, set it to display the top points.
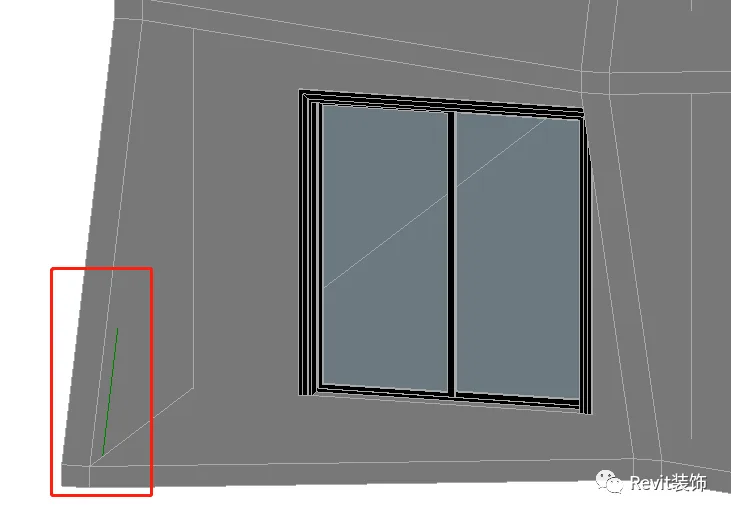
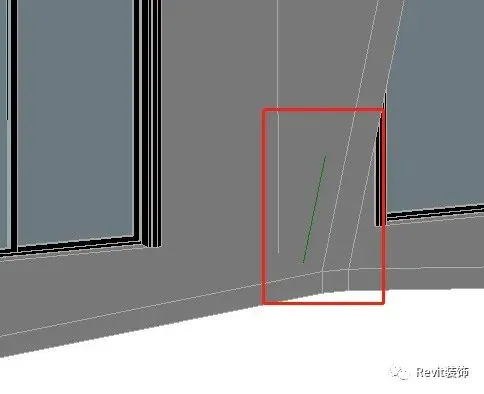
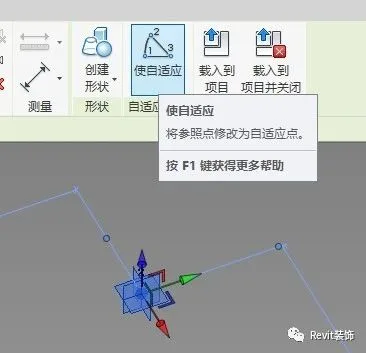
Step 2: Create adaptive families. Begin by placing two adaptive points in the family editor. These points will serve as adaptive hosts.
Connect the two points with a line, then draw a circle with a 10mm radius along the line to create a cylindrical railing. Load this family into your project.
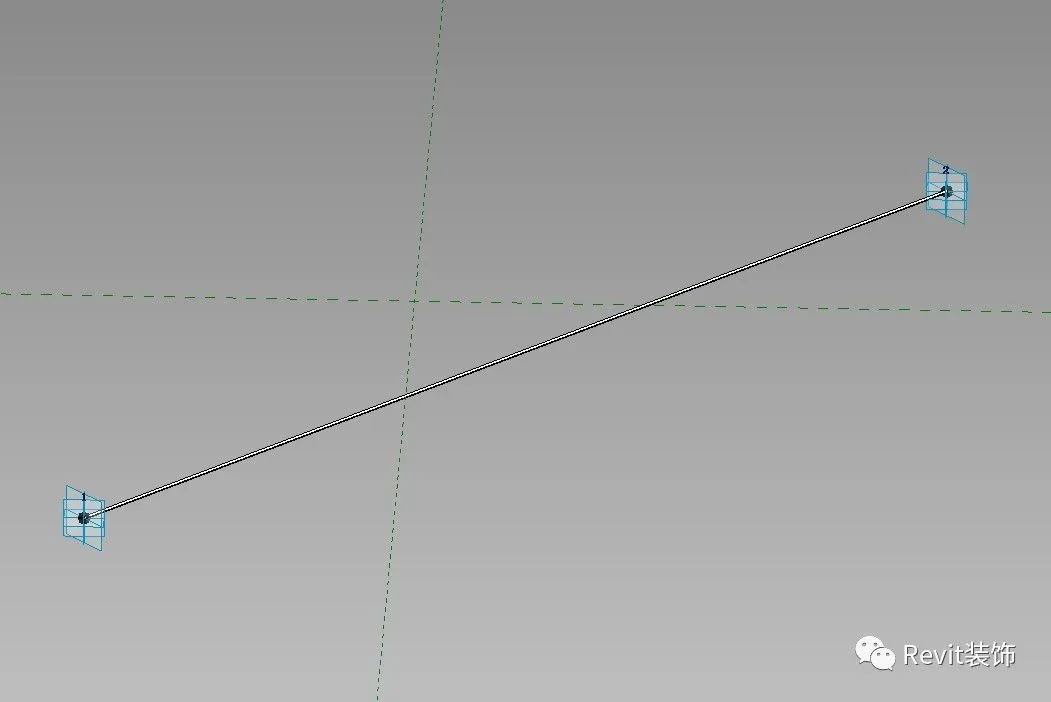
Pick the vertices by selecting one point first, then the other. Do not finish the volume yet. This approach allows you to mirror and copy the entire railing setup efficiently.
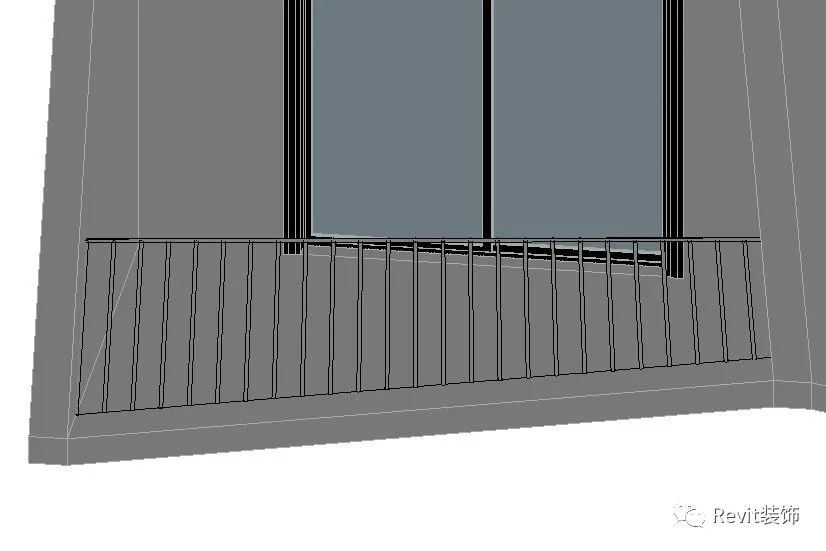
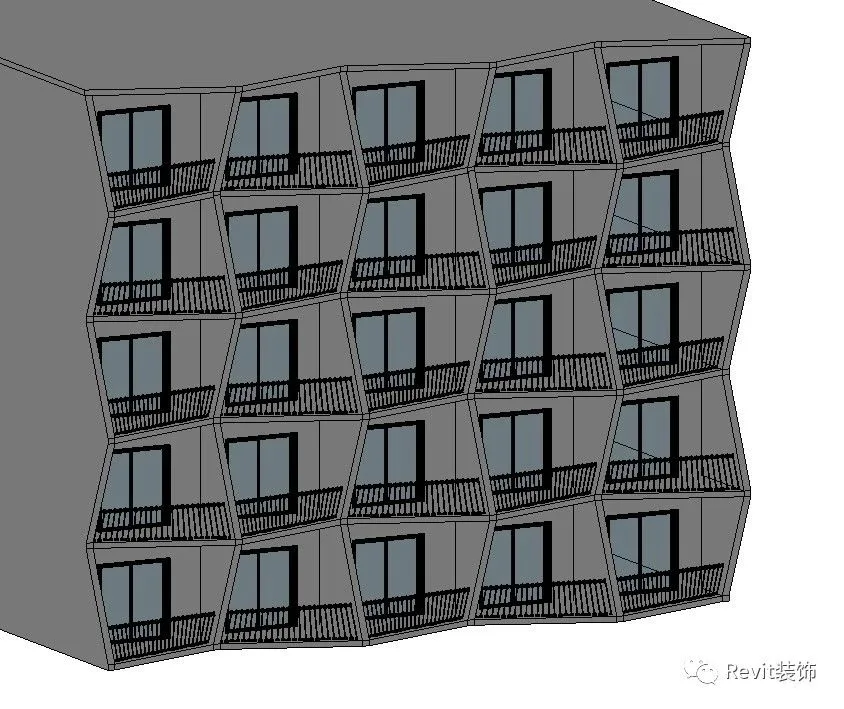
Final result:


Must log in before commenting!
Sign Up