This article is from the WeChat official account: Shi Yiping.
How does Revit create roofs based on walls?
In Revit, roofs are drawn relative to walls, with the roof’s base elevation aligned to the wall’s surface.
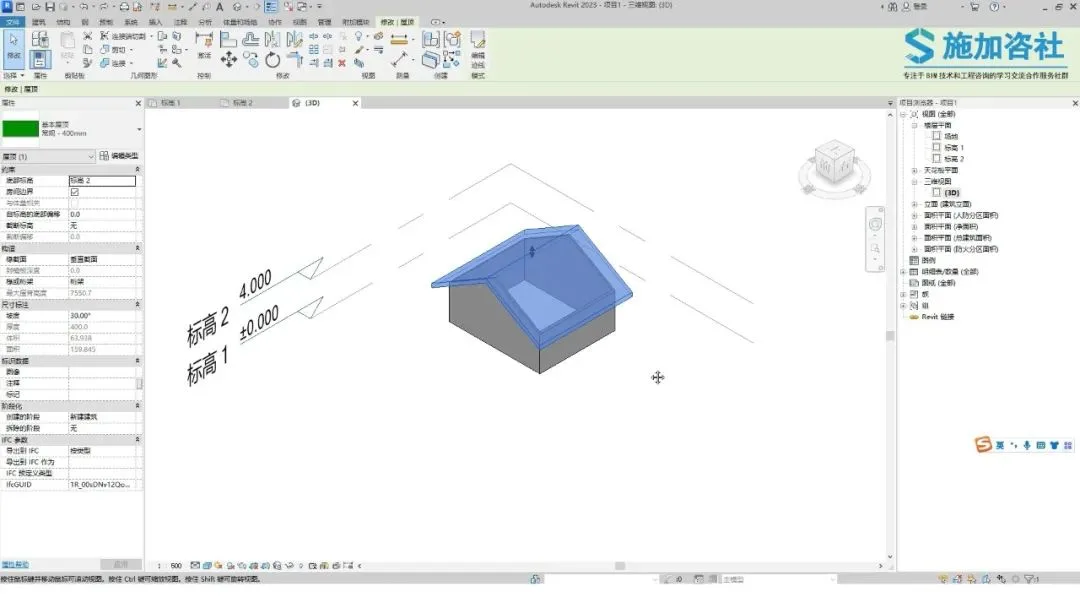
For example, when you modify the position of walls,
the roof adjusts accordingly in a dynamic way. Creating this type of roof requires just one simple step.
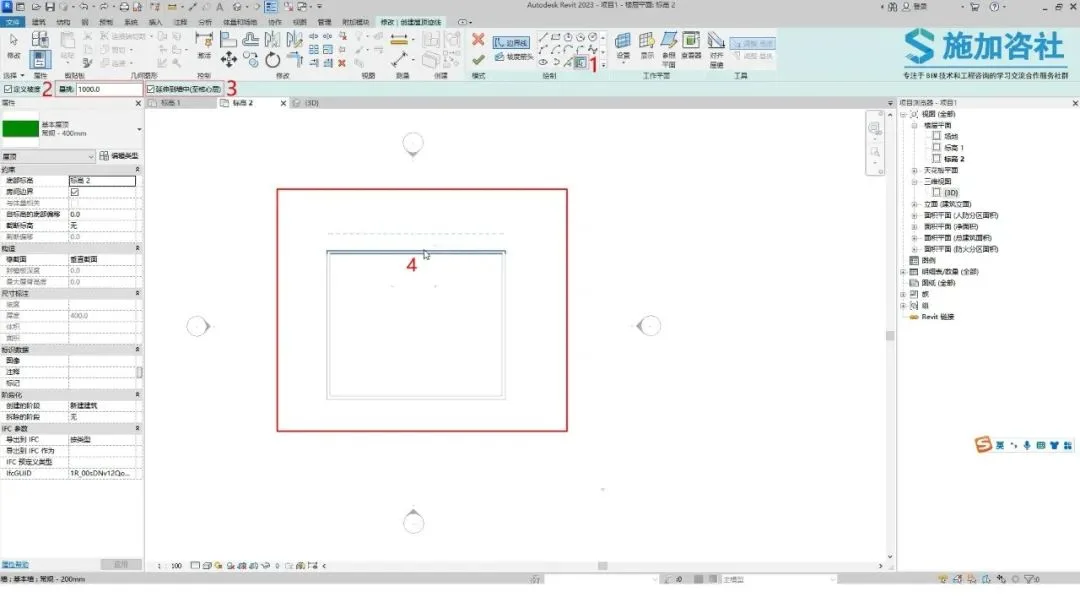
Start by clicking the Roof button in the Building tab, then select Footprint Roof.
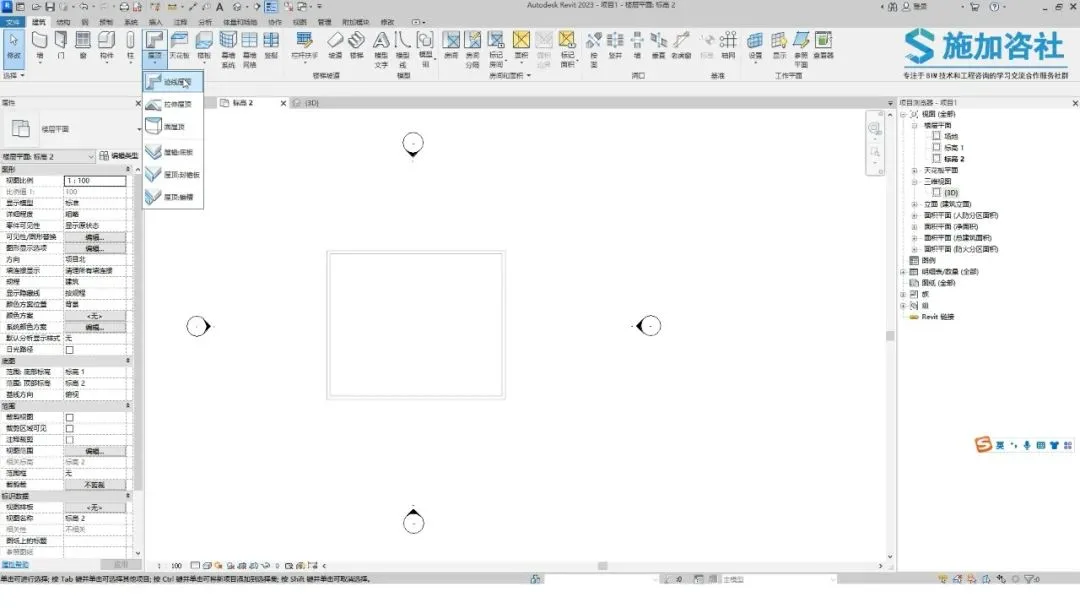
Next, choose the Pick Walls tool. Set the overhang value to 1000, and enable the option to extend into the wall (to the core layer). This ensures the overhang distance is measured from the wall’s core layer.
Then, click along the outer edges of the four walls.
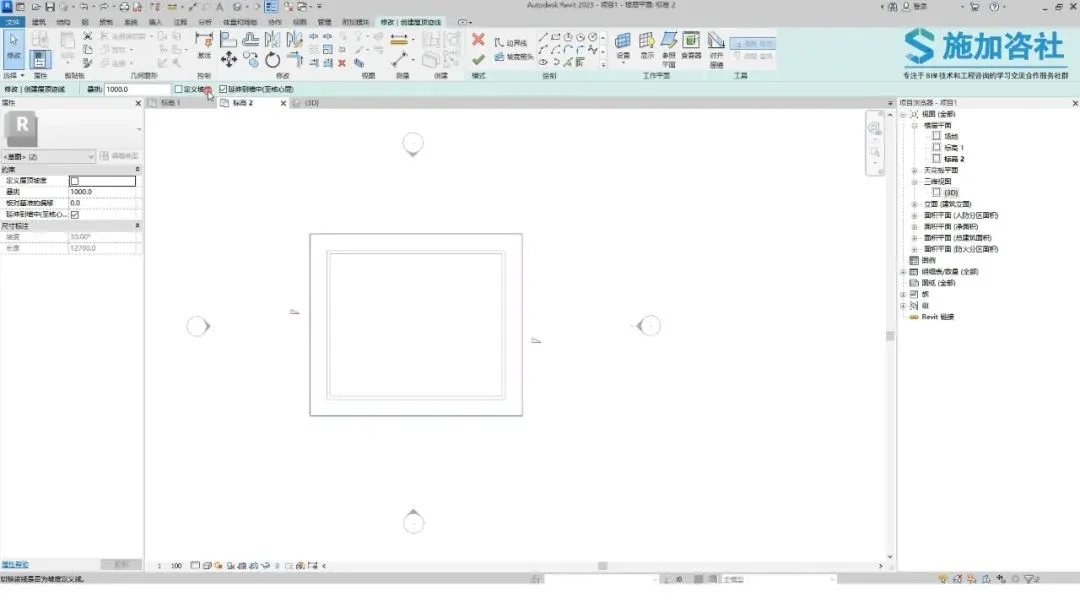
Cancel the current drawing, select the top and bottom sides, then set their slope as undefined.
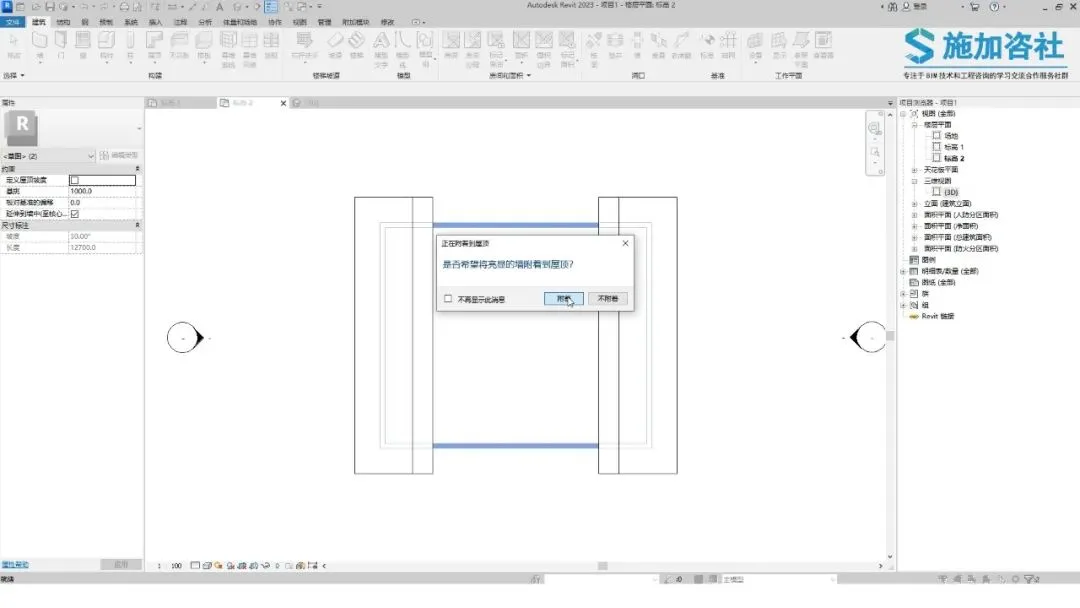
Finally, click the Finish button to complete the roof.
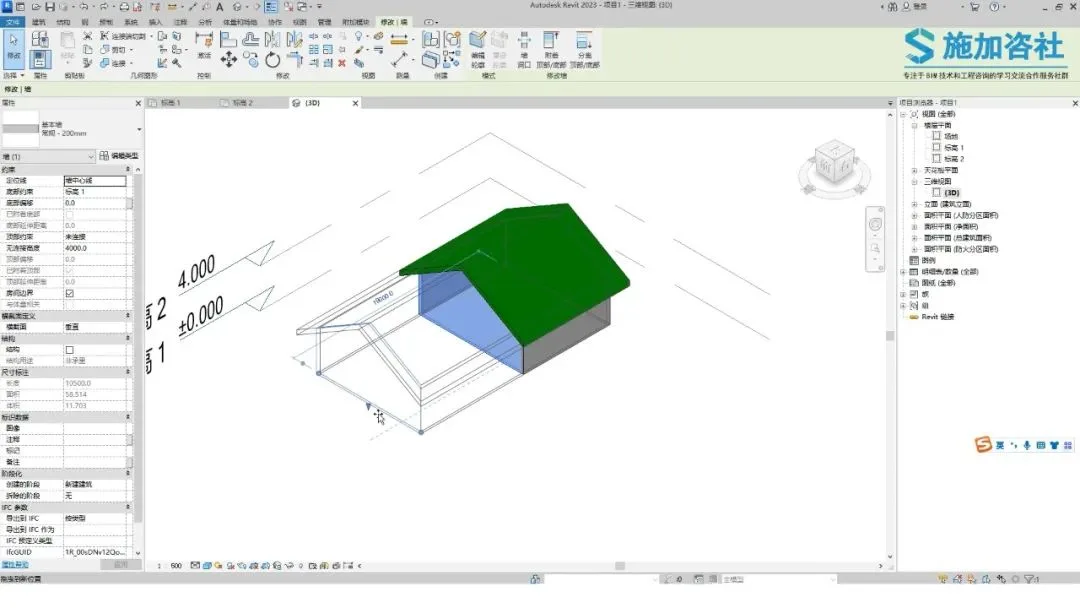
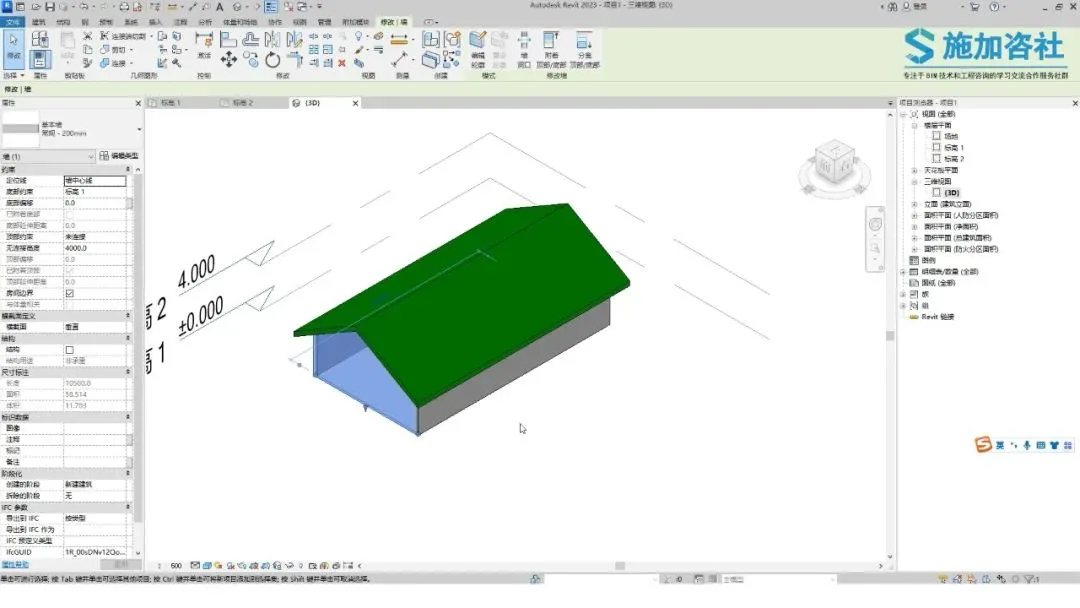
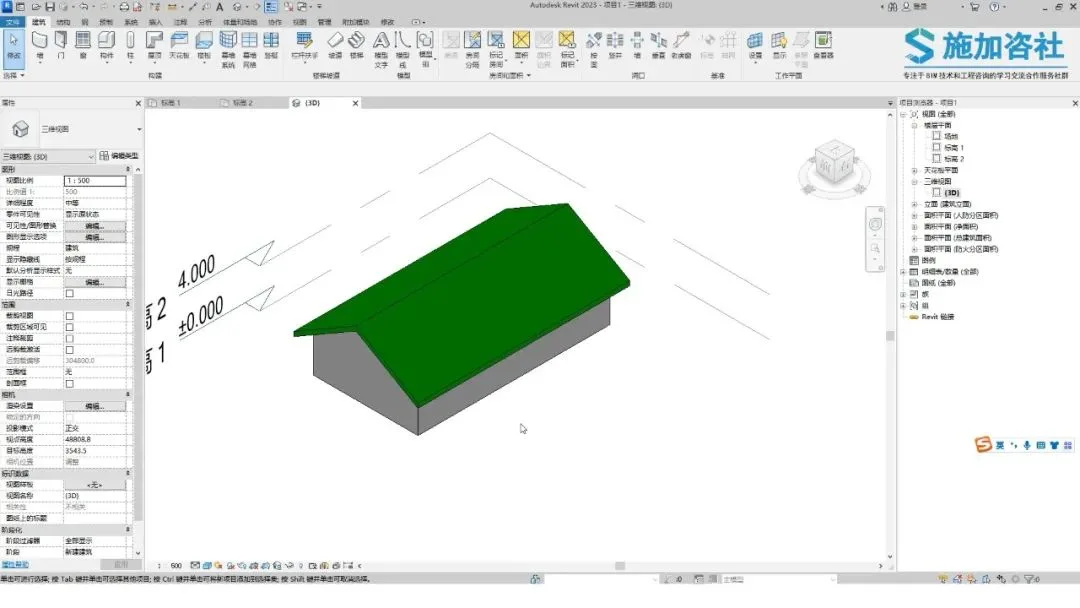
Now, switch to the 3D view to see the result. Select any section of the wall and move it to a new position.
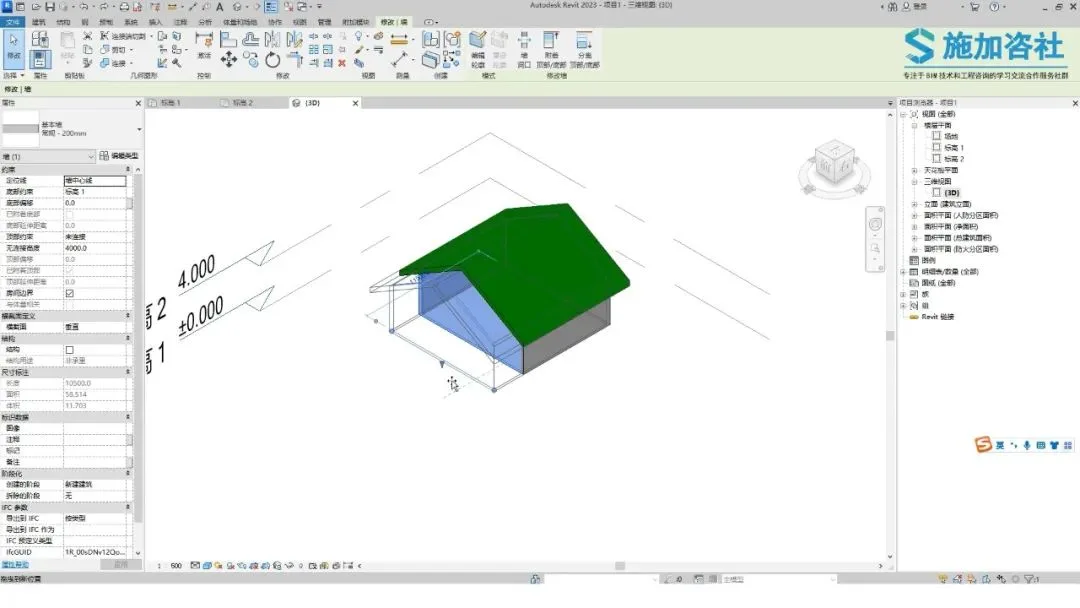
The roof adapts correspondingly, reflecting the changes made to the walls and completing the model.
Use your creativity and understanding to practice this method diligently. Stay engaged with the Application Consulting Society to discover more BIM skills and tips.


Must log in before commenting!
Sign Up