This article is from the WeChat official account: Meichuan Xinyifu, authored by Bear Boy.
Purpose
The goal is to create a uniquely shaped tabletop that can be adjusted dynamically through parameters.
1. Structural Analysis
Countertops are primarily categorized into three shapes: I-shaped, L-shaped, and U-shaped. The I-shaped countertop requires only basic parameters such as length, width, and height. Typically, it can be drawn by creating a flat surface and extruding it, so it will not be covered in detail here. L-shaped and U-shaped countertops are considered irregular shapes because they require multiple constraints to define their dimensions.
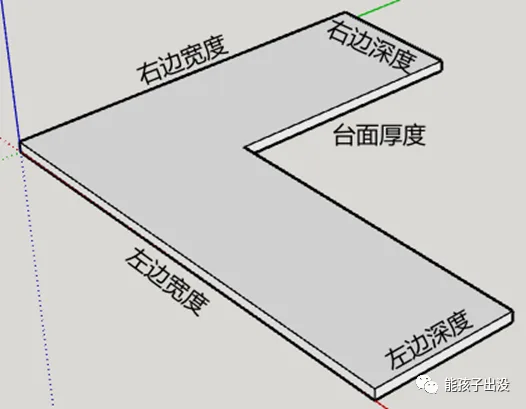
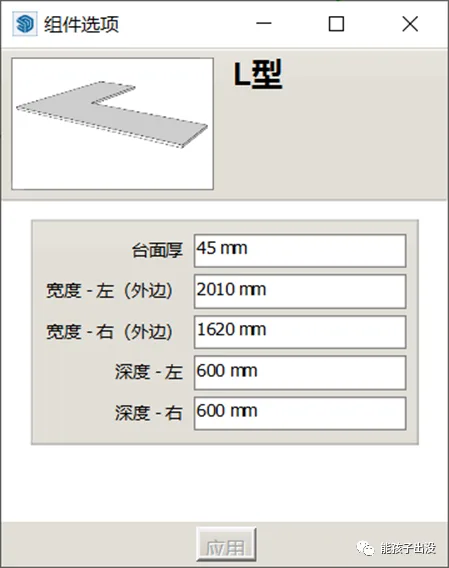
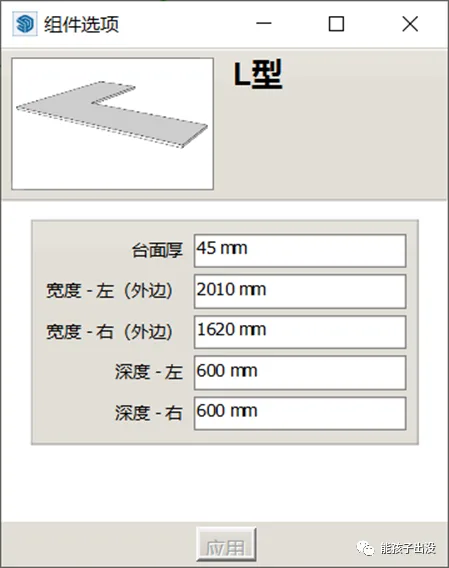
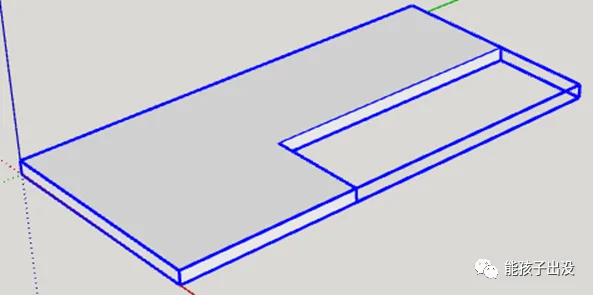
The L-shaped tabletop shown above requires five parameters to define its precise dimensions.
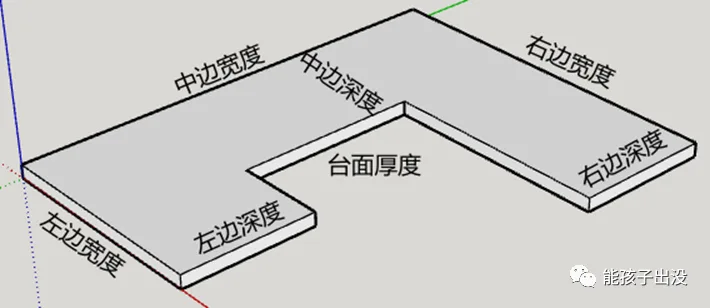
The U-shaped tabletop illustrated above requires seven parameters to fully specify its dimensions.
From a dynamic component creation perspective, it is possible to use the U-shaped design for all countertop types, including I-shaped. However, this approach may not align well with practical usage habits. Additionally, U-shaped countertops demand at least seven parameters (countertop thickness, widths of three sides, depths of three sides) compared to only five for L-shaped countertops (countertop thickness, widths of two sides, depths of two sides). Therefore, separate designs for L-shaped and U-shaped countertops are preferred to avoid cumbersome parameter input. The I-shaped countertop simply involves drawing a flat surface and extruding it, so dynamic parameter input is rarely needed.
To ensure the dynamic components display correctly, the L-shaped and U-shaped tabletops are divided as follows:
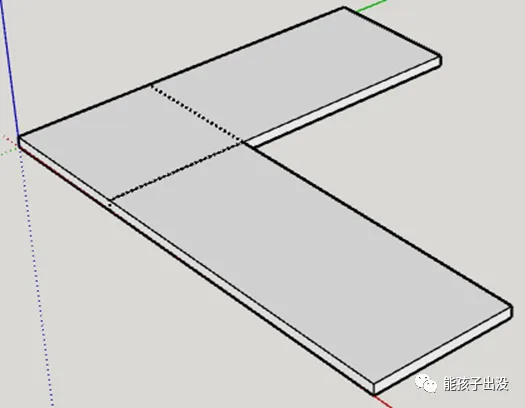
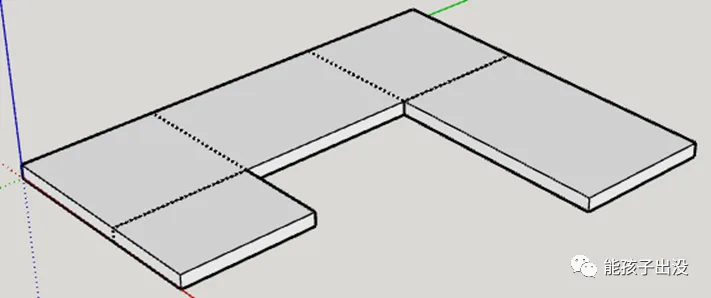
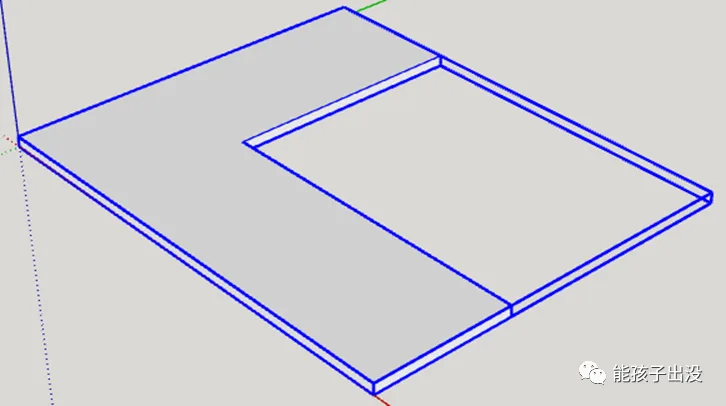
The L-shaped countertop is divided into three parts.
The U-shaped countertop is divided into five parts.
Note: For simple component creation, the L-shaped countertop could be divided into two parts and the U-shaped into three. However, this would compromise the visual accuracy. The segmentation shown above allows for a flawless display by hiding the edges.
2. Production Process
The following steps outline the creation of L-shaped countertops. The process for U-shaped countertops is similar and can be referred to accordingly.
2.1 Drawing Modules
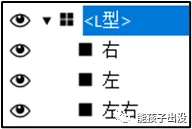
Begin by drawing three separate modules. Position them as shown in the diagram, and assign names accordingly.
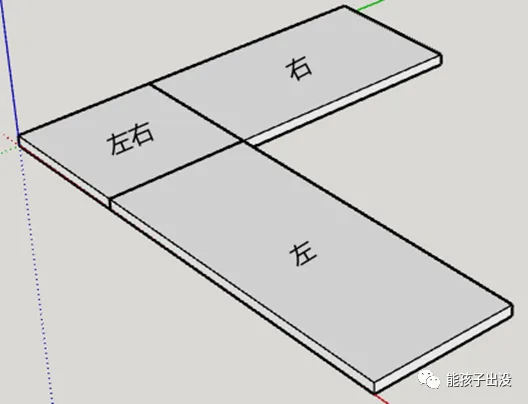
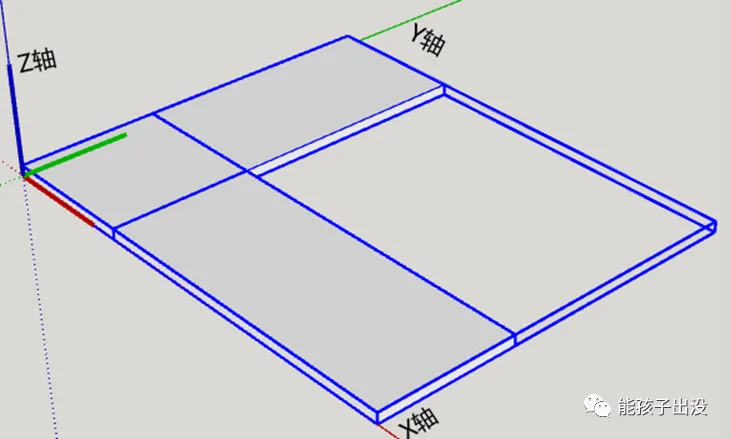
The origin point for all three modules is based on the corner vertex nearest to the coordinate system’s origin. If the positioning is incorrect after drawing, adjust the origin using the coordinate axis function.
Group the three modules together and name the group “L-shaped”.
Create components within the “L-shaped” group.
2.2 Adding Attributes
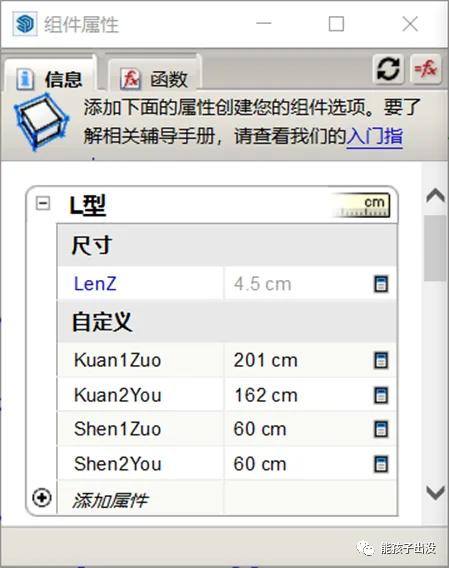
Add custom attributes to the L-shaped dynamic components as shown below:
Note: To keep attributes within the same category, it is not necessary to use numbering or other methods.
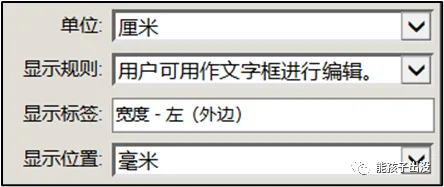
Set each attribute according to the diagram below:
2.3 Writing Functions
Assign position and size attributes to each module as displayed below, then configure the functions accordingly.
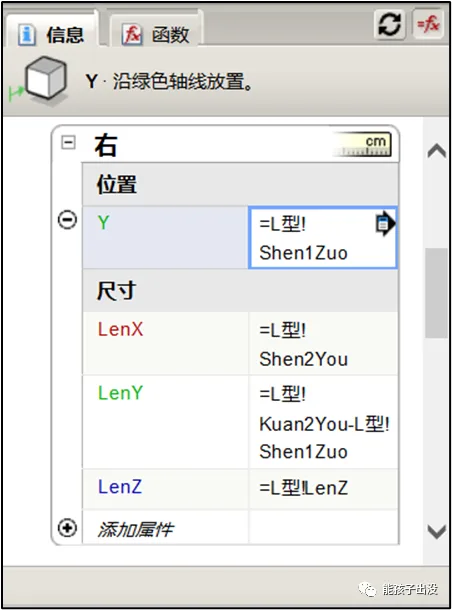
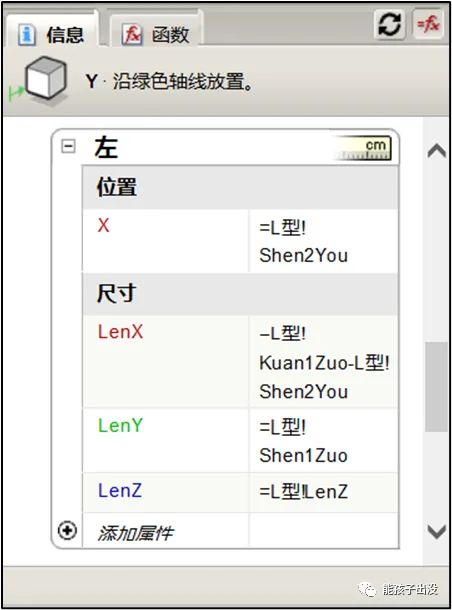
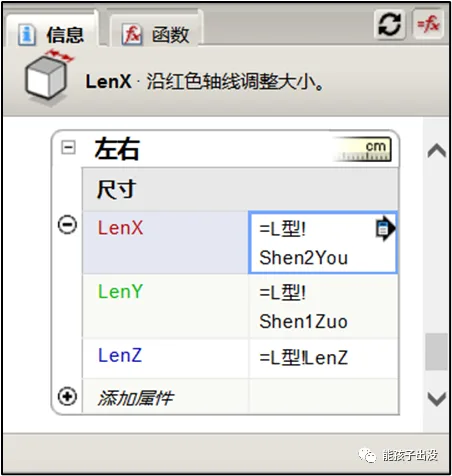
Function Description:
① The right side of the module represents an offset distance based on the left depth along the Y-axis. The X-axis length corresponds to the right side depth, while the Y-axis length equals the right side length minus the left depth.
② The left side of the module represents an offset distance based on the right depth along the X-axis. The X-axis length equals the left length minus the right depth, and the Y-axis length corresponds to the right side depth.
③ The X-axis length for the module’s left and right sides corresponds to the right side depth, and the Y-axis length corresponds to the left side depth.
④ The Z-axis direction for all three modules corresponds to the thickness of the countertop.
After completing the function setup, hide the internal edges of the three modules to finish the process.
Note: While edge hiding can be done during the drawing stage, it is easier to understand and manage when done after setting up the functions.
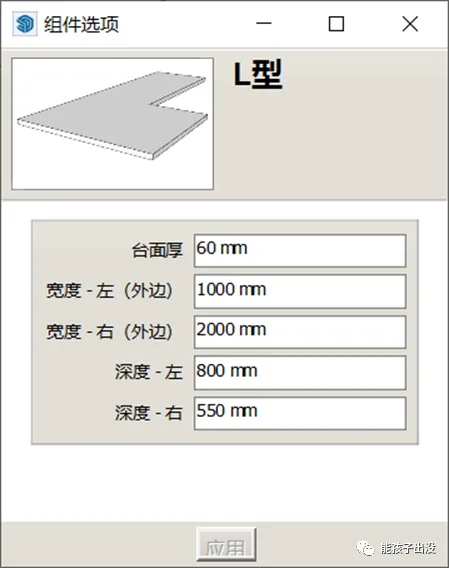
3. Final Display


Must log in before commenting!
Sign Up