This article is from the official account TopsBIM.
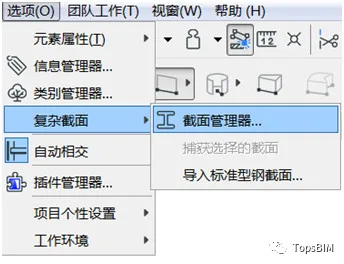
To create or edit a custom section, start by opening the Section Manager, located under Options > Complex Section > Section Manager.
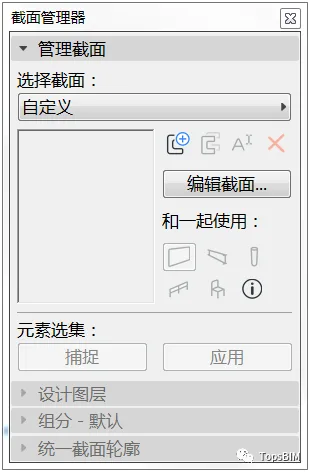
The Section Manager consists of four main components: managing sections, designing layers, default components, and unifying section profiles.
Now, let’s use the Section tool to create a parapet section.
1. Section Management Panel
1. Click New to open the “New Configuration File” dialog box. Enter the section name as parapet wall.
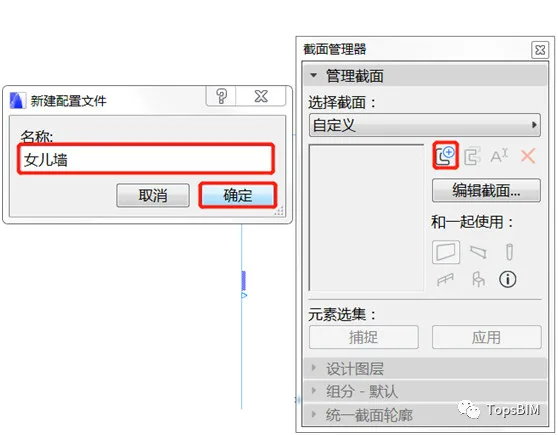
2. Click OK to open the Section Editor interface, where you can use 2D graphic tools to draw and edit sections.
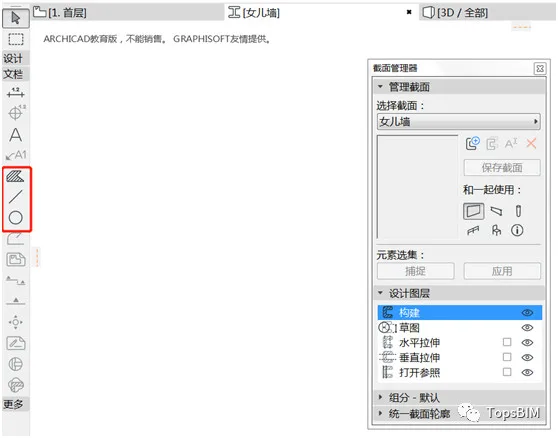
3. Select the Fill tool, choose the polygon drawing method, and pick a fill type. Capture the origin point in the drawing interface, set it to be used with the wall, and click Save Section once finished.
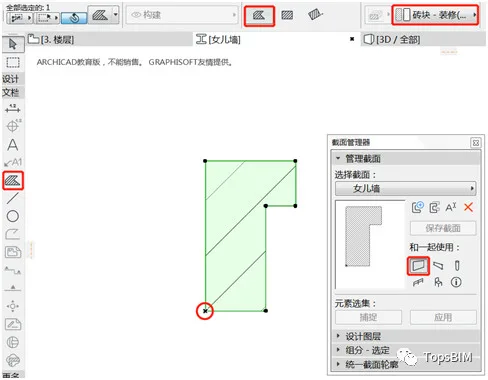
Tip: You can also edit an existing wall section by capturing its section, which achieves the same effect.
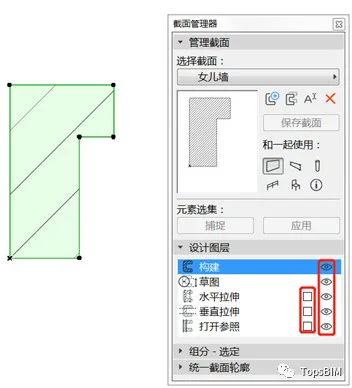
2. Design Layers Panel
In the Section Editor, use the eye icons to toggle the visibility of sections. The horizontal and vertical stretch options allow you to control the stretching range in each direction.
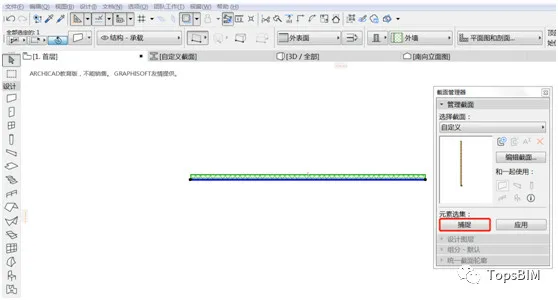
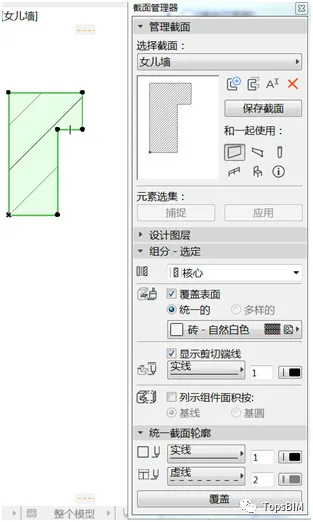
3. Components Selection Panel and Unified Profile Panel
Within the Components panel, you can set properties for section fills, including surface materials, cut line types, and colors. The Unified Profile panel lets you configure the line types and colors for cut and division lines.
After setting all parameters, save the section. Then, open the Wall Default Settings dialog, select the “Complex Section” structural type, and locate the section you just created. Finally, draw the parapet along the exterior wall in the roof plan.


Must log in before commenting!
Sign Up