This article is provided by the official account: BIM Center of Guangdong Heavy Industry Institute.
Today’s Tip: ArchiCAD Drawing Process
Default Shortcut Key: None
The general workflow for generating drawings in ArchiCAD involves the following steps: open the Manager, access the Project Tree View, configure View Mapping, organize Catalogs, set up Publisher Sets, and finally publish the drawings in formats like DWG or PDF.
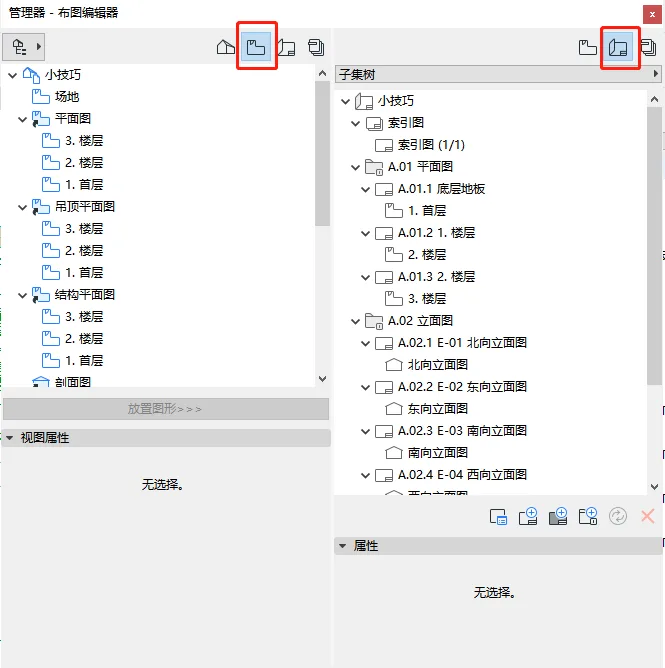
To start, open the Manager by right-clicking on the empty space in the right panel of the interface and selecting “Manager” from the context menu.
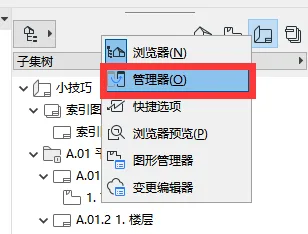
(The location of the “Manager” is shown in the image above.)
Step 1: In the Manager dialog, select the first tab from the top. On the left panel, choose “Project Tree View,” and on the right panel, select “View Mapping,” as illustrated below.
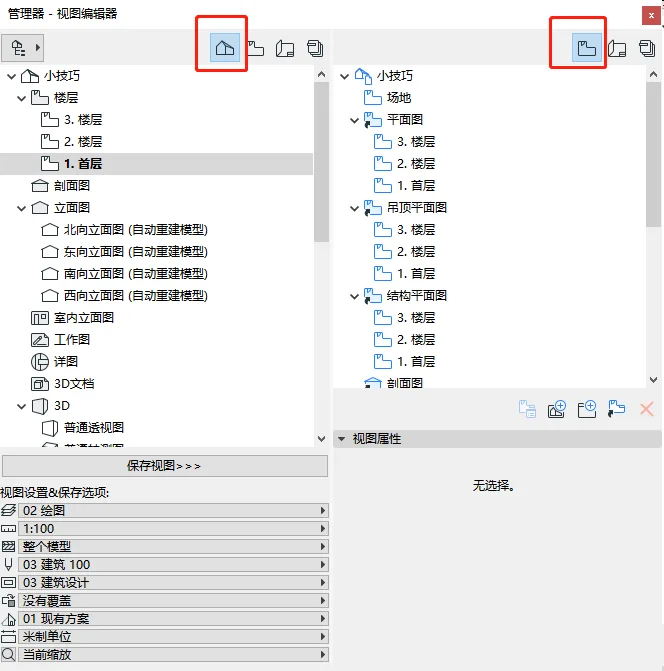
(The “Manager View Editor” window as shown above.)
Within the “Project Tree View” list, locate the view settings. Typically, you will need to configure the layer, scale, pen sets, and layer combinations. If no specific adjustments are required, default settings can remain unchanged, as shown below.
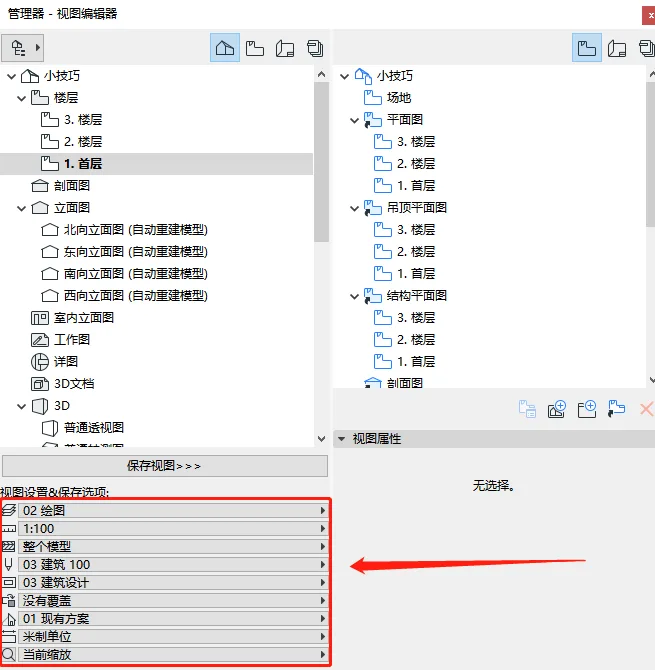
(Location of the “Manager View Editor View Settings” is displayed above.)
Next, create a new folder within the “View Mapping” list on the right. Enter a name for the folder in the dialog box and save your views inside this folder.
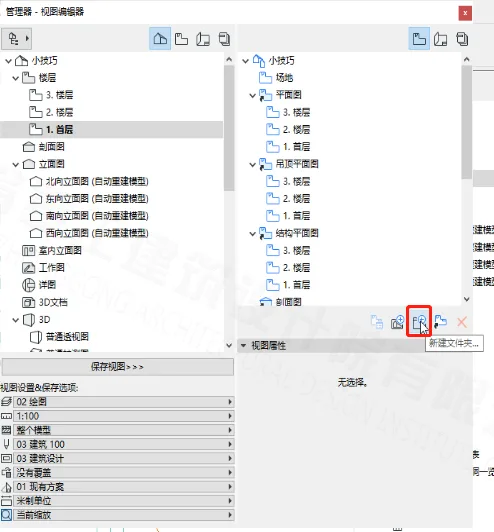
(The “Manager View Editor New Folder” location is illustrated above.)
Step 2: From the left panel, select “View Mapping,” then choose “Catalog” on the right. The interface is shown below.
(“Manager View Editor” as shown above.)
Create a new subset by clicking “New Subset” in the “Catalog” section, enter a name in the pop-up dialog, and click “Create”.
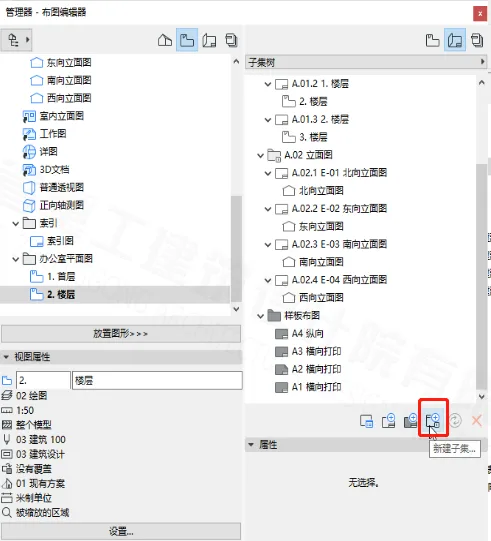
(The “Manager View Editor New Subset” location is shown above.)
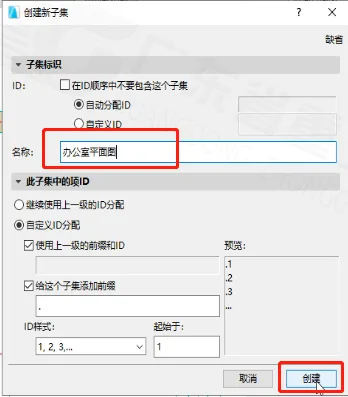
(The “Create New Subset” dialog box is shown above.)
After creating the subset, select it in the “Catalog” list. Then choose the plan view you want to place from the “View Mapping” list and click “Place View” to add it. See the example below.
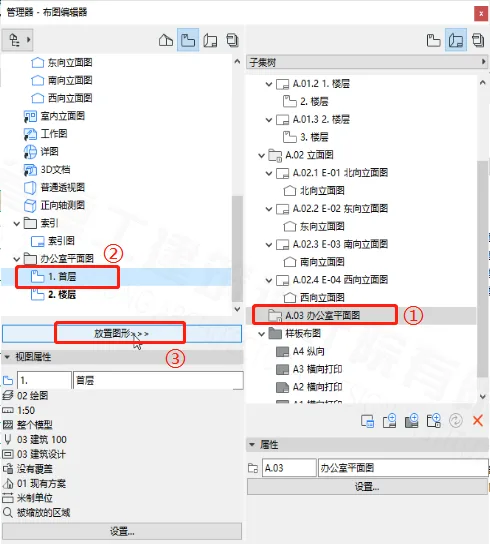
(The “Manager View Editor” dialog box shown above.)
Next, click on the placed view in the “Catalog” list, and below the list, select the desired drawing size from the “Template Layout” options. Refer to the image below.
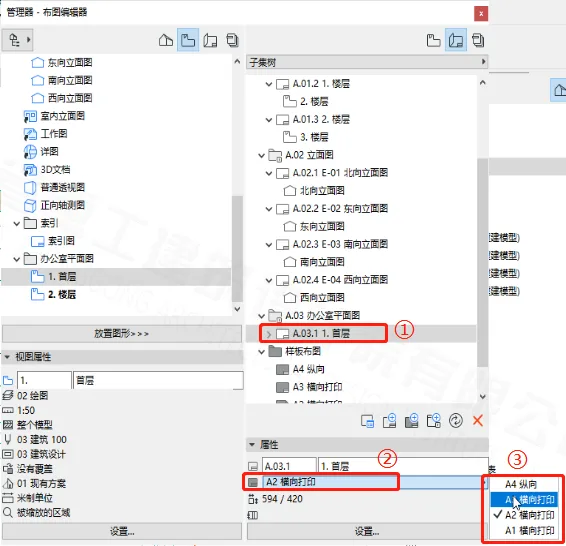
(“Manager View Editor Template Layout” dialog box above.)
Double-click the inserted view to adjust its position and visible range on the layout. The example is shown below.

(“View Range Adjustment” as shown above.)
Step 3: Select “Album” on the left and “Publisher Collection” on the right, as shown below.

(“Manager View Editor” window as shown above.)
Click the small arrow below “Publisher Collection” to go back to the previous level, as illustrated below.
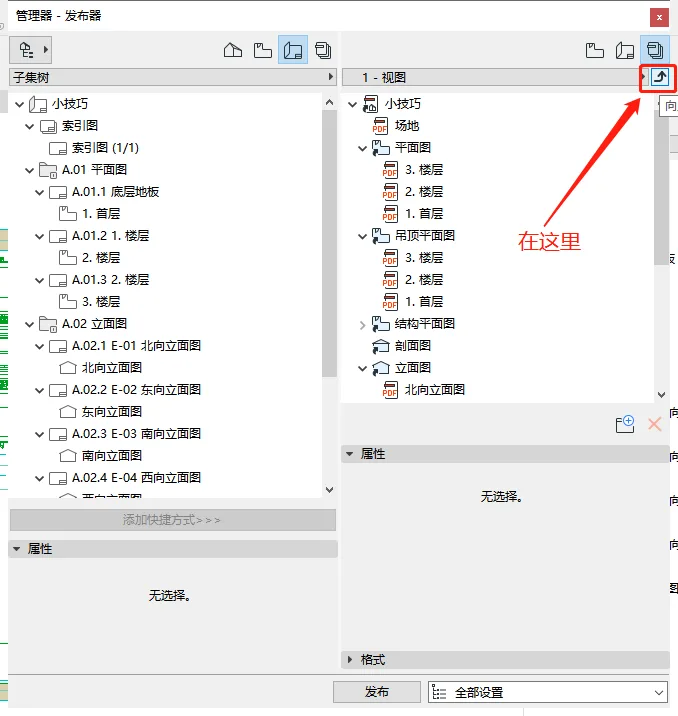
(The arrow location to return to the previous level is shown above.)
Now, create a new “Publisher Set” and enter a name, as demonstrated below.
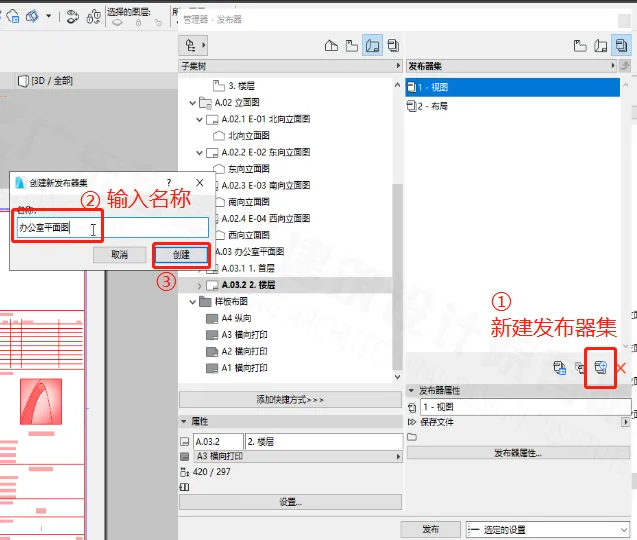
(The location of the “New Publisher Set” is shown above.)
Double-click the newly created Publisher Set to open it, then drag the folder containing your views from the left panel into this Publisher Set, as shown below.
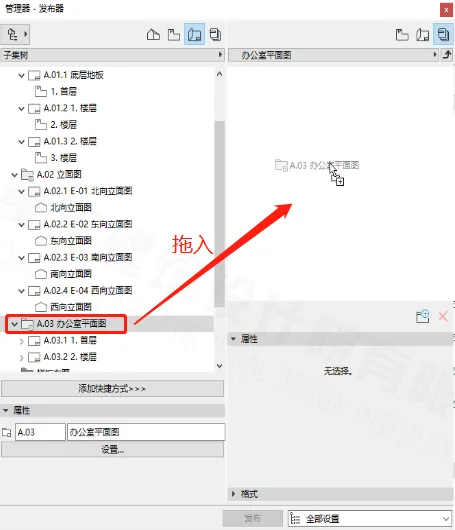
(Dragging the view folder into the Publisher Set is shown above.)
Next, select this folder and choose the desired output format from the format options below.
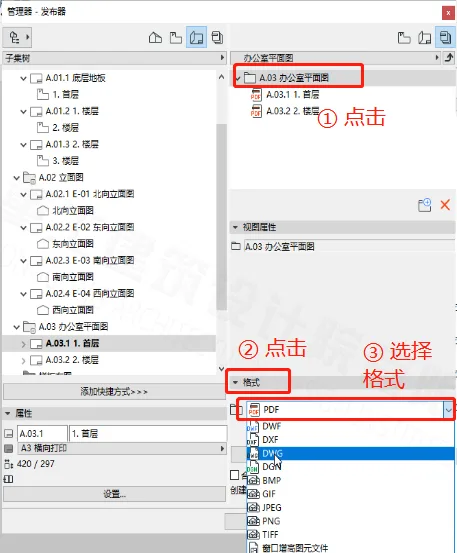
(Format selection process illustrated above.)
Click the small arrow above to navigate back to the previous menu, as shown here.
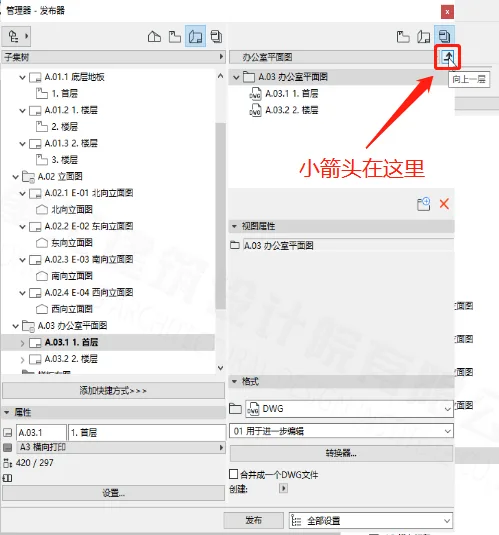
(The location of the back arrow is shown above.)
Finally, select the Publisher Set, then click on its properties below. In the pop-up dialog, check “Create a Real Folder Structure,” click “Browse” to select the destination folder for saving the drawings, then click “OK” and finally “Publish” to complete the drawing generation process.
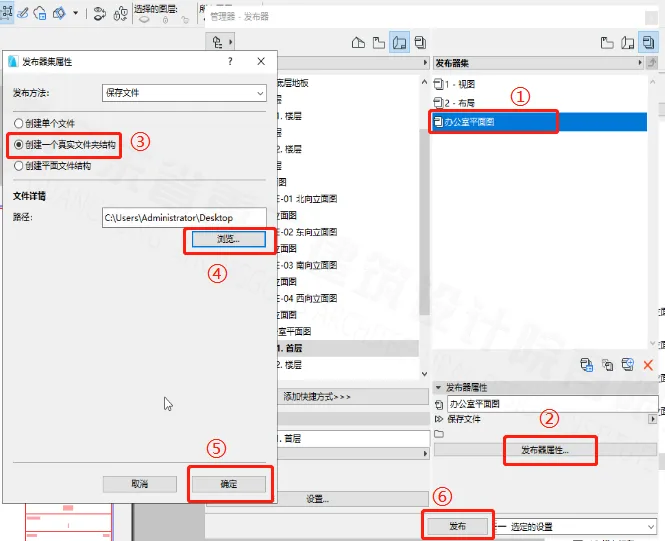
(“Publisher Set Operation” as shown above.)
We have shared the overall process for generating drawings in ArchiCAD. Please configure the specific layer settings according to your project requirements.


Must log in before commenting!
Sign Up