Source: Geek BIM Workshop
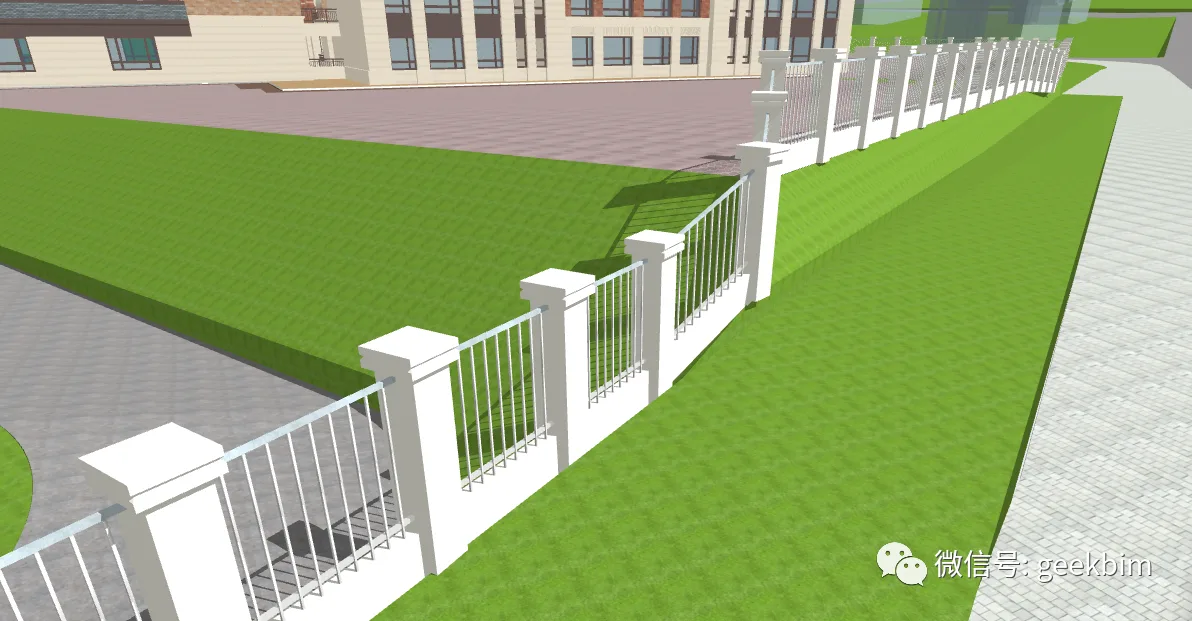
Building walls on sloped terrain can be challenging. Instead of adjusting the elevation of each wall pillar individually, why not use railings? Let’s explore how railings can automatically adapt their height to the terrain. This approach offers great flexibility and ease. Here’s the demonstration.
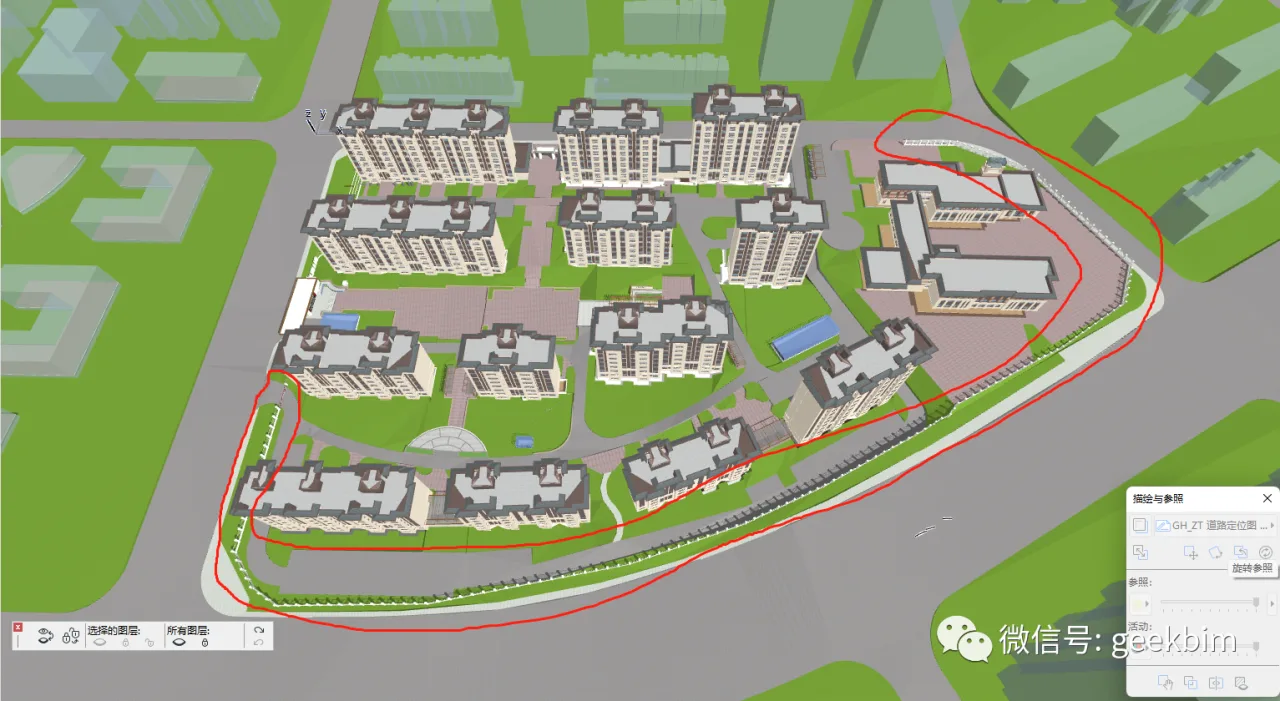
Below is the resulting effect:
Here is the detailed setup process. Feel free to try building a venue and experiment with it in your spare time.
1. Open the Railing Bookmark:
Using bookmarks is advantageous because your frequently used components, once configured, appear distinct and can be saved as ArchiCAD objects. The parameterization process is quite interesting. Favorites should be an essential part of enterprise building templates, as they save considerable time when setting line types, colors, and names.
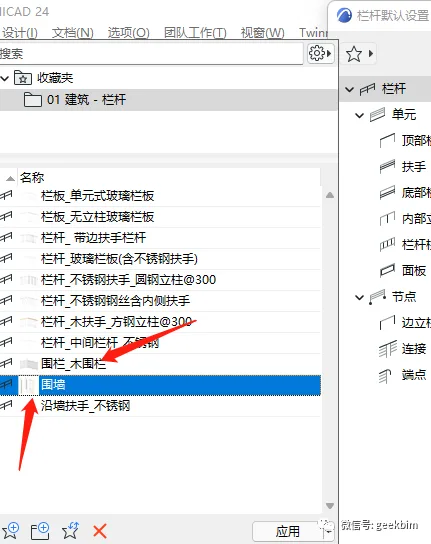
2. Copying Collections: Duplicate collections with similar settings within the railing tool to reduce setup time.

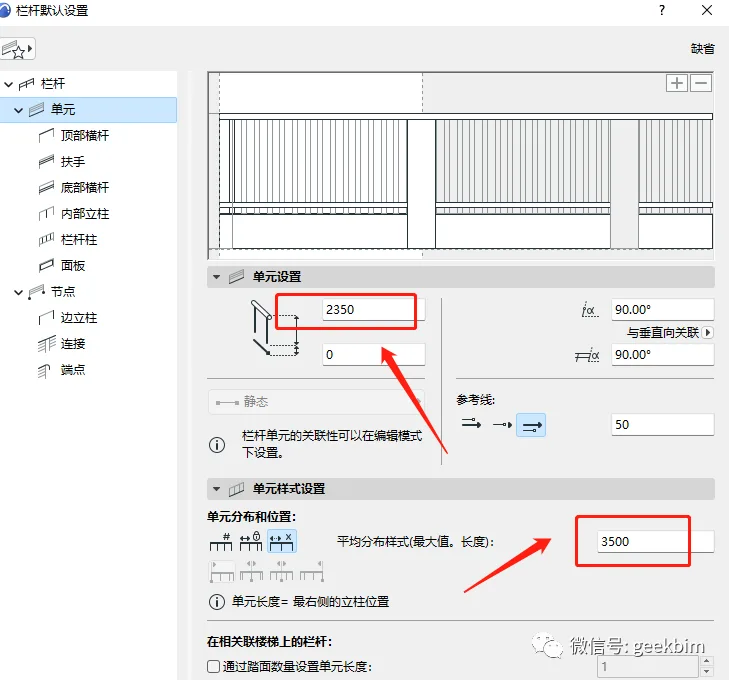
3. Unit Settings: Focus on these two parameters to achieve the desired elevation adjustments.
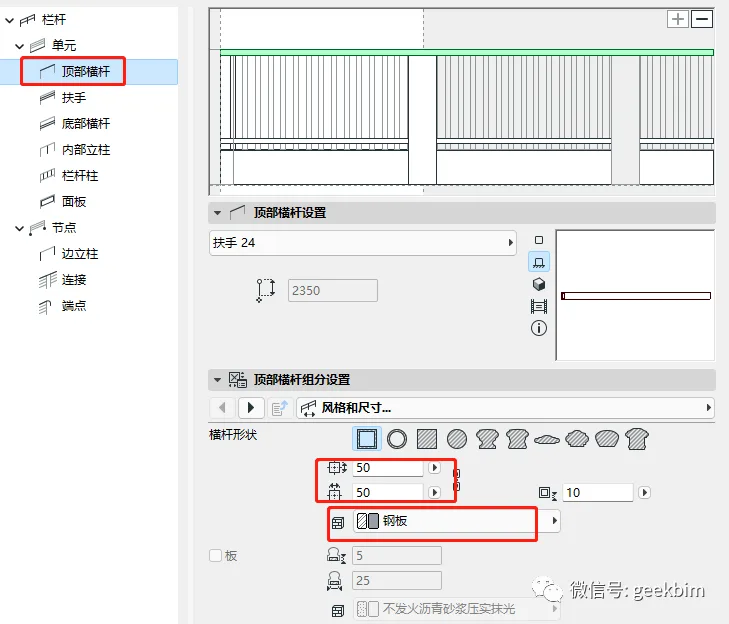
4. Top Crossbar: This is set to the standard configuration.
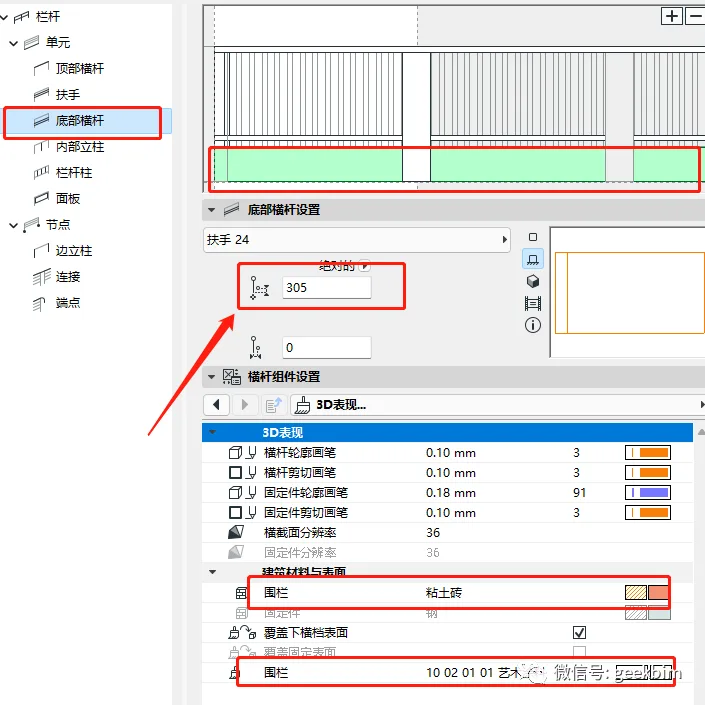
5. Bottom Crossbar: The armrest is removed as it has no configurable settings. The bottom crossbar is set with particular attention to the 305mm height parameter, which centers the height and adjusts it upwards to align with the bottom of the column.
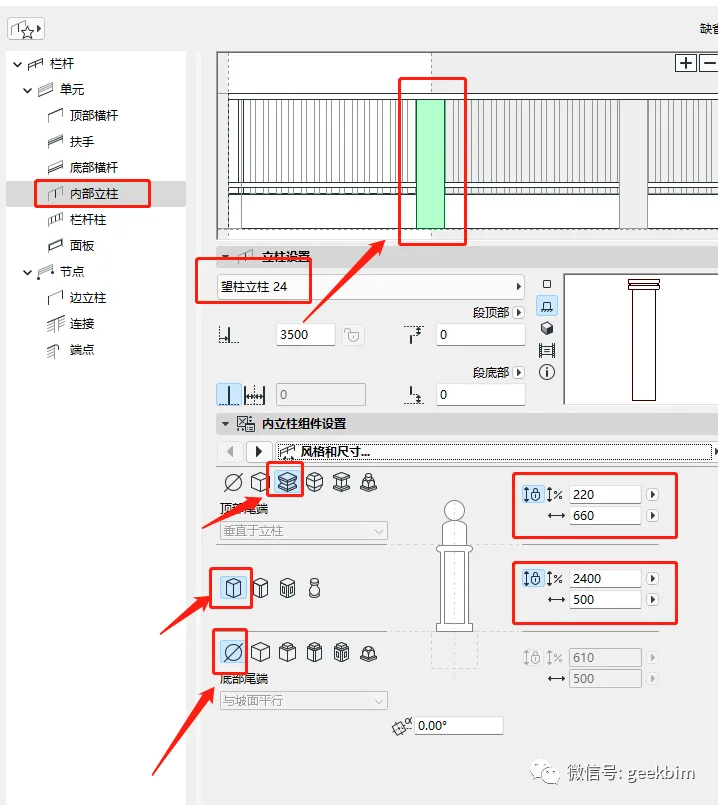
6. Internal Columns: Configure the internal columns as shown below.
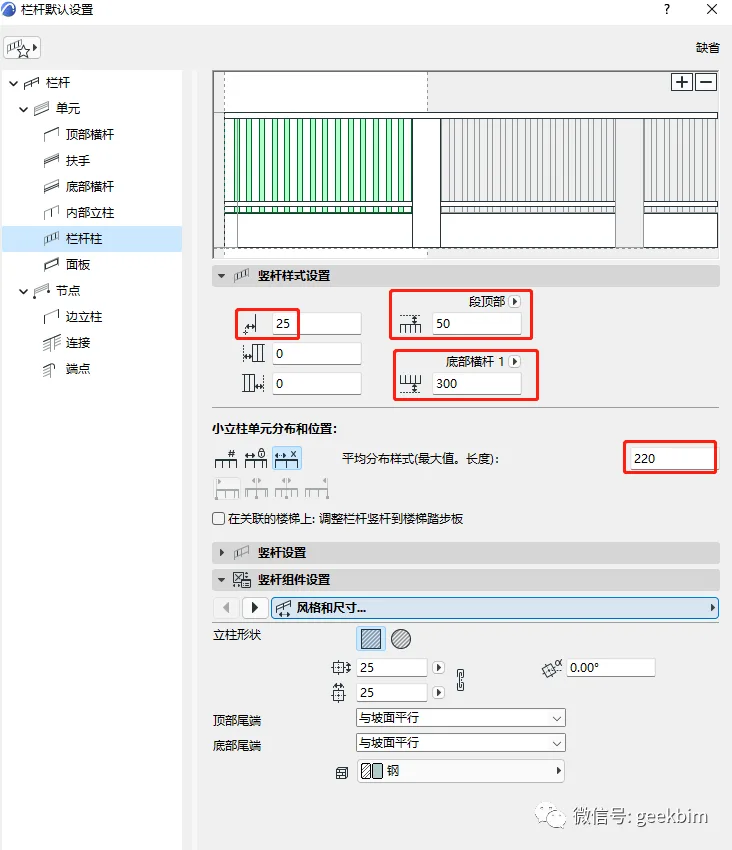
7. Railing Settings: Apply the following settings for the railing itself.
8. Edge Columns: Use the same internal column parameters for edge columns. Default settings for panels, connections, and endpoints require no adjustments. This method enables you to draw walls following the natural undulations of the terrain efficiently and quickly.
Thank you for your attention. We will continue to provide updates.


Must log in before commenting!
Sign Up