Today, I’d like to share an insightful article from the official “BIMZONE” account.
Over the past year, the domestic renderer D5 Render has made remarkable progress through continuous updates. The recently released version 2.1 has reached a level of usability, stability, performance, and rendering quality that supports official use.
In this post, I’ll walk you through a brief case study on how to create realistic grass in D5 Render. The final result is shown in the image below.
Step 1:
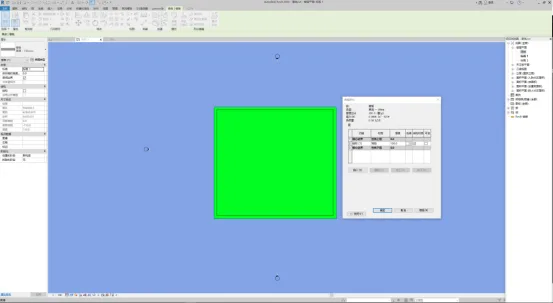
Within your site model, isolate the area where you want to place the grass. It’s important to set a boundary line around the grass area; otherwise, grass may unintentionally spread across the entire site.
Step 2:
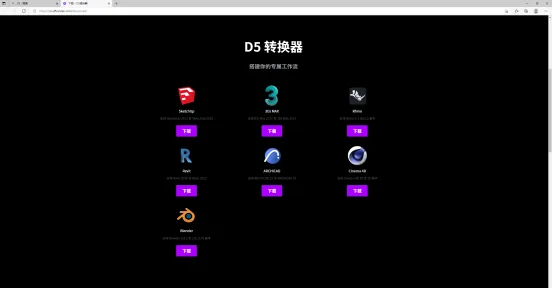
Export your model in D5A format. To do this, download the D5 Bridge plugin from the official D5 website. The process is: visit the D5 official site → Download section → D5 Converter (Revit) → then choose “Export” inside Revit.

Step 3:
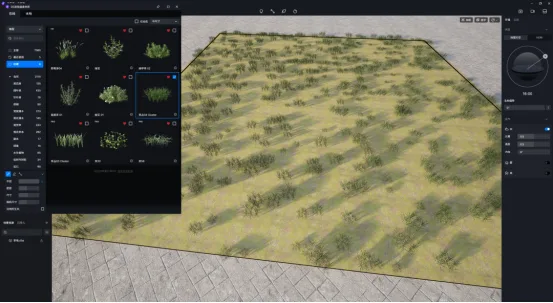
Create a new scene in D5 Render and import your model. Apply grass materials to the designated grass model using the material library: Upper left → Online → Materials → Wild Grass. Assign appropriate materials to the rest of the site model.
Step 4:
Navigate to the “Nature Ornamental Grass” category and select “Grass 04.” Activate the brush tool on the left edge (pencil icon), then set the radius, density, size, and size randomness. Click on “Grass” to scatter the selected plants over the grass area.
Step 5:
Repeat the previous step with other plant types. Remember to adjust the radius, density, size, and randomness for each. Click on the grassland to gradually build a rich and natural-looking grass scene.
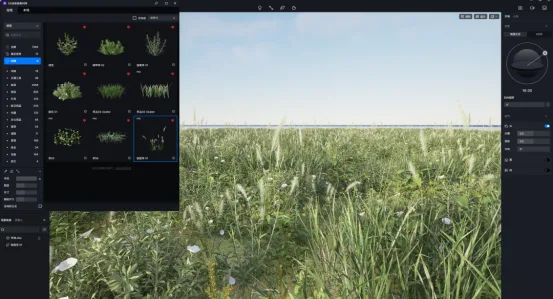
Additionally, scatter some fallen leaves to enhance the scene’s depth and realism.
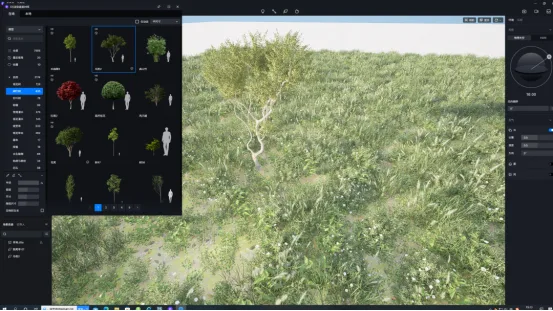
Step 6:
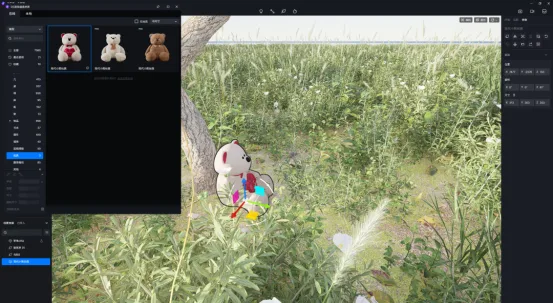
Choose a decorative tree from the Material Library under Model → Nature → Broad-leaved Tree. Also, add a teddy bear model from Model → Accessories → Toy to add interest to the scene.
Step 7:
Adjust your camera angle and arrange some gravel to enrich the environment further. Use the scene list on the top left and click the right side options to save your current scene settings.
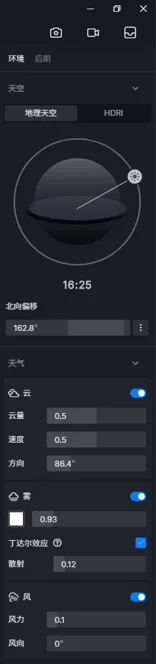
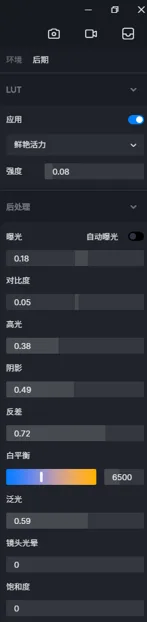
Step 8:
On the right panel, fine-tune the environment and post-production settings using the parameters shown below to achieve the best visual effect.
Article by Zhang Tianqiu.
For learning and communication purposes only. Copyright belongs to the original author. If there is any infringement, please contact us for removal.


Must log in before commenting!
Sign Up